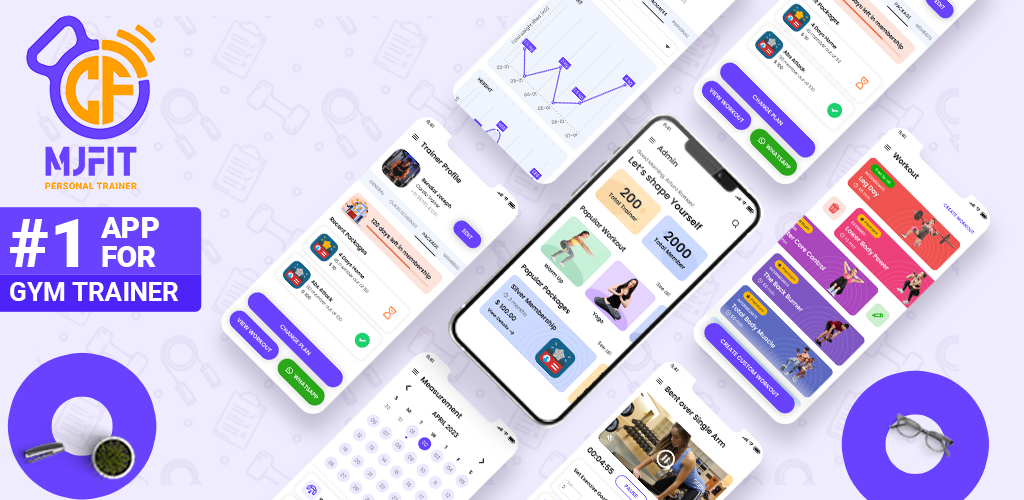
MJFIT Web
Documented by Mojoomla - at December 12 2024
MJFIT Web
Documented by Mojoomla - at January 31, 2026
1) Introduction
The MJFIT Gym Trainer website consists of three main user roles: Admin, Member, and Trainer.
This user guide covers all the options that these features provide. Please read the documentation carefully, as it likely contains answers to most of the questions that may arise. If you feel some aspects are not covered or have any questions, please contact us via email at sales@mojoomla.com. We will do our best to respond as quickly as possible.
2) Set up Flutter Project
A Requirement
- Latest Android Studio
- Windows XP (32-bit), Vista (32- or 64-bit), or Windows 7 And up (32- or 64-bit)
- Mac OS X 10.5.8 or later (x86 only)
- Linux (tested on Ubuntu Linux, Lucid Lynx)
- GNU C Library (glibc) 2.7 or later is required.
- On Ubuntu Linux, version 8.04 or later is required.64-bit distributions must be capable of running 32-bit applications.
- 4 GB RAM minimum, 8 GB RAM recommended.
- Free Disk At least 1 GB for Android SDK, emulator system images, and caches.
- Oracle® Java Development Kit (JDK) 8 and up.
B Installing the latest version of Android Studio.
MJFIT App is built with the latest Android studio Otter 2 Feature Drop | 2025.2.2 NOTE: There are several other tools to build and run android projects.
- Go to the Android Developer Page
- Download the Android Studio. This should contain the latest version of Android Studio
- Install Android studio. more information Go to install Android studio
C Update the IDE and SDK Tools
- The Android SDK Manager provides the SDK tools, platforms, and other components you need to develop your apps.
- MJFIT App minimum required SDK Platform API level 21
- Install SDK Platform API levels.
- Open the Preferences window by clicking File -> Settings.
- In the left panel, click Appearance & Behavior -> System Settings -> Android SDK.
- Select required SDK platforms
- Click ok.
3) Flutter Version
environment: sdk: '>=2.18.4 <3.0.0'
4) Set Up Firebase
To set up Firebase Database for a MJFIT Web, follow these step-by-step instructions:
Step 1: Create a Firebase project
Step 2: Connect your Web to Firebase
For Web:
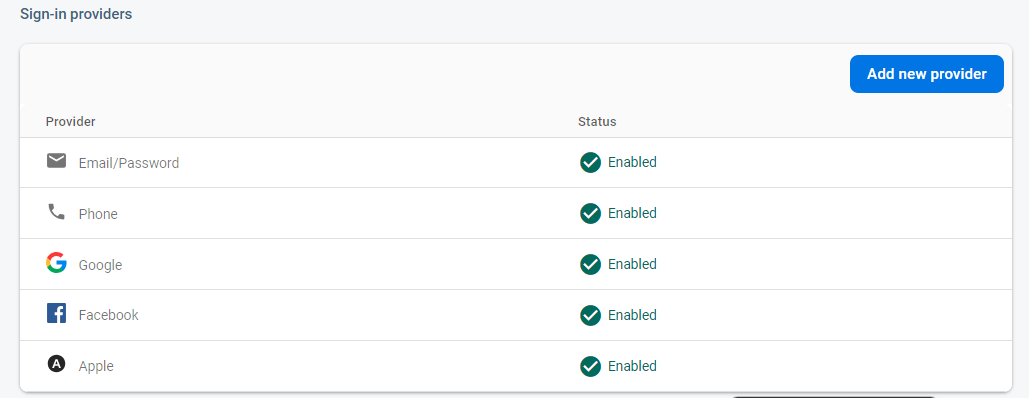
Step 3: Enable Sign-in-Method
Step 4: Change your Firease Database rules
rules_version = '2';
service cloud.firestore {
match /databases/{database}/documents {
match /{document=**} {
allow read, write: if request.auth != null;
allow read: if request.auth == null;
}
}
}
Step 5: Change your storage rules
rules_version = '2';
service firebase.storage {
match /b/{bucket}/o {
match /{allPaths=**} {
allow read, write: if request.auth != null;
allow read, write: if request.auth == null;
}
}
}
Step 6: Add your app Indexes
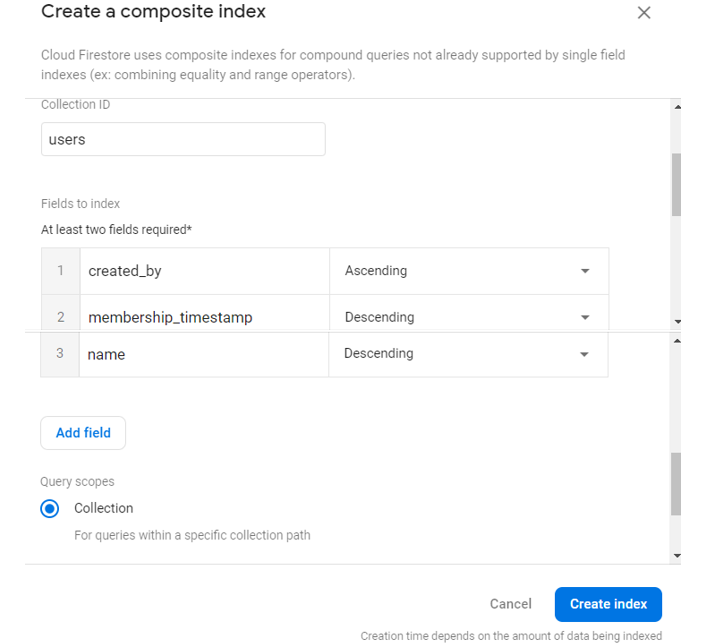
| Collection ID | Fields indexed help_outline | Query scope | Status |
|---|---|---|---|
| payment_history | user_id Ascending created_at Ascending |
Collection | Enabled |
| table_workout_category | created_by Ascending title Ascending |
Collection | Enabled |
| users | user_role Ascending full_name Ascending |
Collection | Enabled |
| users | created_by Ascending full_name Ascending |
Collection | Enabled |
| payment_history | created_by Ascending created_at Ascending |
Collection | Enabled |
| users | created_by Ascending membership_timestamp Descending |
Collection | Enabled |
| workout_category | created_by Ascending title Ascending |
Collection | Enabled |
| users | created_by Ascending full_name Descending |
Collection | Enabled |
| table_membership | created_by Ascending member_count Descending |
Collection | Enabled |
| payment_history | user_id Ascending created_at Descending |
Collection | Enabled |
| payment_history | user_id Ascending user_role Ascending created_at Descending |
Collection | Enabled |
| payment_history | created_by Ascending user_role Ascending created_at Descending |
Collection | Enabled |
| payment_history | created_by Ascending payment_status Ascending created_at Descending |
Collection | Enabled |
| workouts | created_by Ascending workout_type Descending created_at Descending |
Collection | Enabled |
| payment_history | payment_status Ascending user_id Ascending created_at Descending |
Collection | Enabled |
| users | created_by Ascending membership_timestamp Ascending |
Collection | Enabled |
| users | created_by Ascending created_at Descending |
Collection | Enabled |
| users | created_by Ascending user_role Ascending membership_timestamp Descending |
Collection | Enabled |
| workouts | created_by Ascending workout_type Ascending |
Collection | Enabled |
| workouts | created_by Ascending workout_type Descending |
Collection | Enabled |
| payment_history | created_by Ascending created_at Descending |
Collection | Enabled |
| workouts | selected_member Arrays workout_type Descending |
Collection | Enabled |
| users | created_by Ascending user_role Ascending membership_timestamp Ascending |
Collection | Enabled |
| users | created_by Ascending user_role Ascending full_name Descending |
Collection | Enabled |
| payment_history | created_by Ascending user_role Ascending created_at Ascending |
Collection | Enabled |
| payment_history | created_by Ascending payment_status Ascending user_role Ascending created_at Ascending |
Collection | Enabled |
| payment_history | payment_status Ascending user_id Ascending created_at Ascending |
Collection | Enabled |
Step 7: Add SHA1 and SHA-256 Key in firebase
Step 8: Deploy firebase function
Following bellow steps to genrate google-service-key
Set up Firebase Project
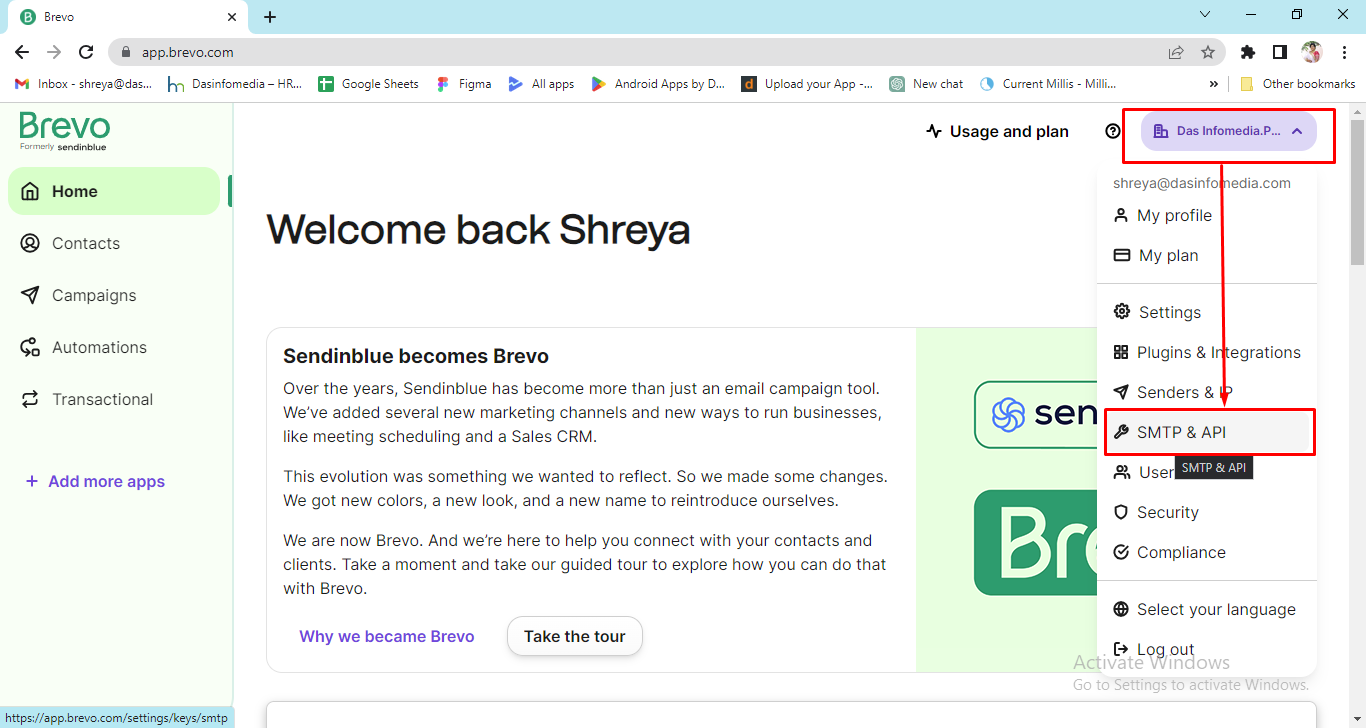
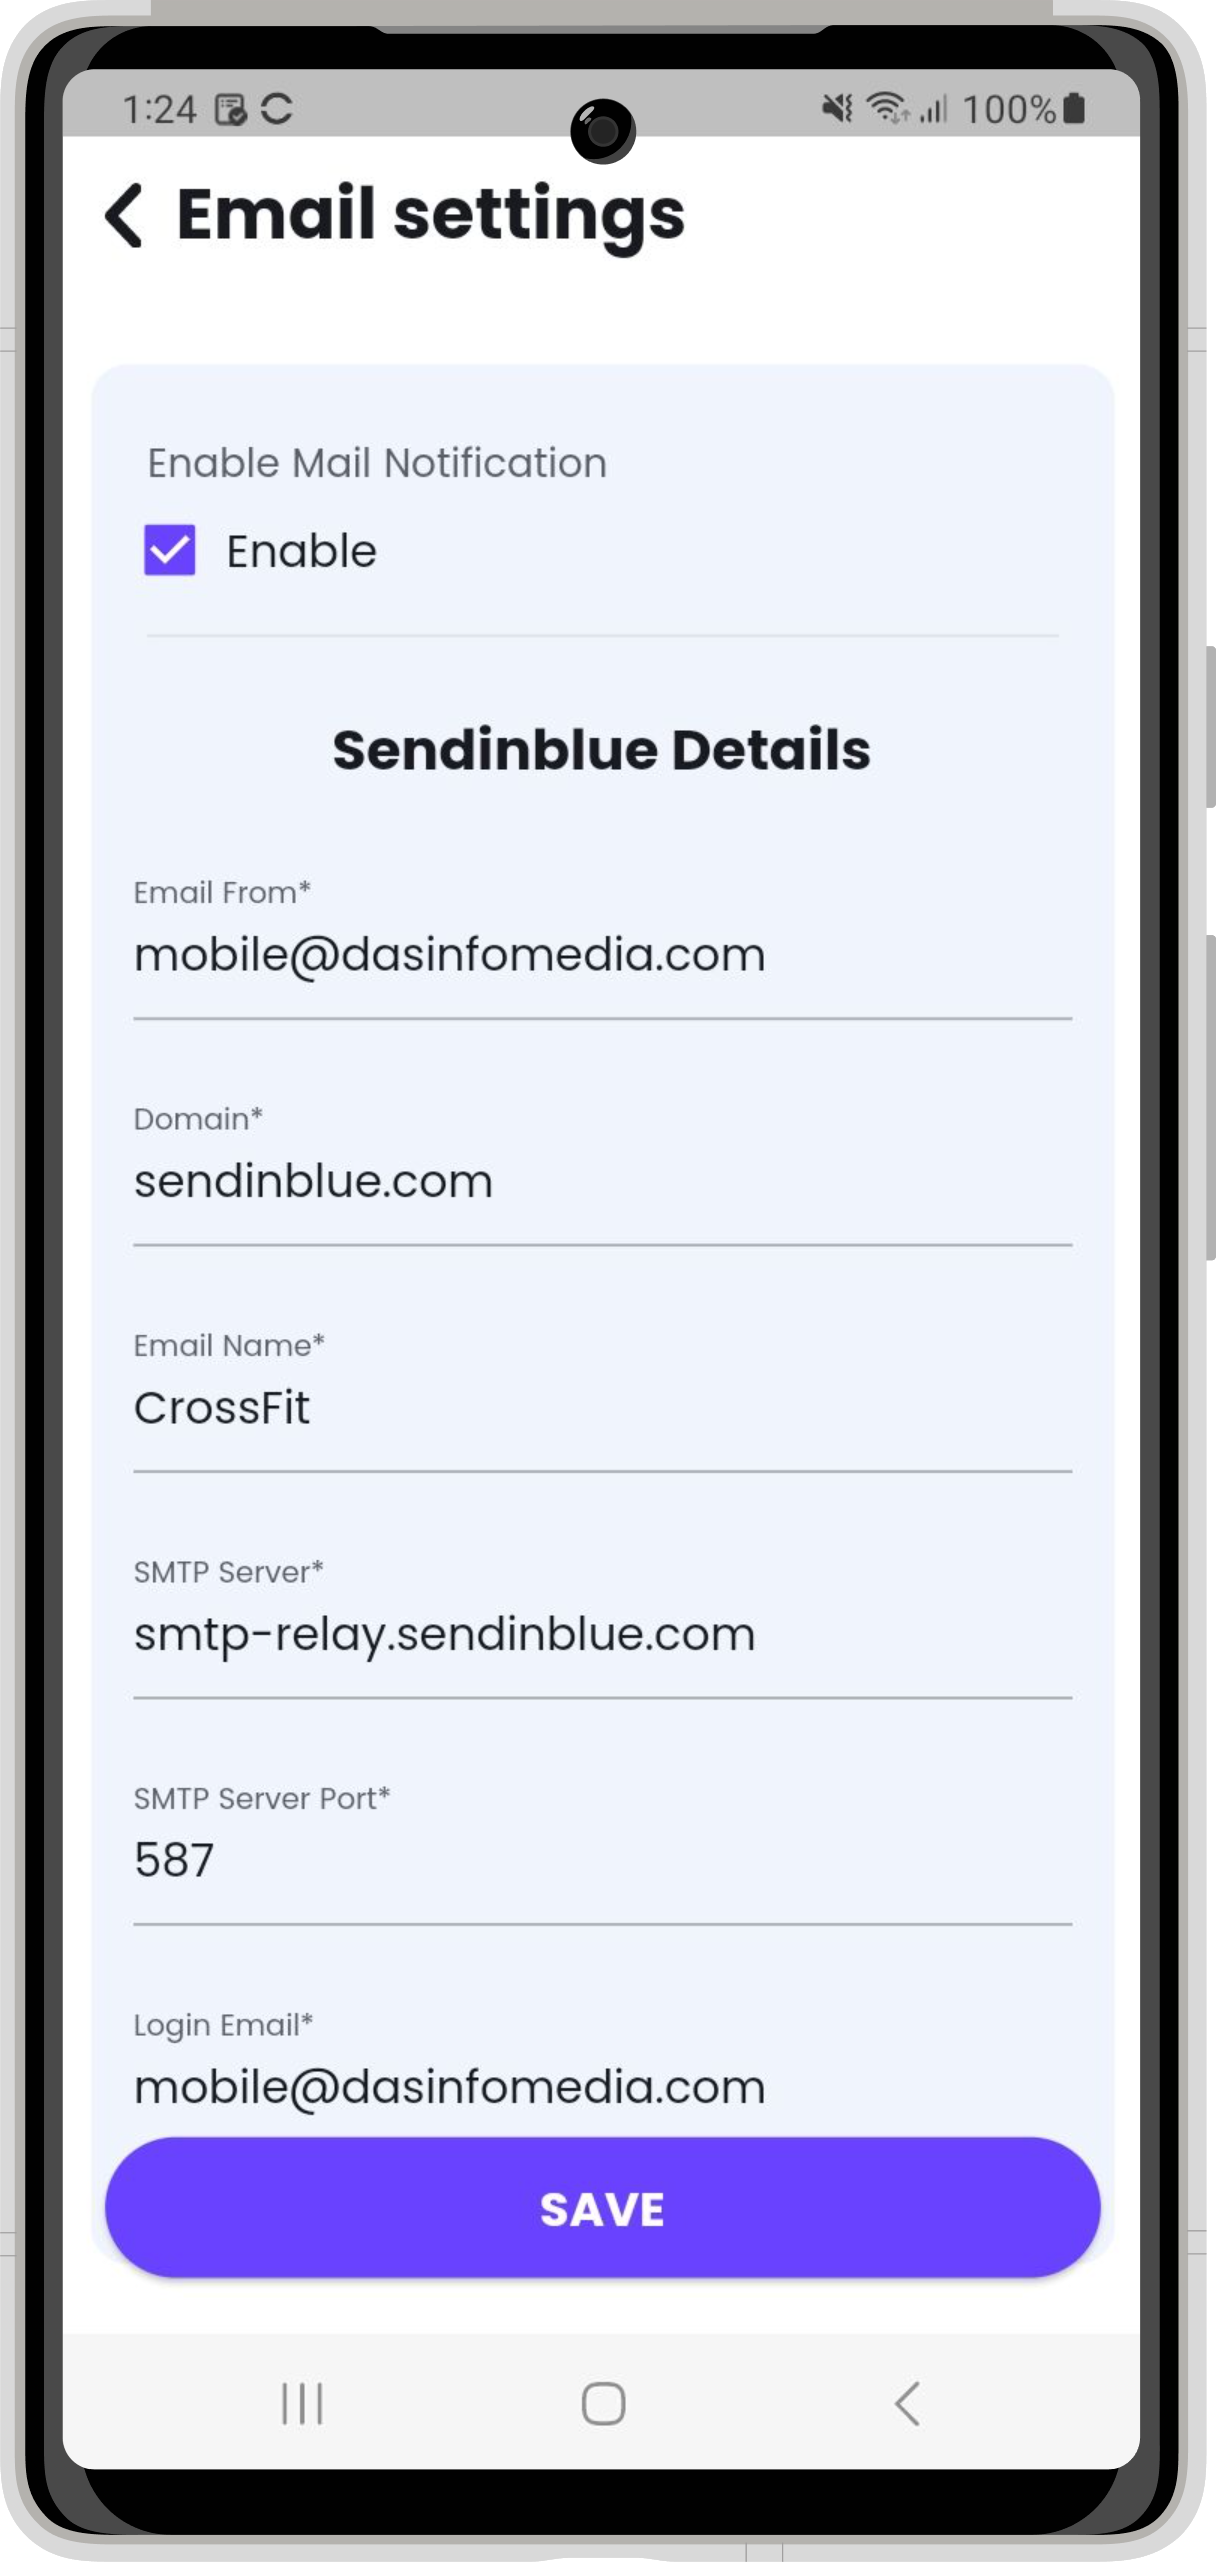
5) Set Up Email Notification
To set up Email Notification for a MJFIT app, follow these step-by-step instructions:
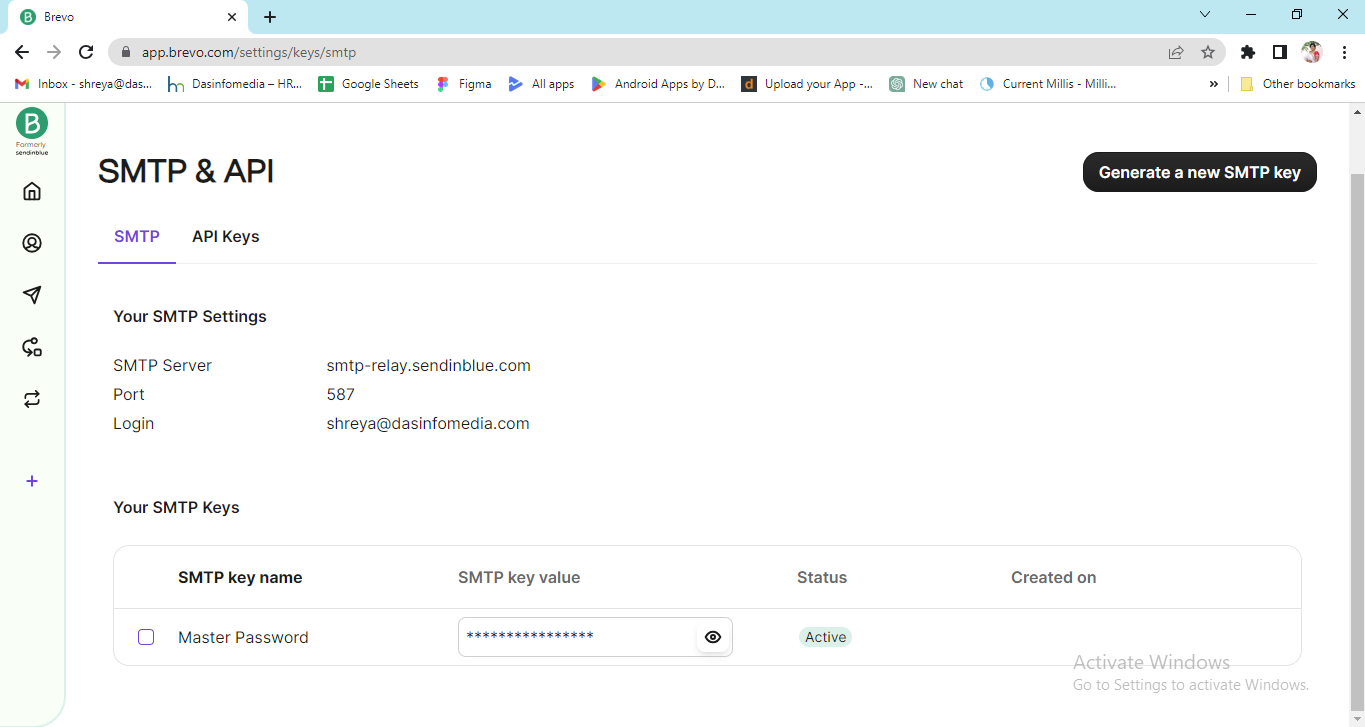
Step 1: Create a Sendinblue account
Step 2: Connect your Website with SMTP & API
6) Change Website Name
Change the website name To change the name of a Flutter web, you need to modify the appropriate files and configurations. Here's a step-by-step guide to help you change the web name:
- Open the Flutter project in your preferred integrated development environment (IDE) or code editor.
- Now, you need to update the web name in the Android configuration.
- Follow below steps and you can change your web name.
- First you go your app in android folder in same path "android -> app -> src -> main -> AndroidManifest.xml"
- After in "AndroidMani`fest.xml" you find "label" keyword and change your web name
- If you need change your apk name ypu can follow this below steps
- First you go your app in android folder in same path "android -> app -> src -> build.gradle"
- After in "build.gradle" you find "setProperty" keyword and can change the app name After in "build.gradle" you find "setProperty" keyword and can change the app name
- Now, you need to update the app name in the iOS configuration.
- Open the ios directory in your Flutter project.
- Inside the ios directory, find the Runner directory and open it.
- Locate the Info.plist file (usually located at ios/Runner/Info.plist).
- Open the Info.plist file and find the
CFBundleDisplayName section. - Change the value of the
tag below CFBundleDisplayName to your desired app name. For example,MJFIT Web . - Save the Info.plist file.
Note :After following these steps, the name of your Flutter Web should be updated. Remember to clean and rebuild your project to ensure the changes take effect.
7) Change Website Logo
Change the launcher icon in Replace the default web icons:
-> For Android, navigate to the android/app/src/main/res directory in your Flutter project. Replace the icons in the mipmap directories with your custom icons, following the size-specific folders (e.g., mipmap-mdpi, mipmap-hdpi, etc.).
-> For iOS, navigate to the ios/Runner/Assets.xcassets/AppIcon appiconset directory in your Flutter project. Replace the default icons with your custom icons. Make sure to match the size and format requirements for each icon.
Note: You need the 512x512 px size for publishing to Google Play.
8) Change Package Name
To change the package name of a Flutter application, you need to update it in several places within your project. Follow these steps to change the package name:
- Update the Android package name:
- • Open the AndroidManifest.xml file located at android/app/src/main/AndroidManifest.xml.
- • Change the package attribute of the
tag to the new package name. - • Also you need change "applicationId" with your application package name
- • Go to the following path (android/app/src /build.gradle )and change the "applicationId" and change
- • After that update the "applicationId" with your application package name
- Update the iOS bundle identifier:
- • Open the Info.plist file located at ios/Runner/Info.plist.
- • Change the value of the CFBundleIdentifier key to the new package name.Open the Info.plist file and find the
CFBundleName section. Change the value of thetag below CFBundleName to your desired app bundal name. For example, "crossfit.personaltrainer.gymtrainer.fitness ". - Update import statements and references:
- • In your Dart code files, update any import statements that reference the old package name to import the new package name.
- • Replace any references to the old package name within your code with the new package name.
- Clean and rebuild the project: Run the following command in the root directory of your project to clean and rebuild your Flutter project:
- • flutter clean
- • flutter pub get
- • flutter run
After following these steps, your Flutter application should have the updated package name throughout the project. Make sure to update any dependencies or configurations that reference the old package name as well.
9) Build Your Release Web
To set up for a Release web app, follow these step-by-step instructions:
Step 1 Download and install FileZilla (if not installed)
Step 2 Build Your Flutter Web

Click on "Build" → then click on "Flutter" → and finally click on "Build WEB".
gym_trainer_app\build\web\This space will appear after the build is complete.
Step 3 Open FileZilla client
Step 4 Navigate to the Target Directory on the Server
Step 5 Upload Flutter Web Build Files
- Open Local Directory
- • In the left pane (local file system), navigate to the build/web directory of your Flutter project.
- Select Files
- • Select all files and folders inside the build/web directory (including index.html, main.dart.js, and the assets folder).
- Drag and Drop Files
- Drag and drop the selected files from the left pane to the target directory in the right pane
10) MJFIT Web Overview
A) Login Screen:
You will see this login screen.You can now login as admin username and password.
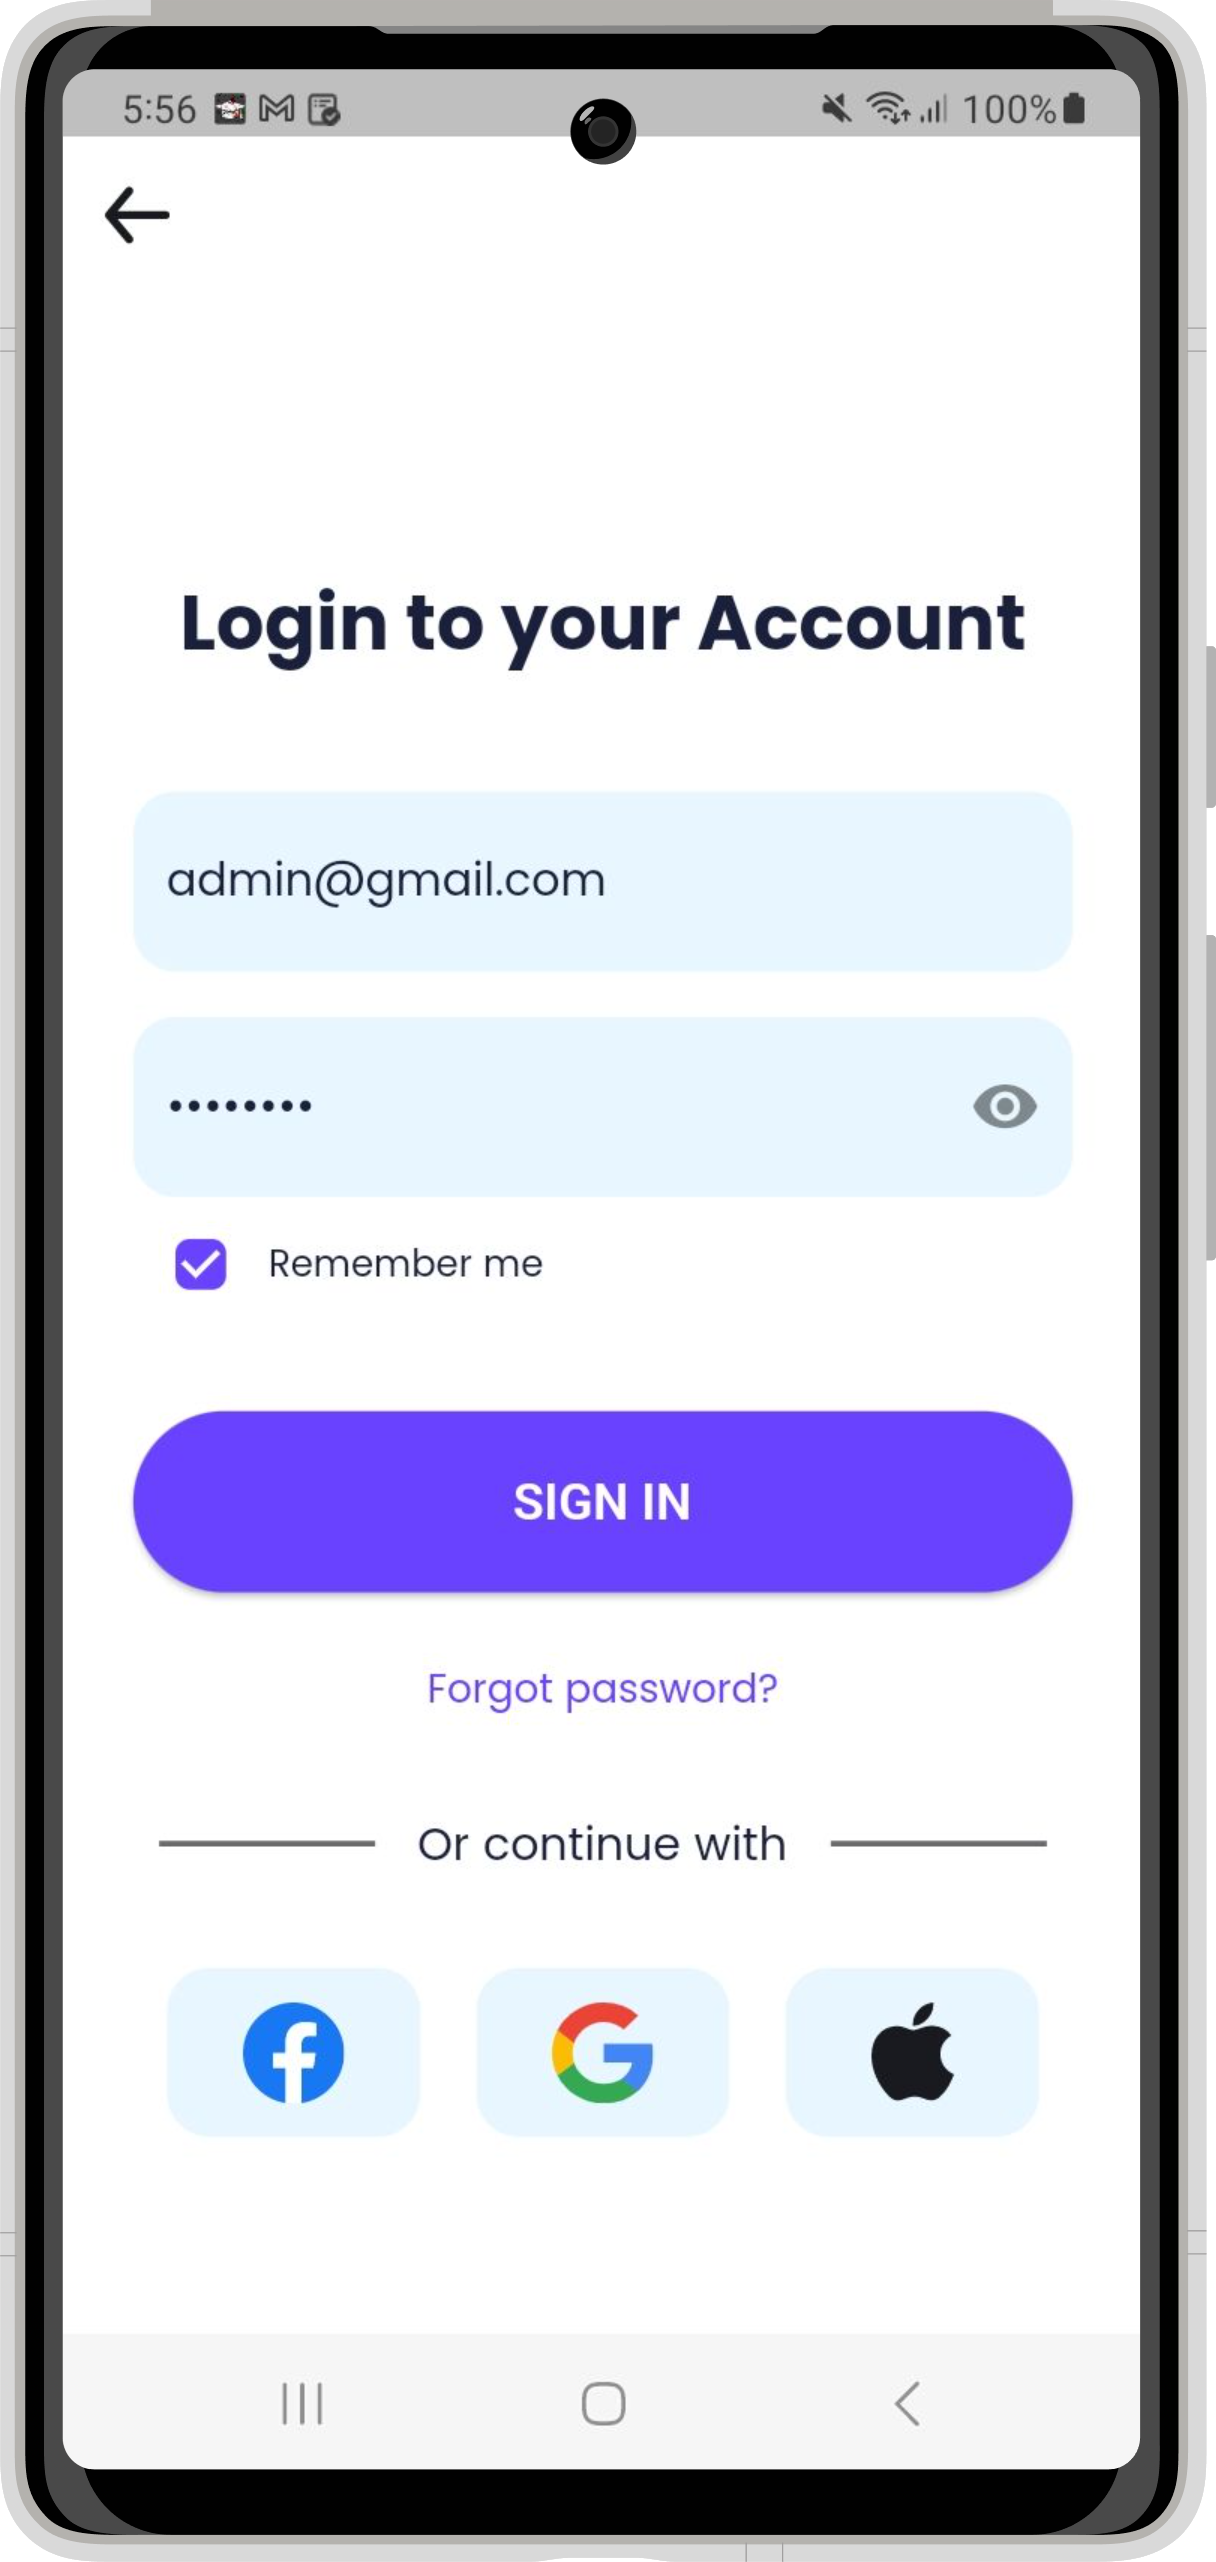
All users can login from this login screen.
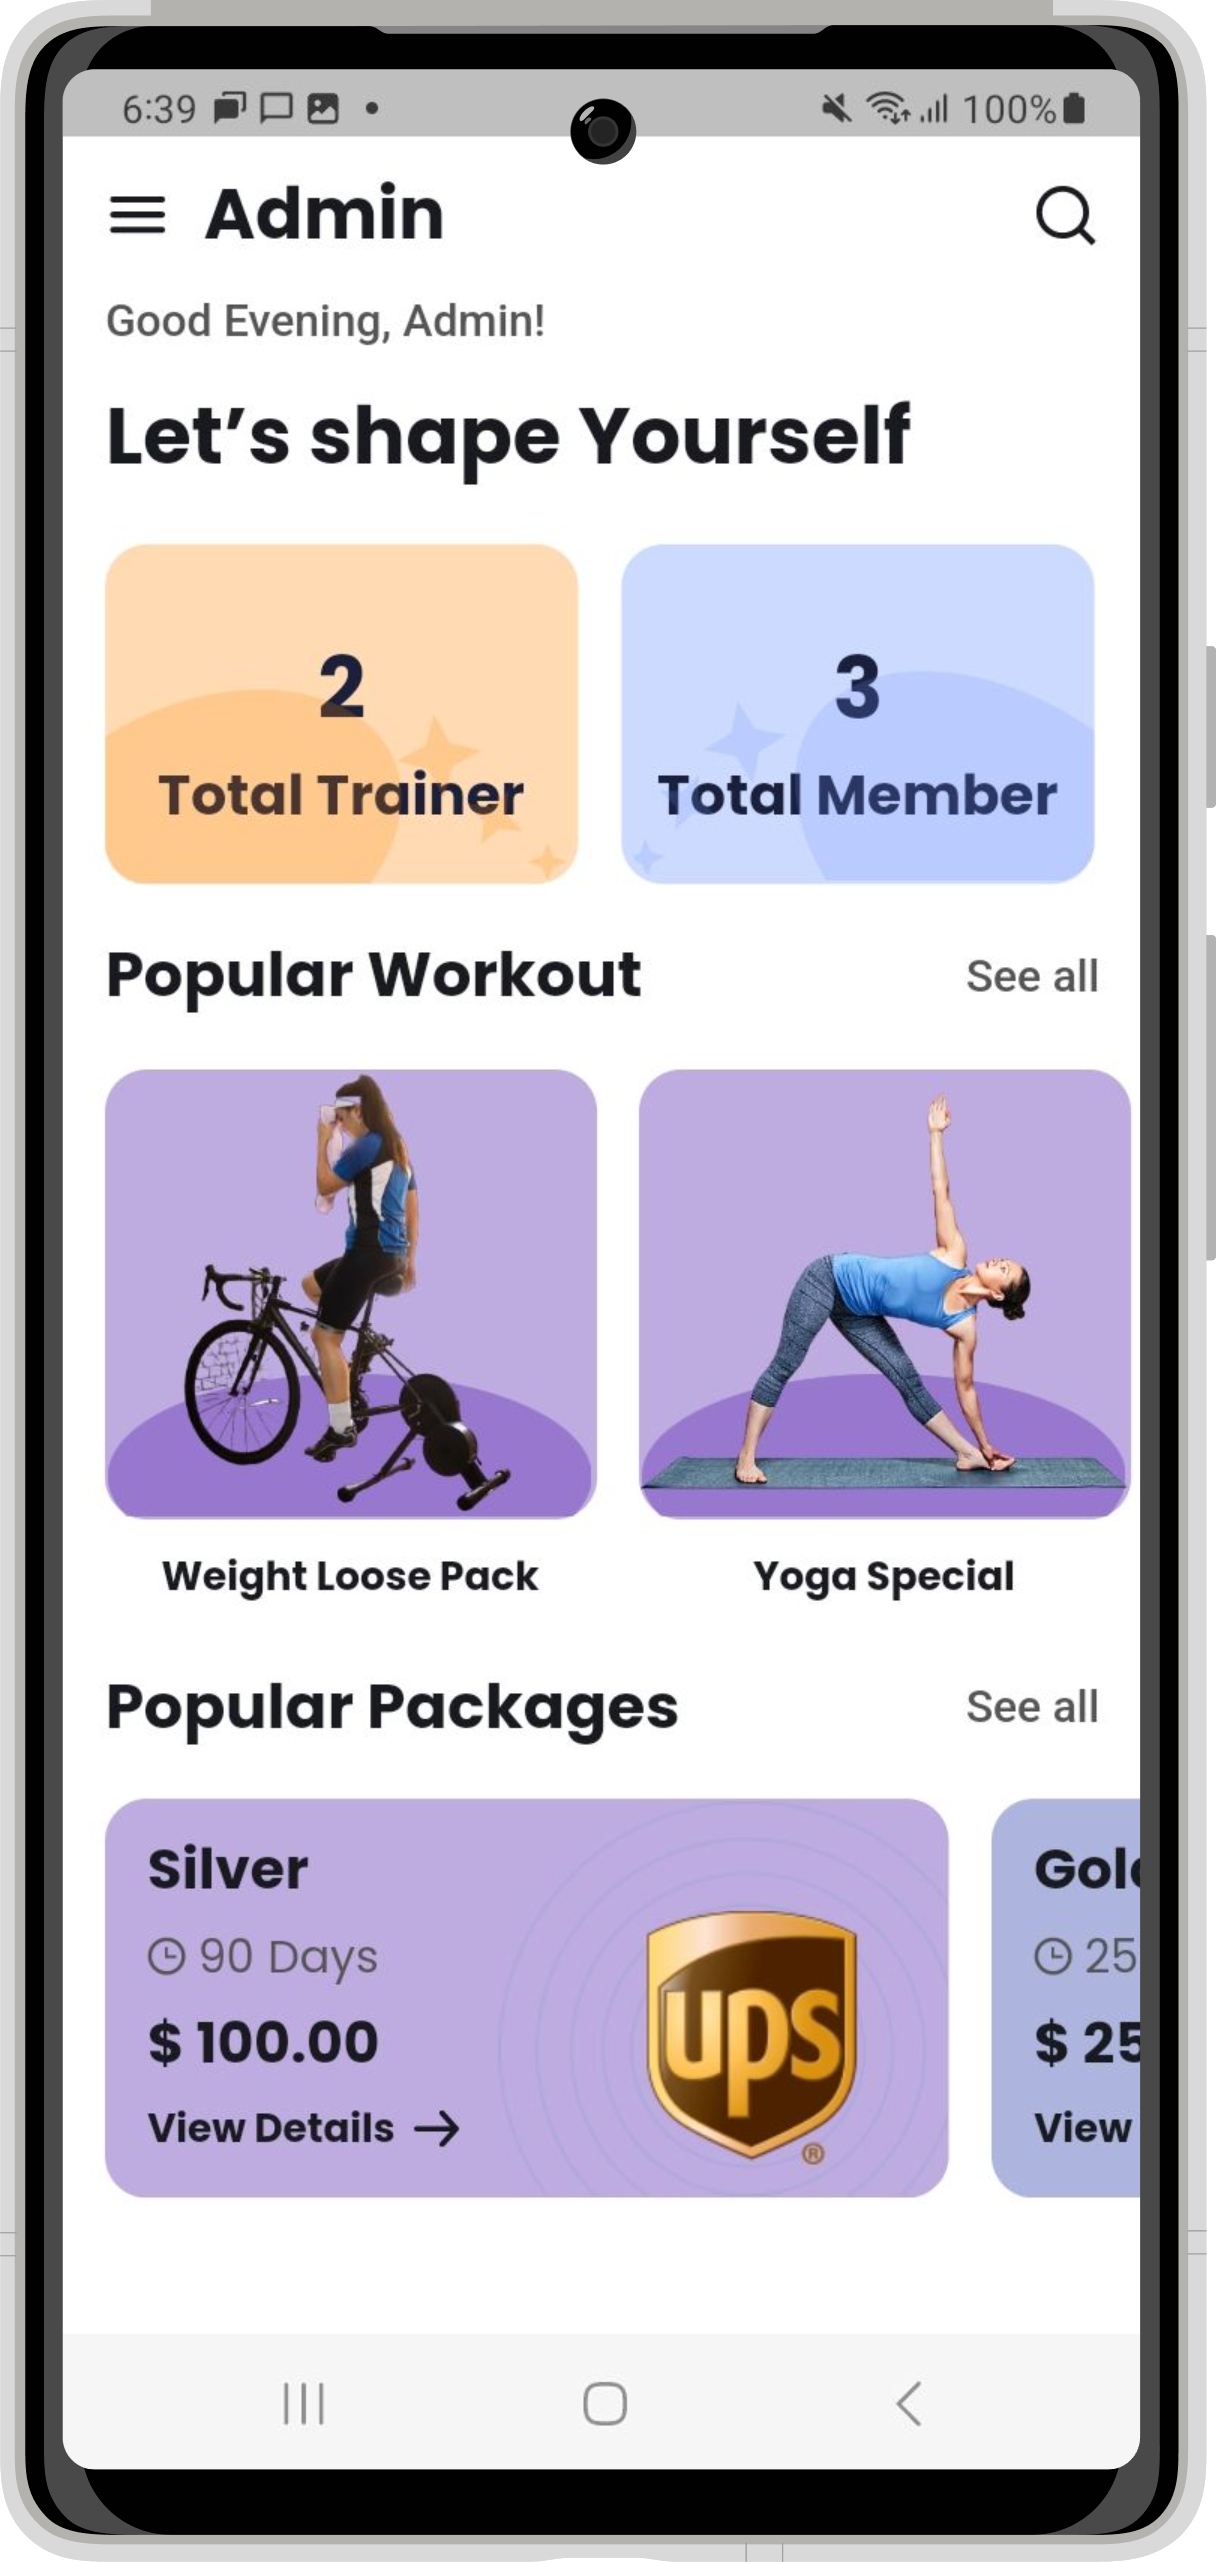
B) Admin
Login Admin ID And Password For Demo
Email :admin@gmail.com
Password :Fitqwe@26
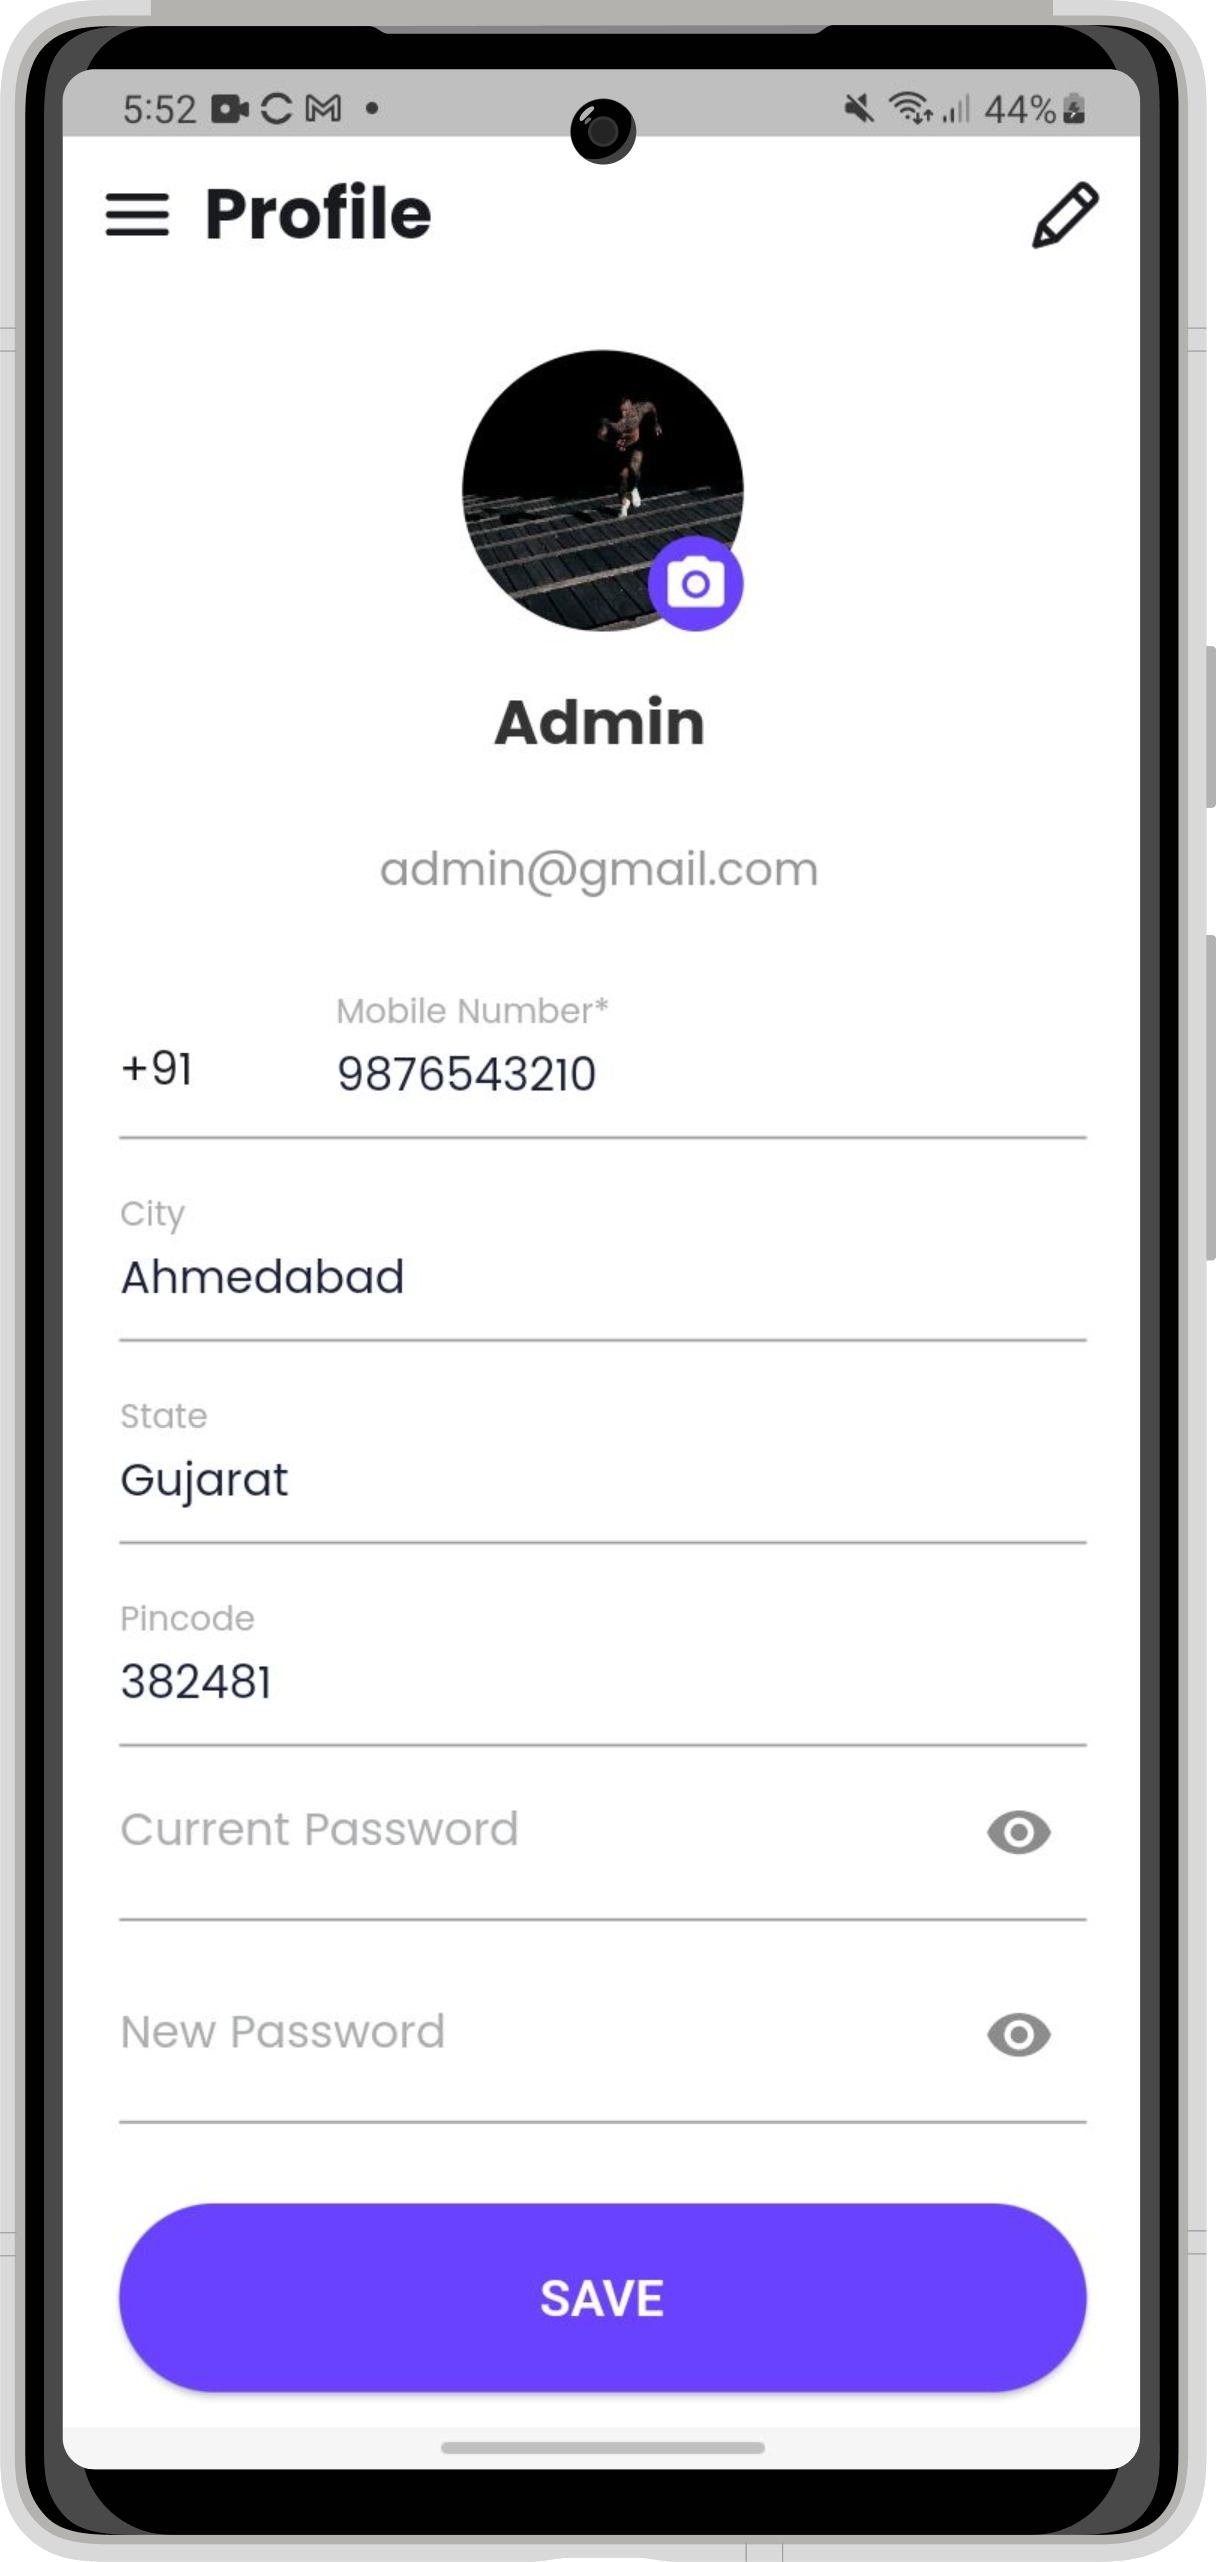
i) Change Admin Email And Password
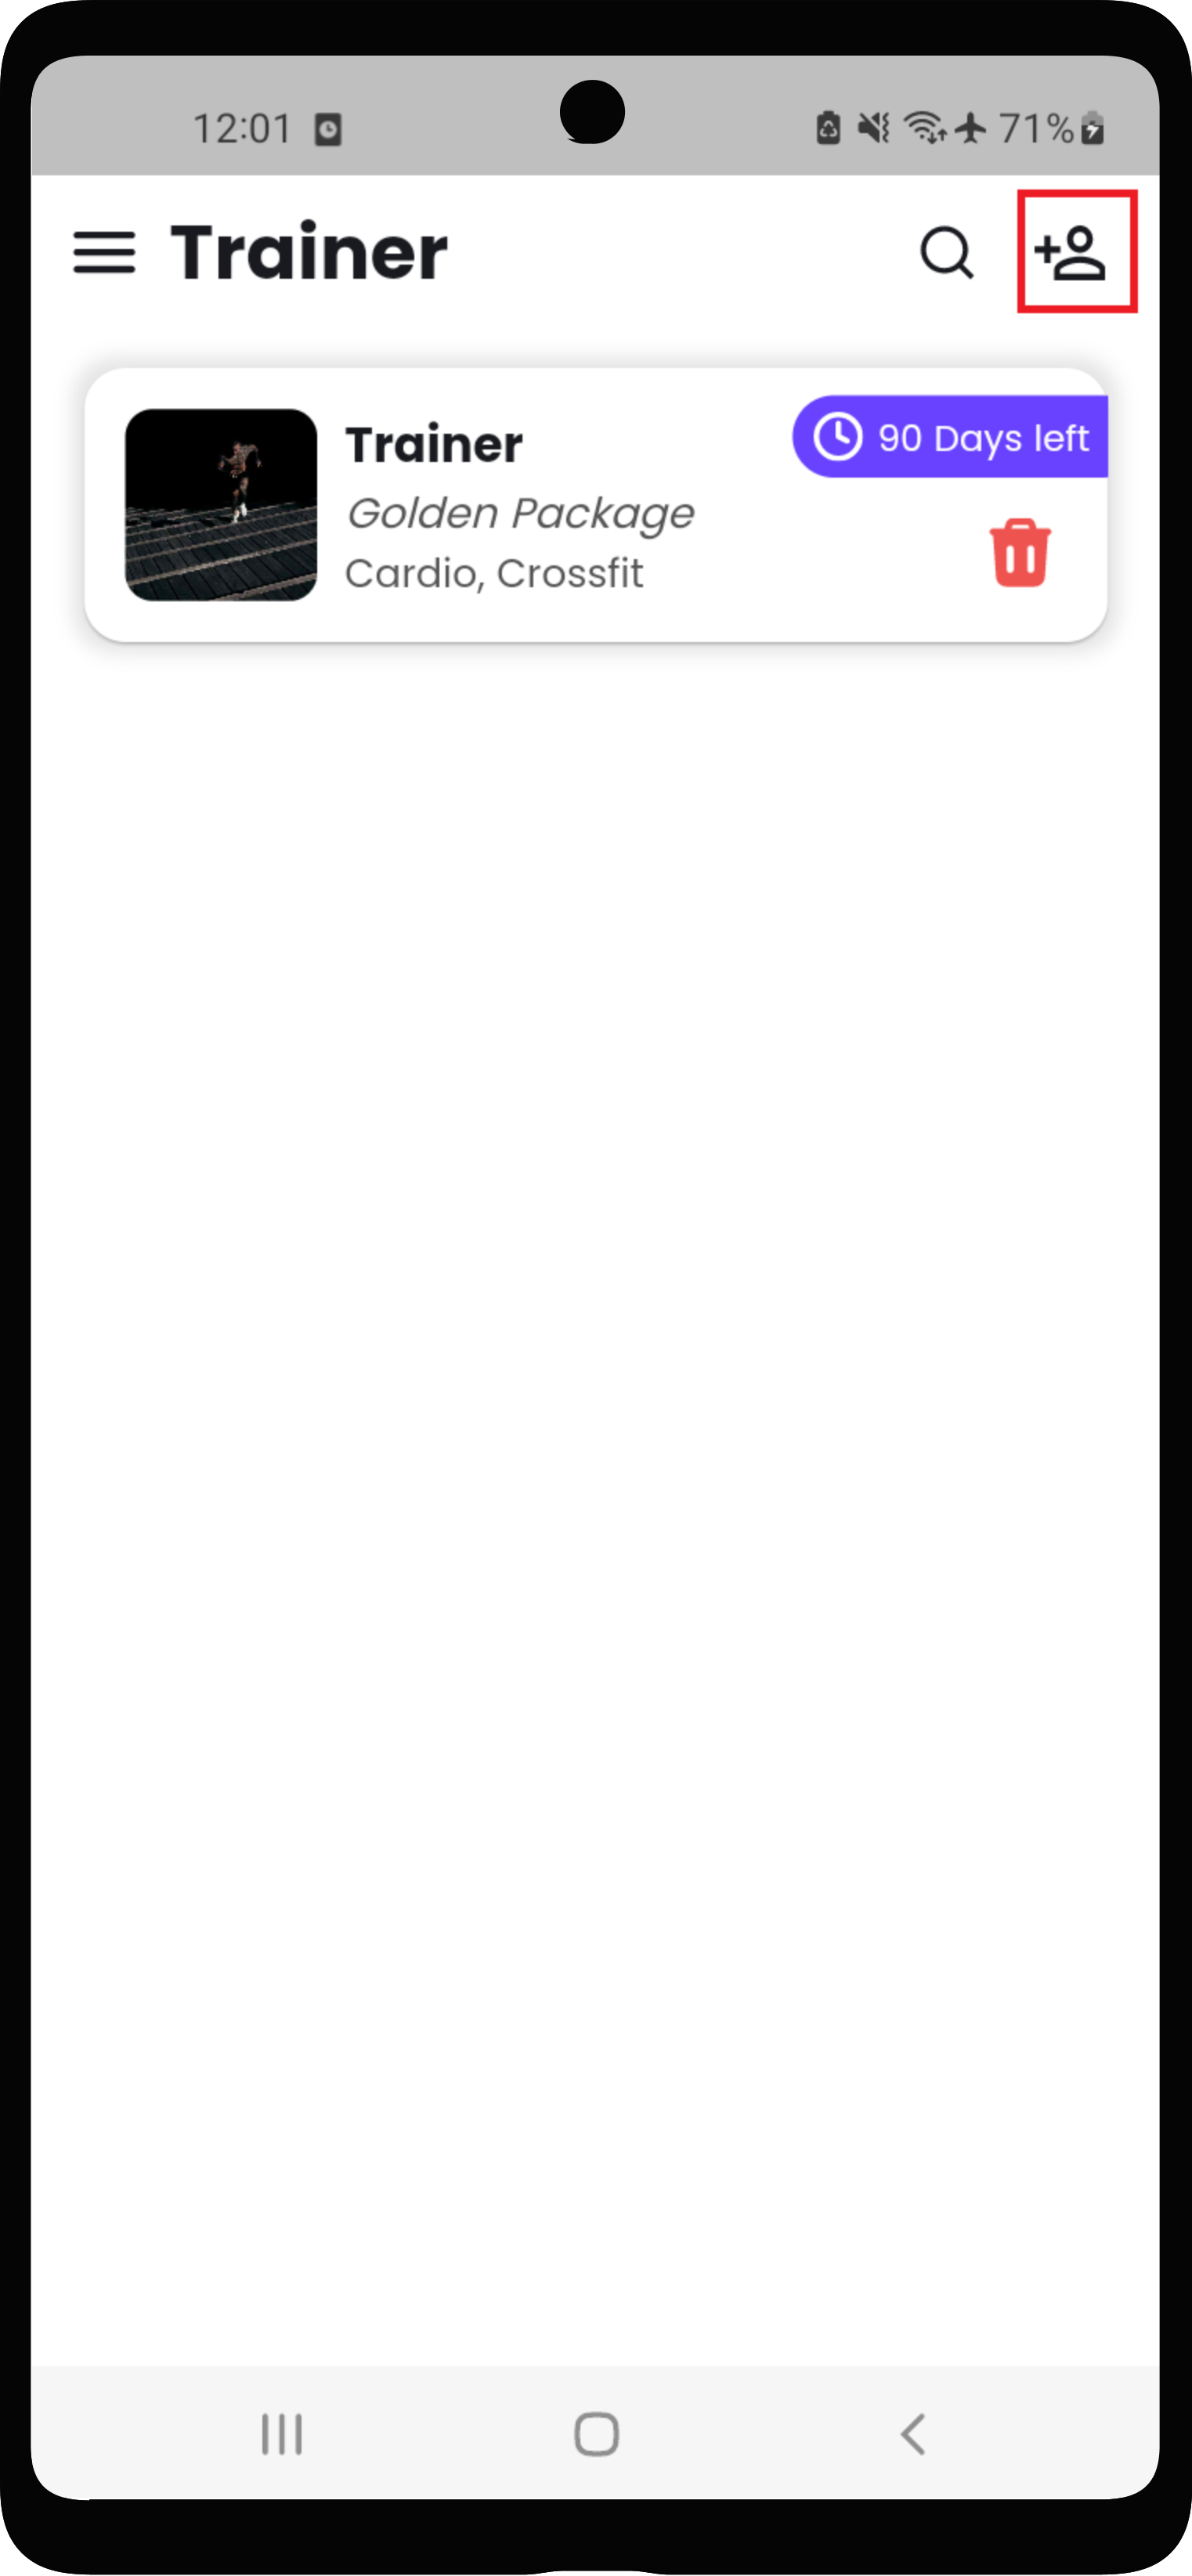
ii) Add Trainer in Admin

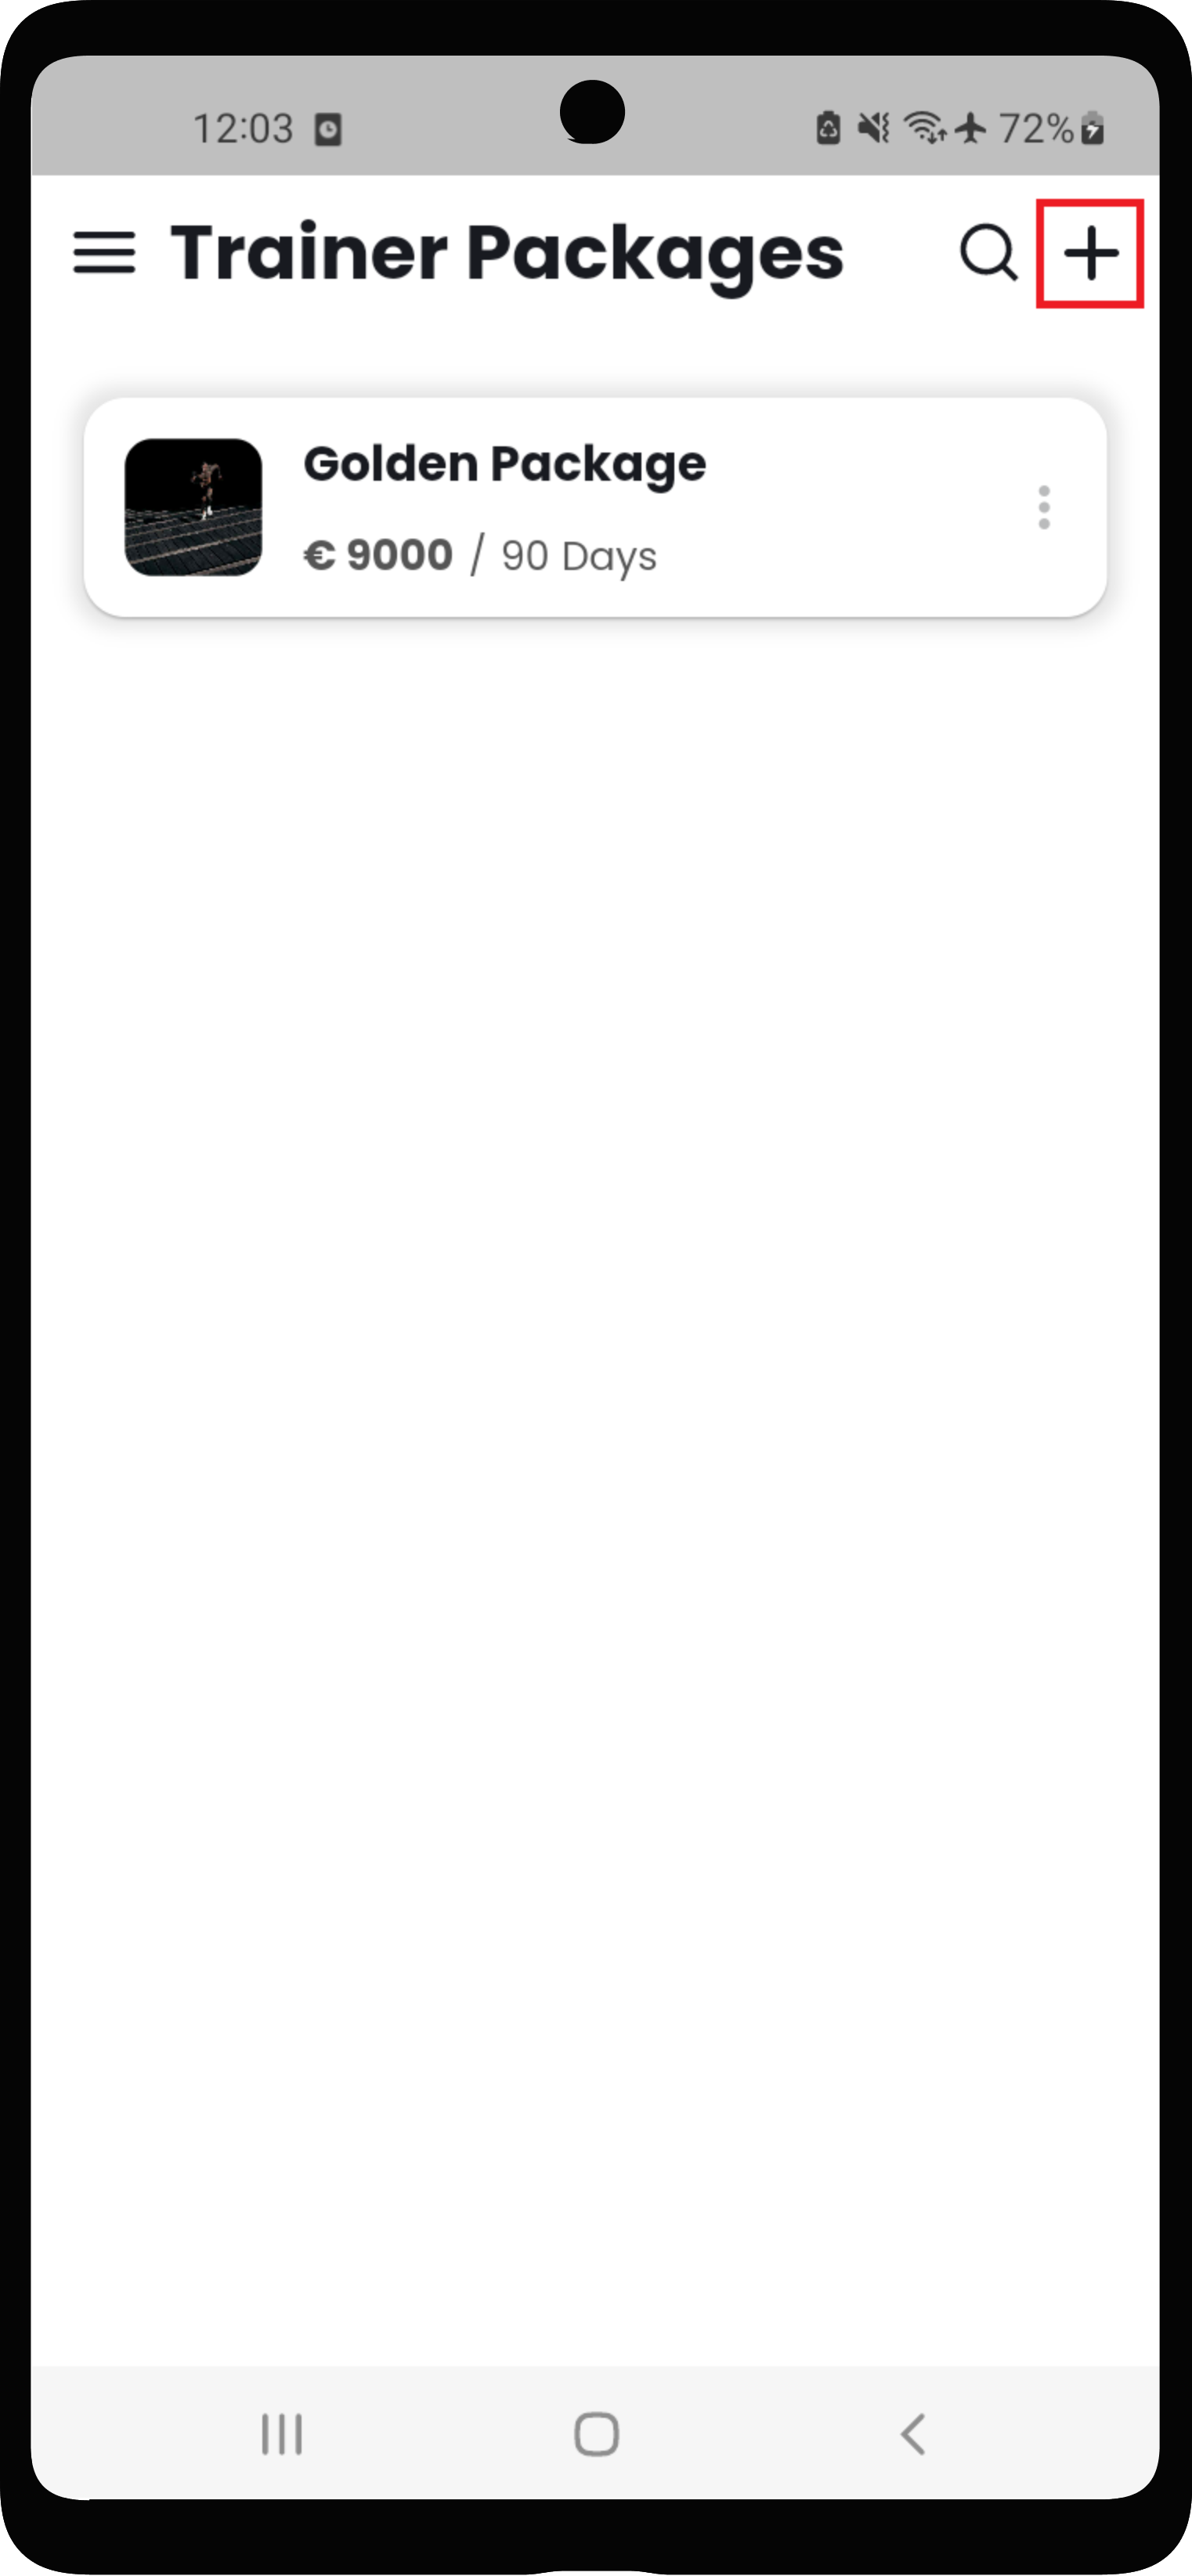
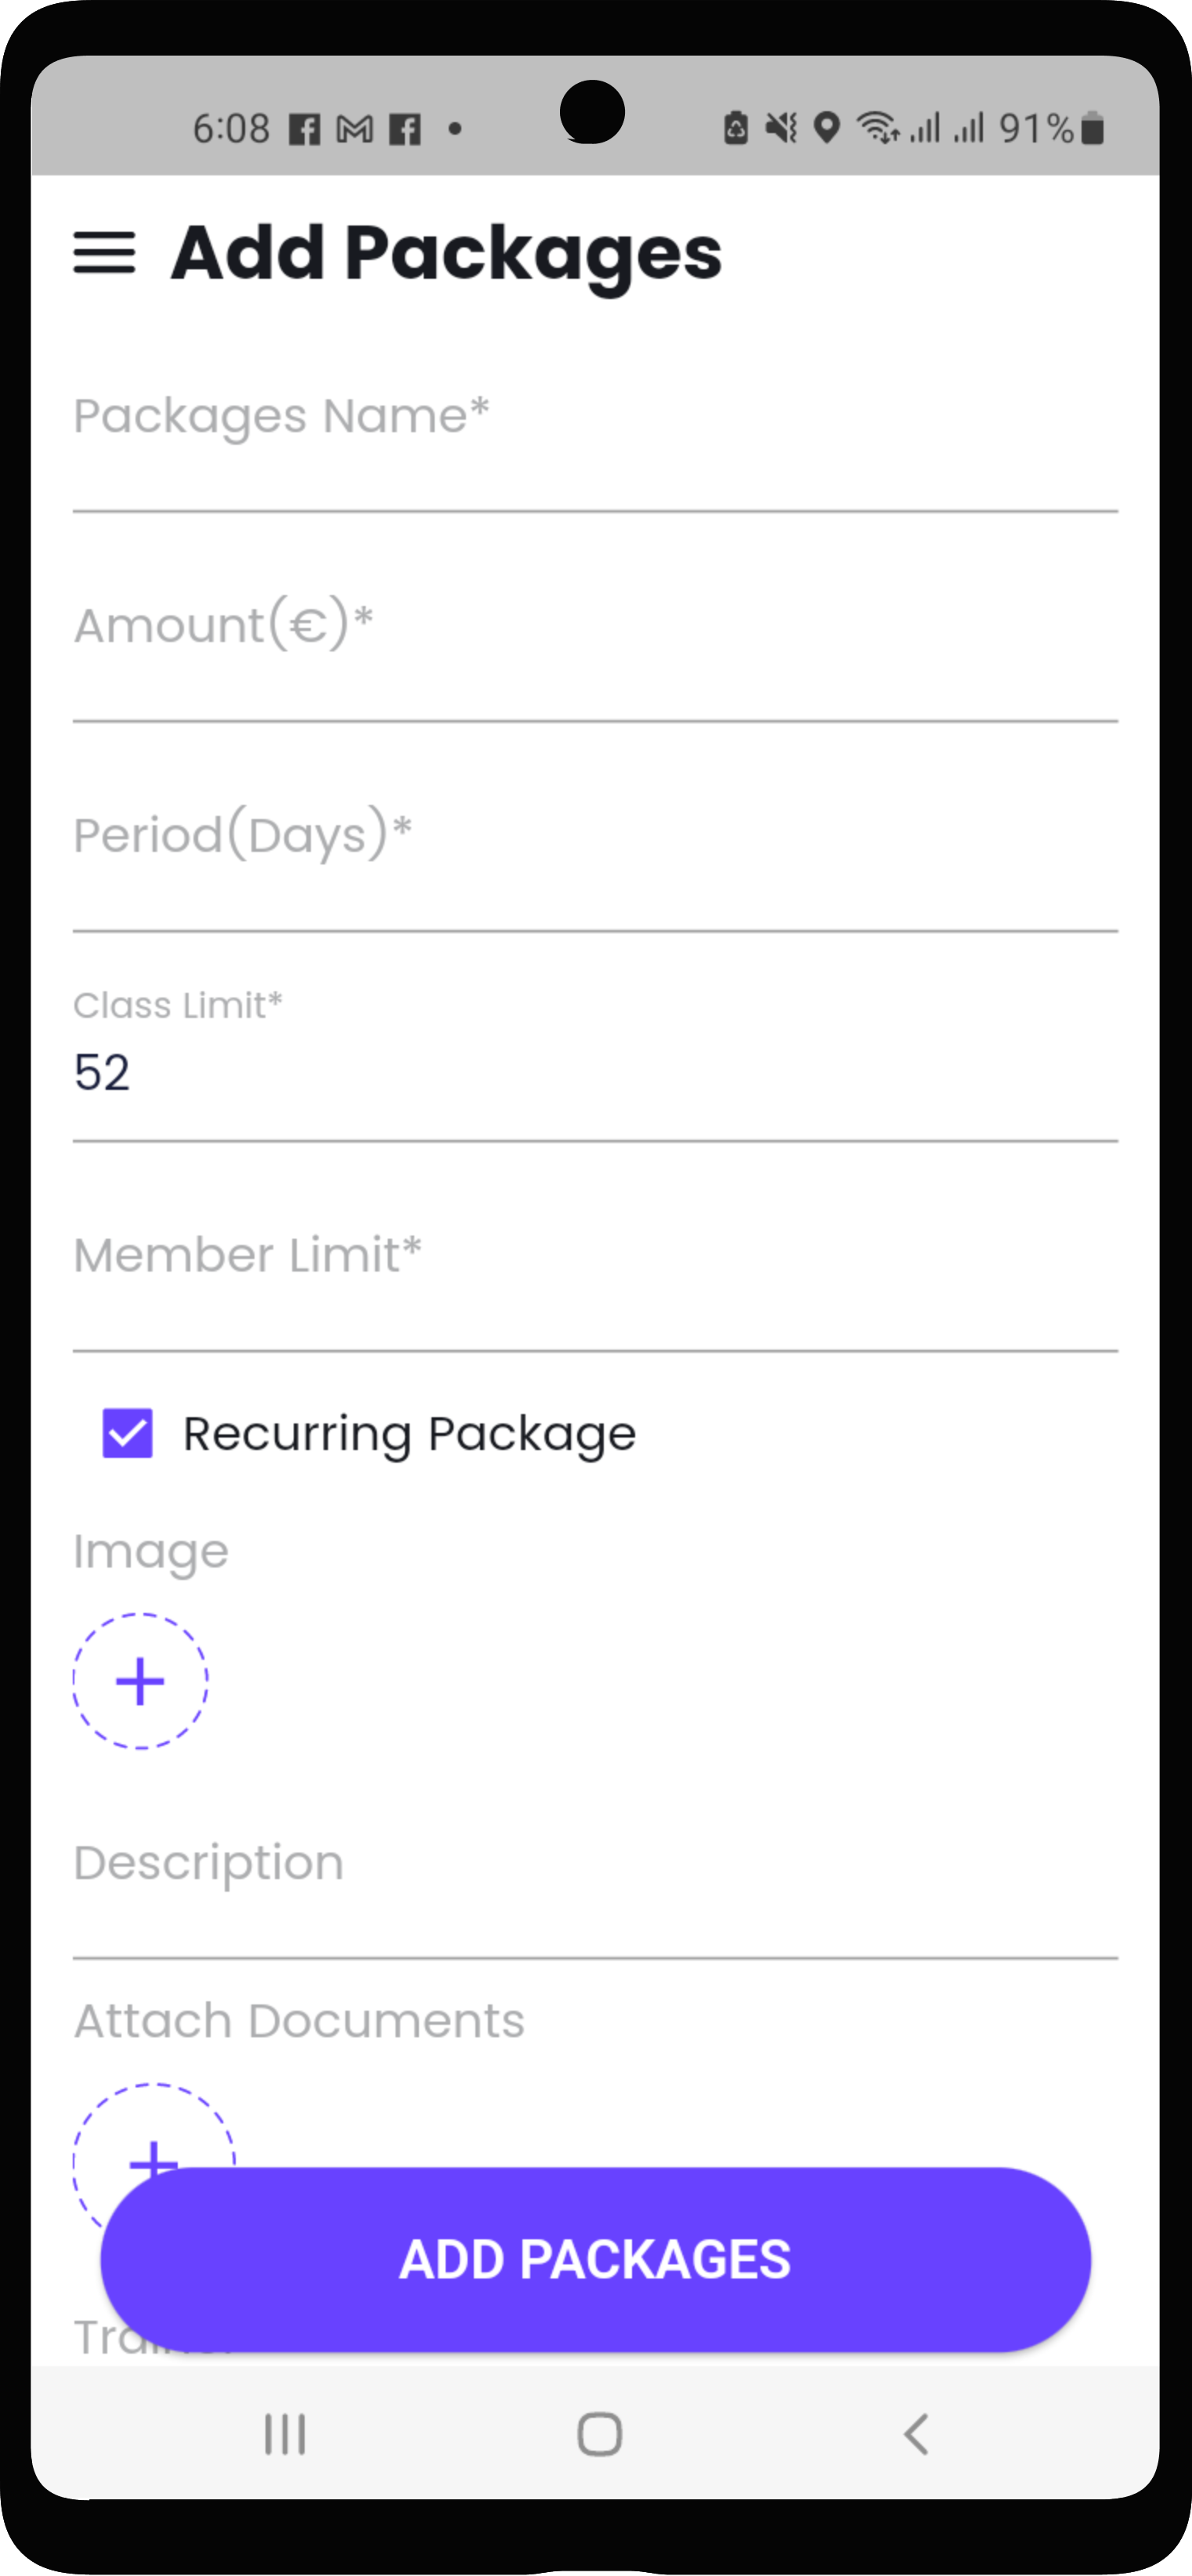
iii) Add Trainer Package in Admin
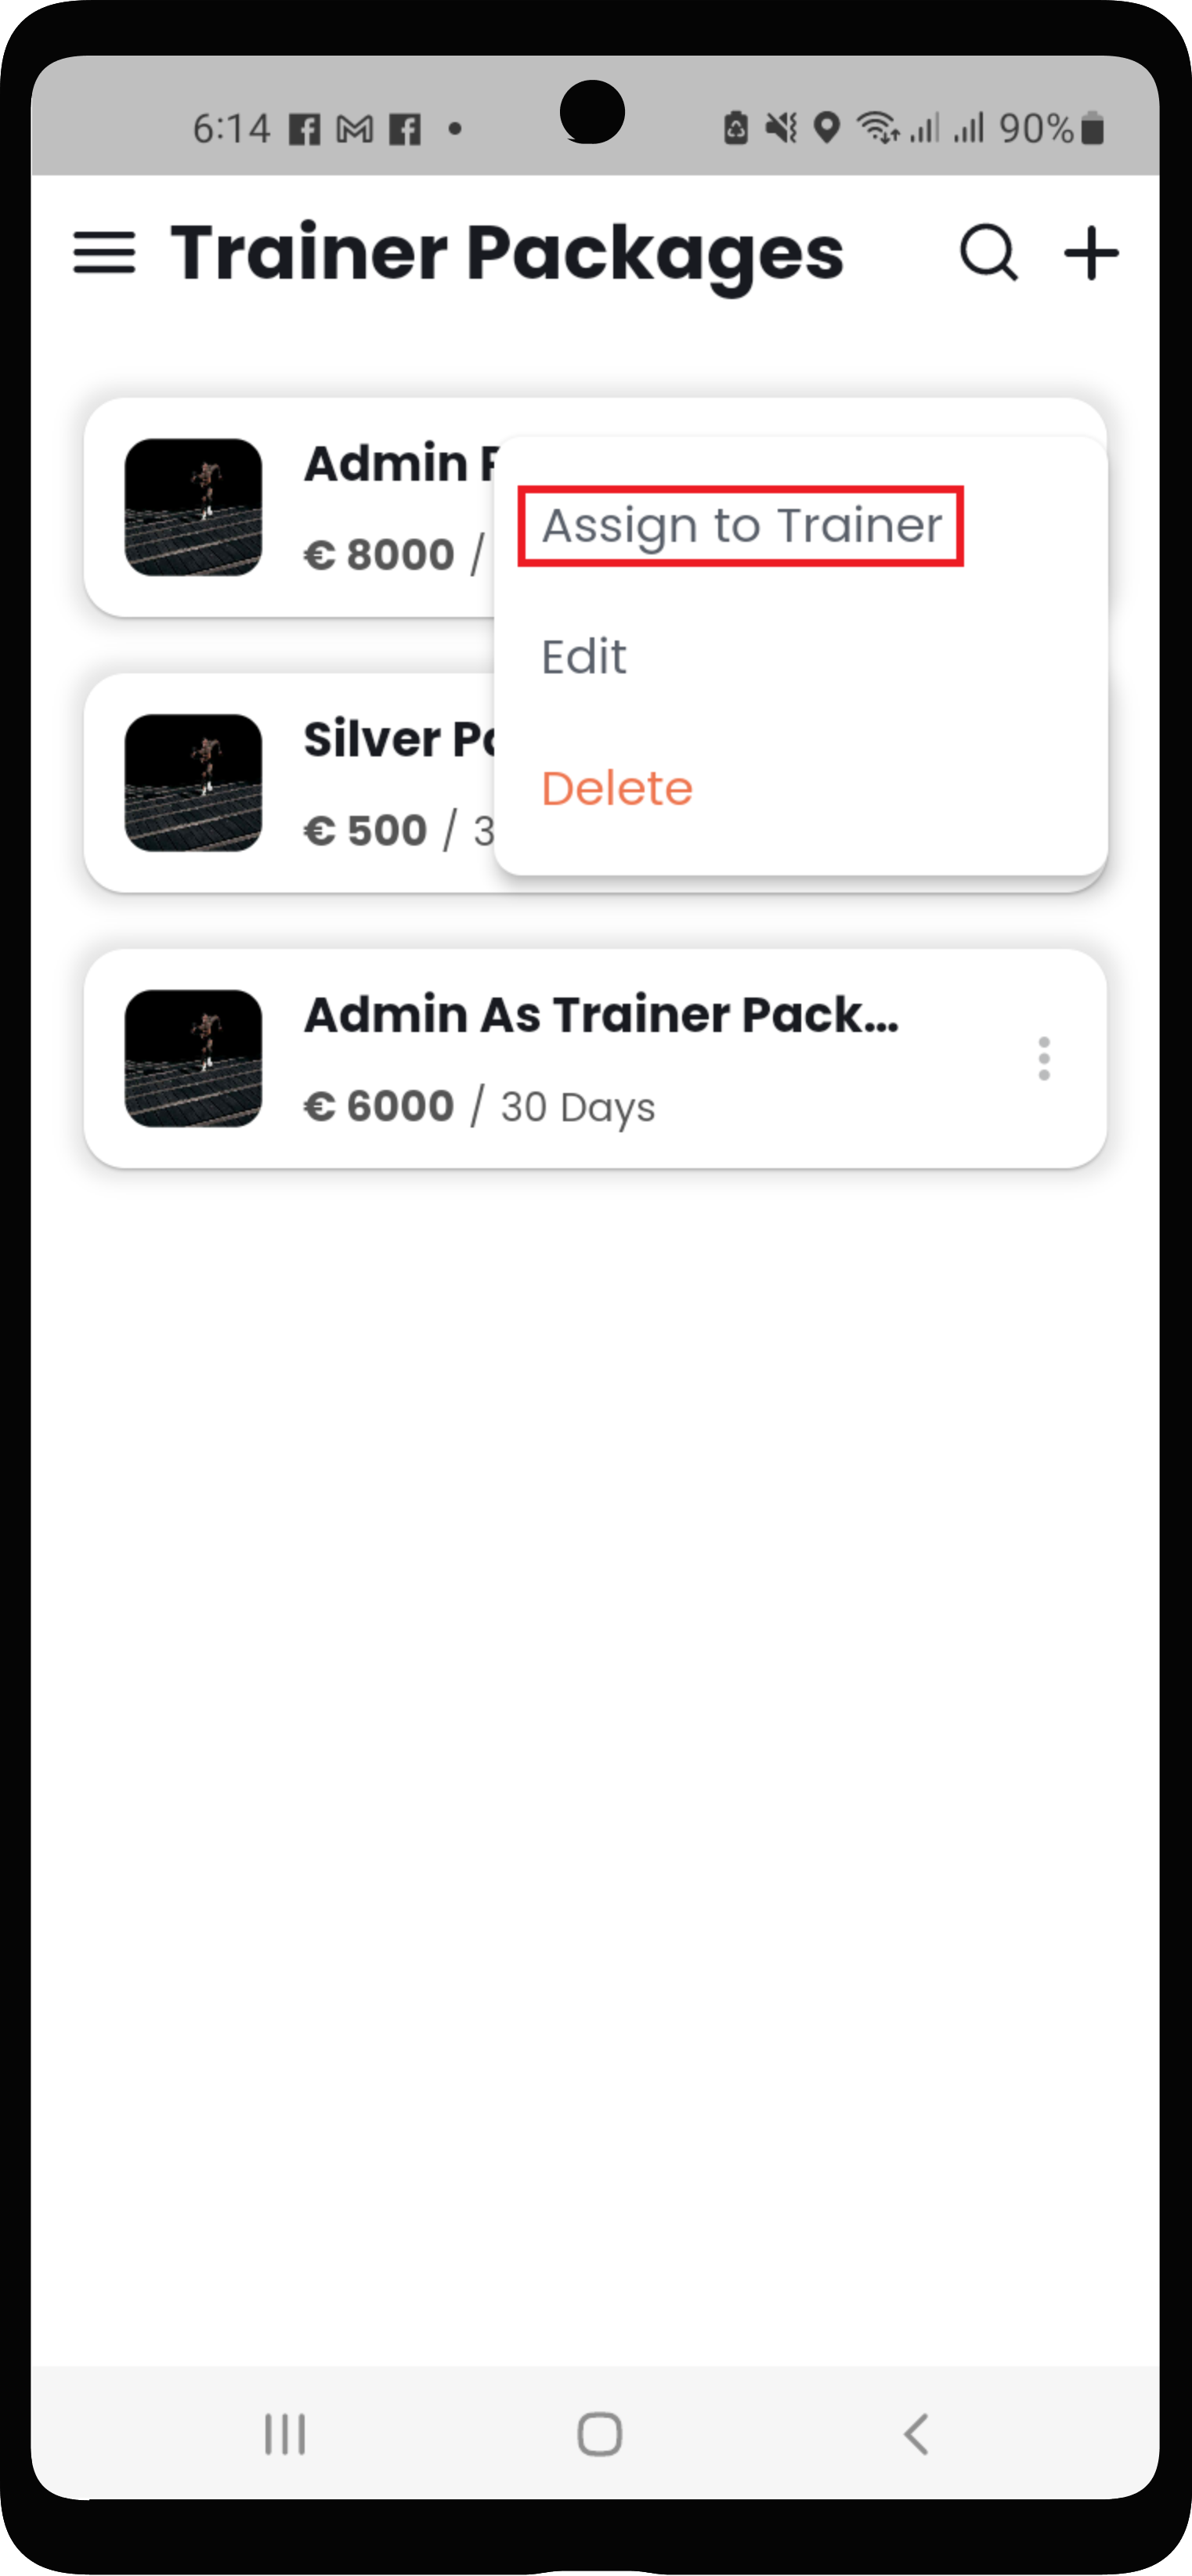
iv) Assign Trainer Package in Admin

v) Manual Invoice
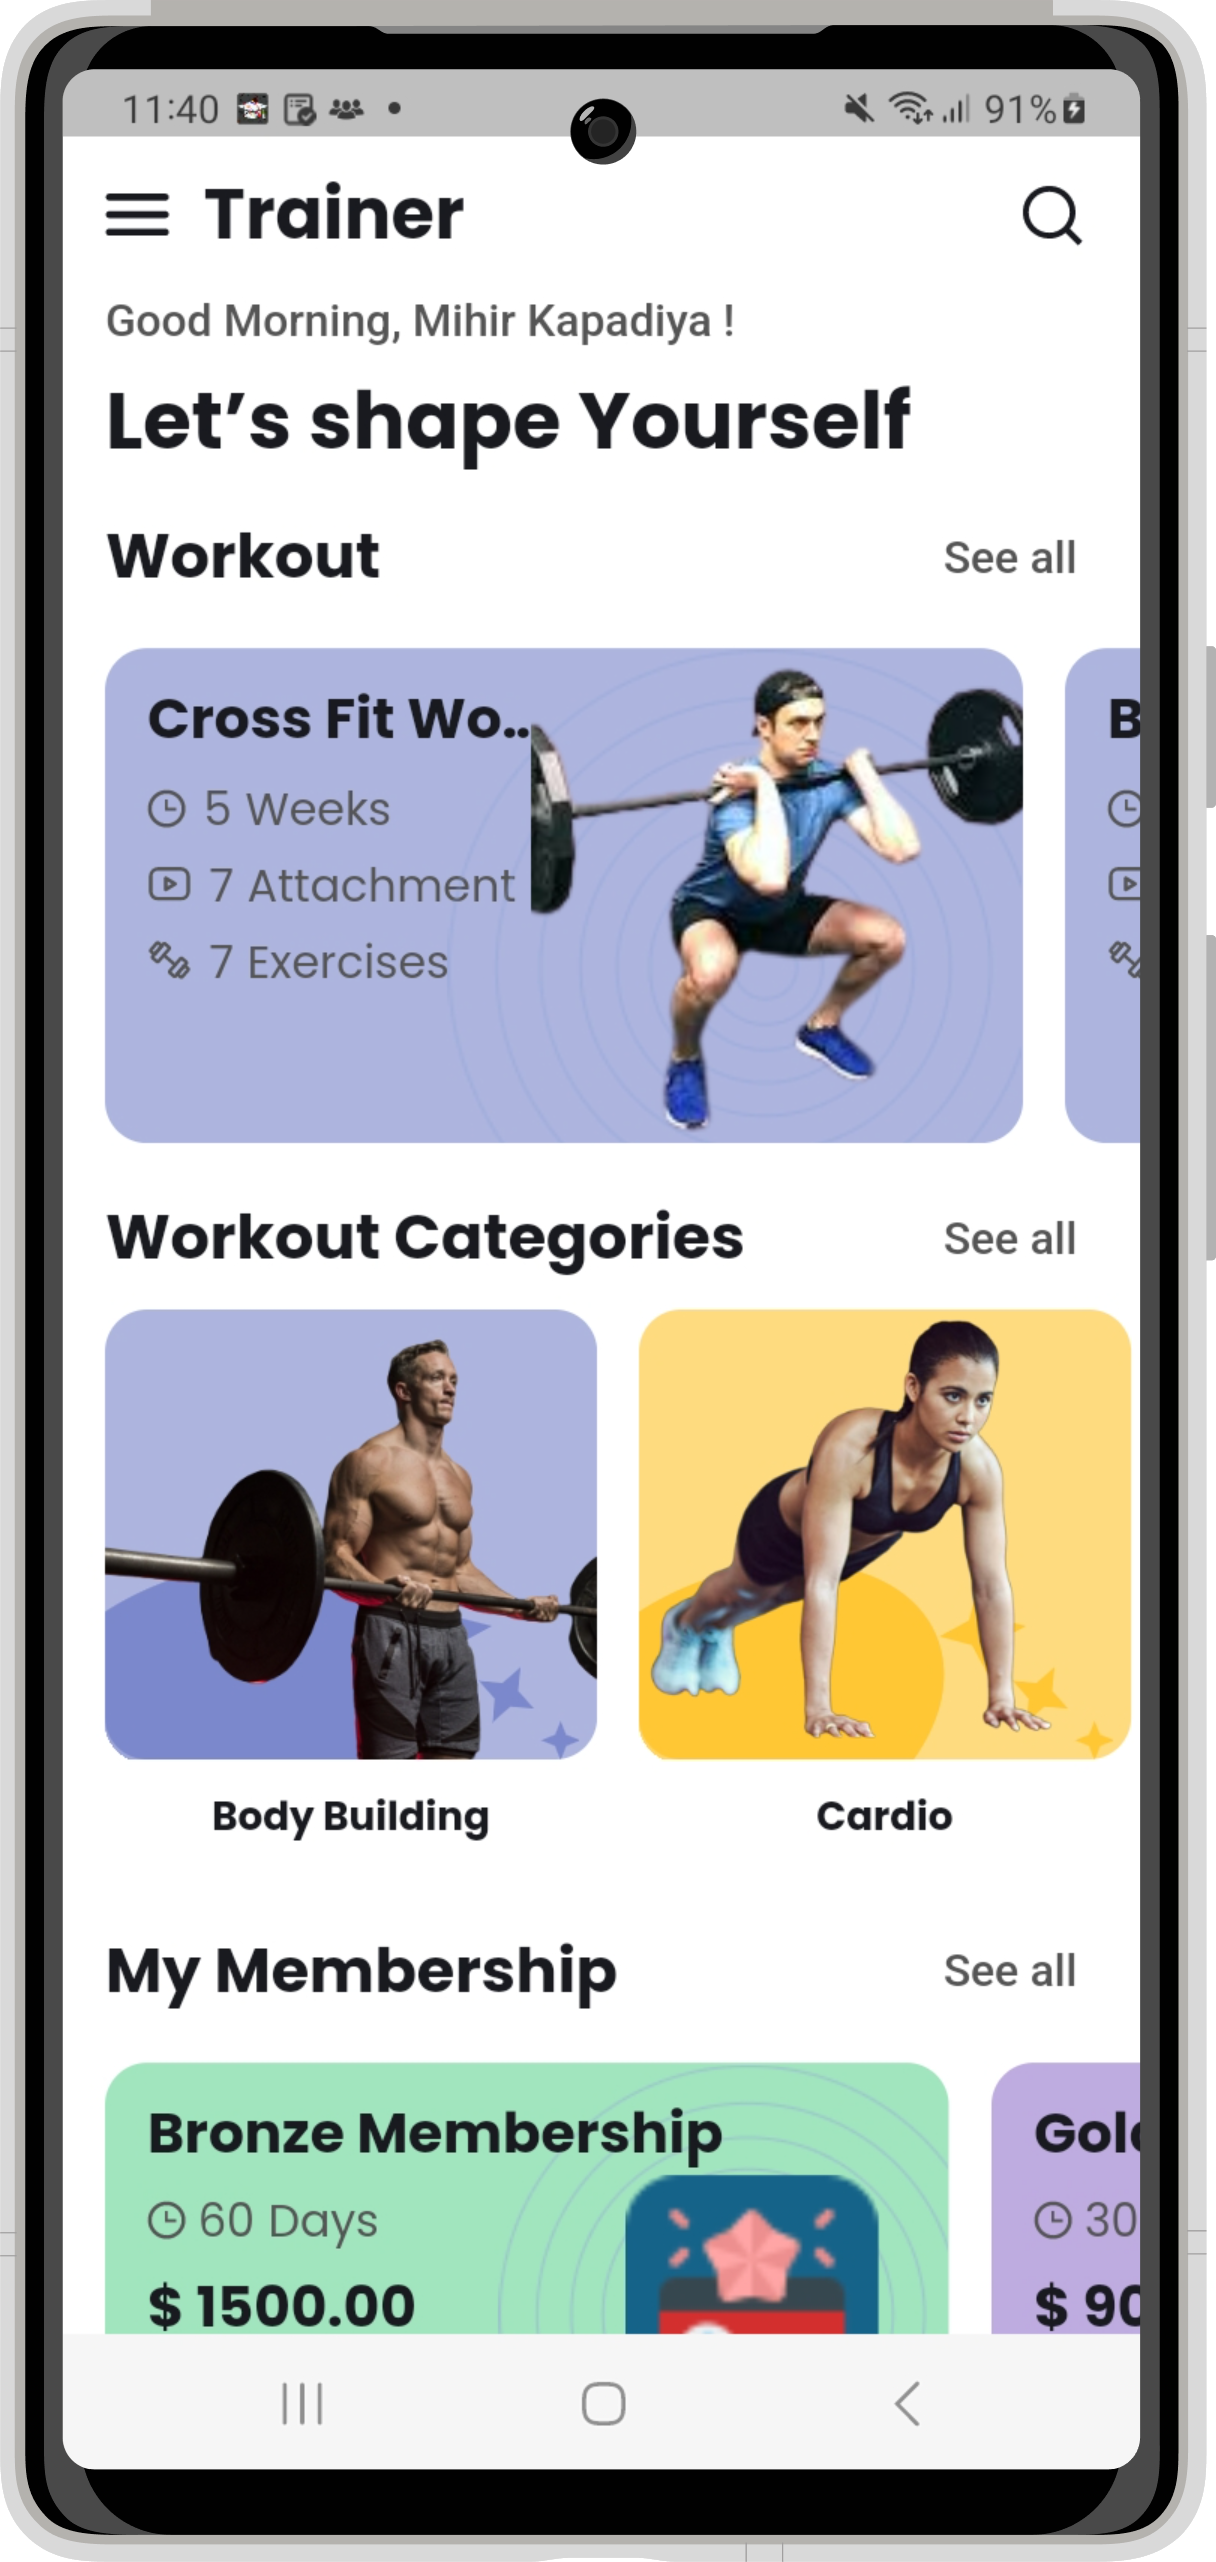
C) Trainer
Login Trainer ID And Password For Demo Email :trainer@gmail.com
Password :trainer
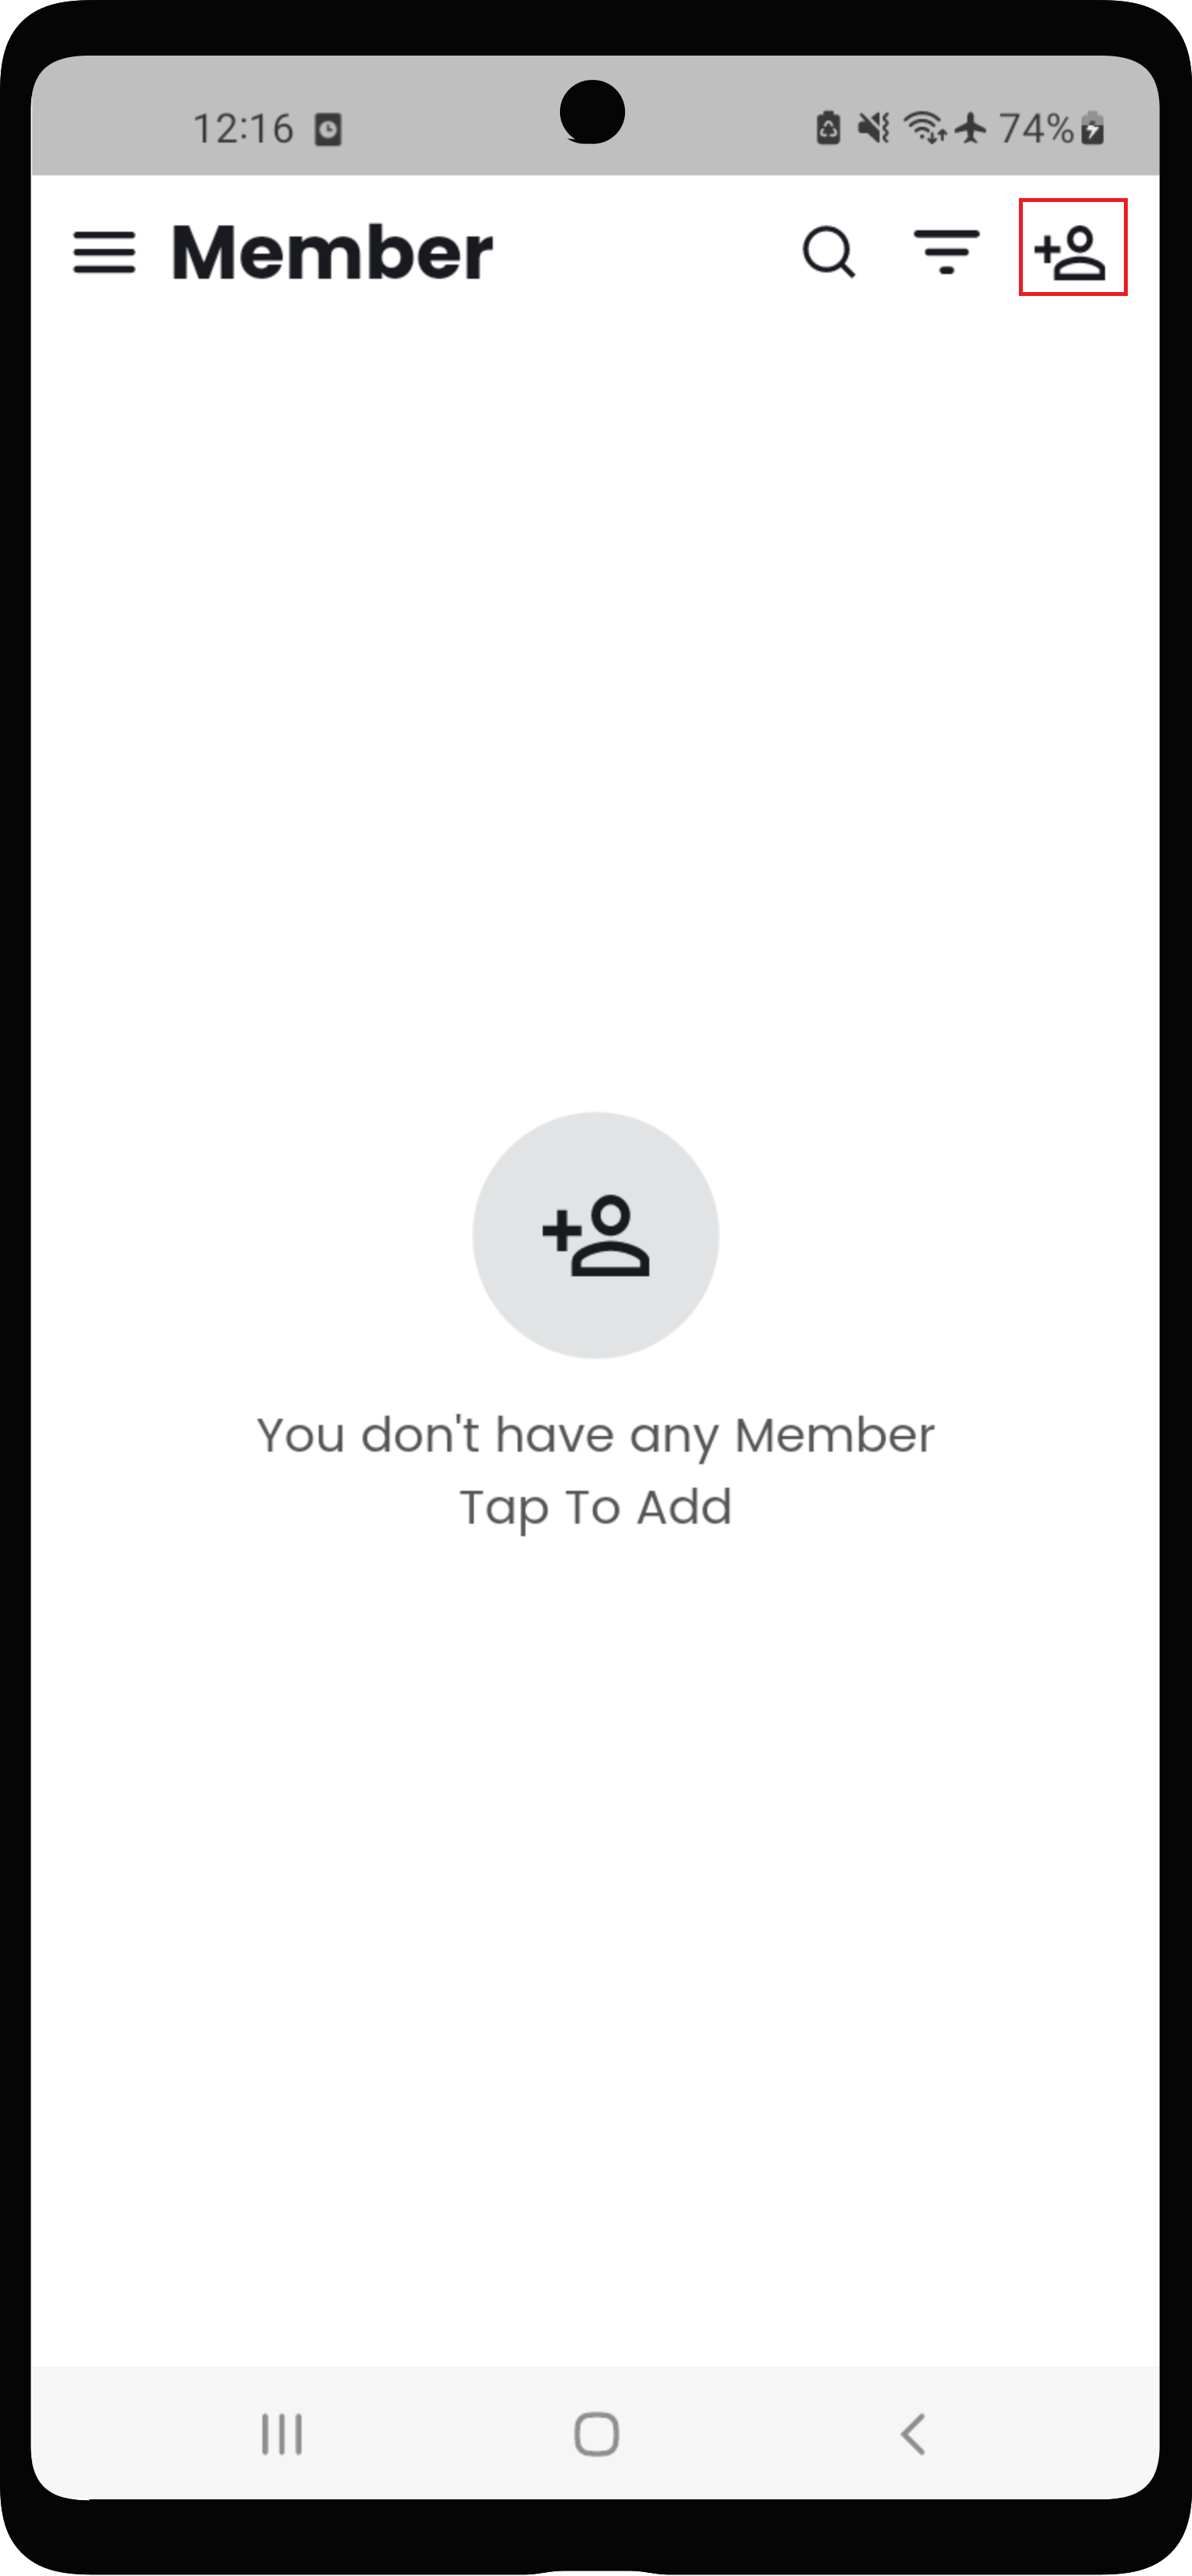
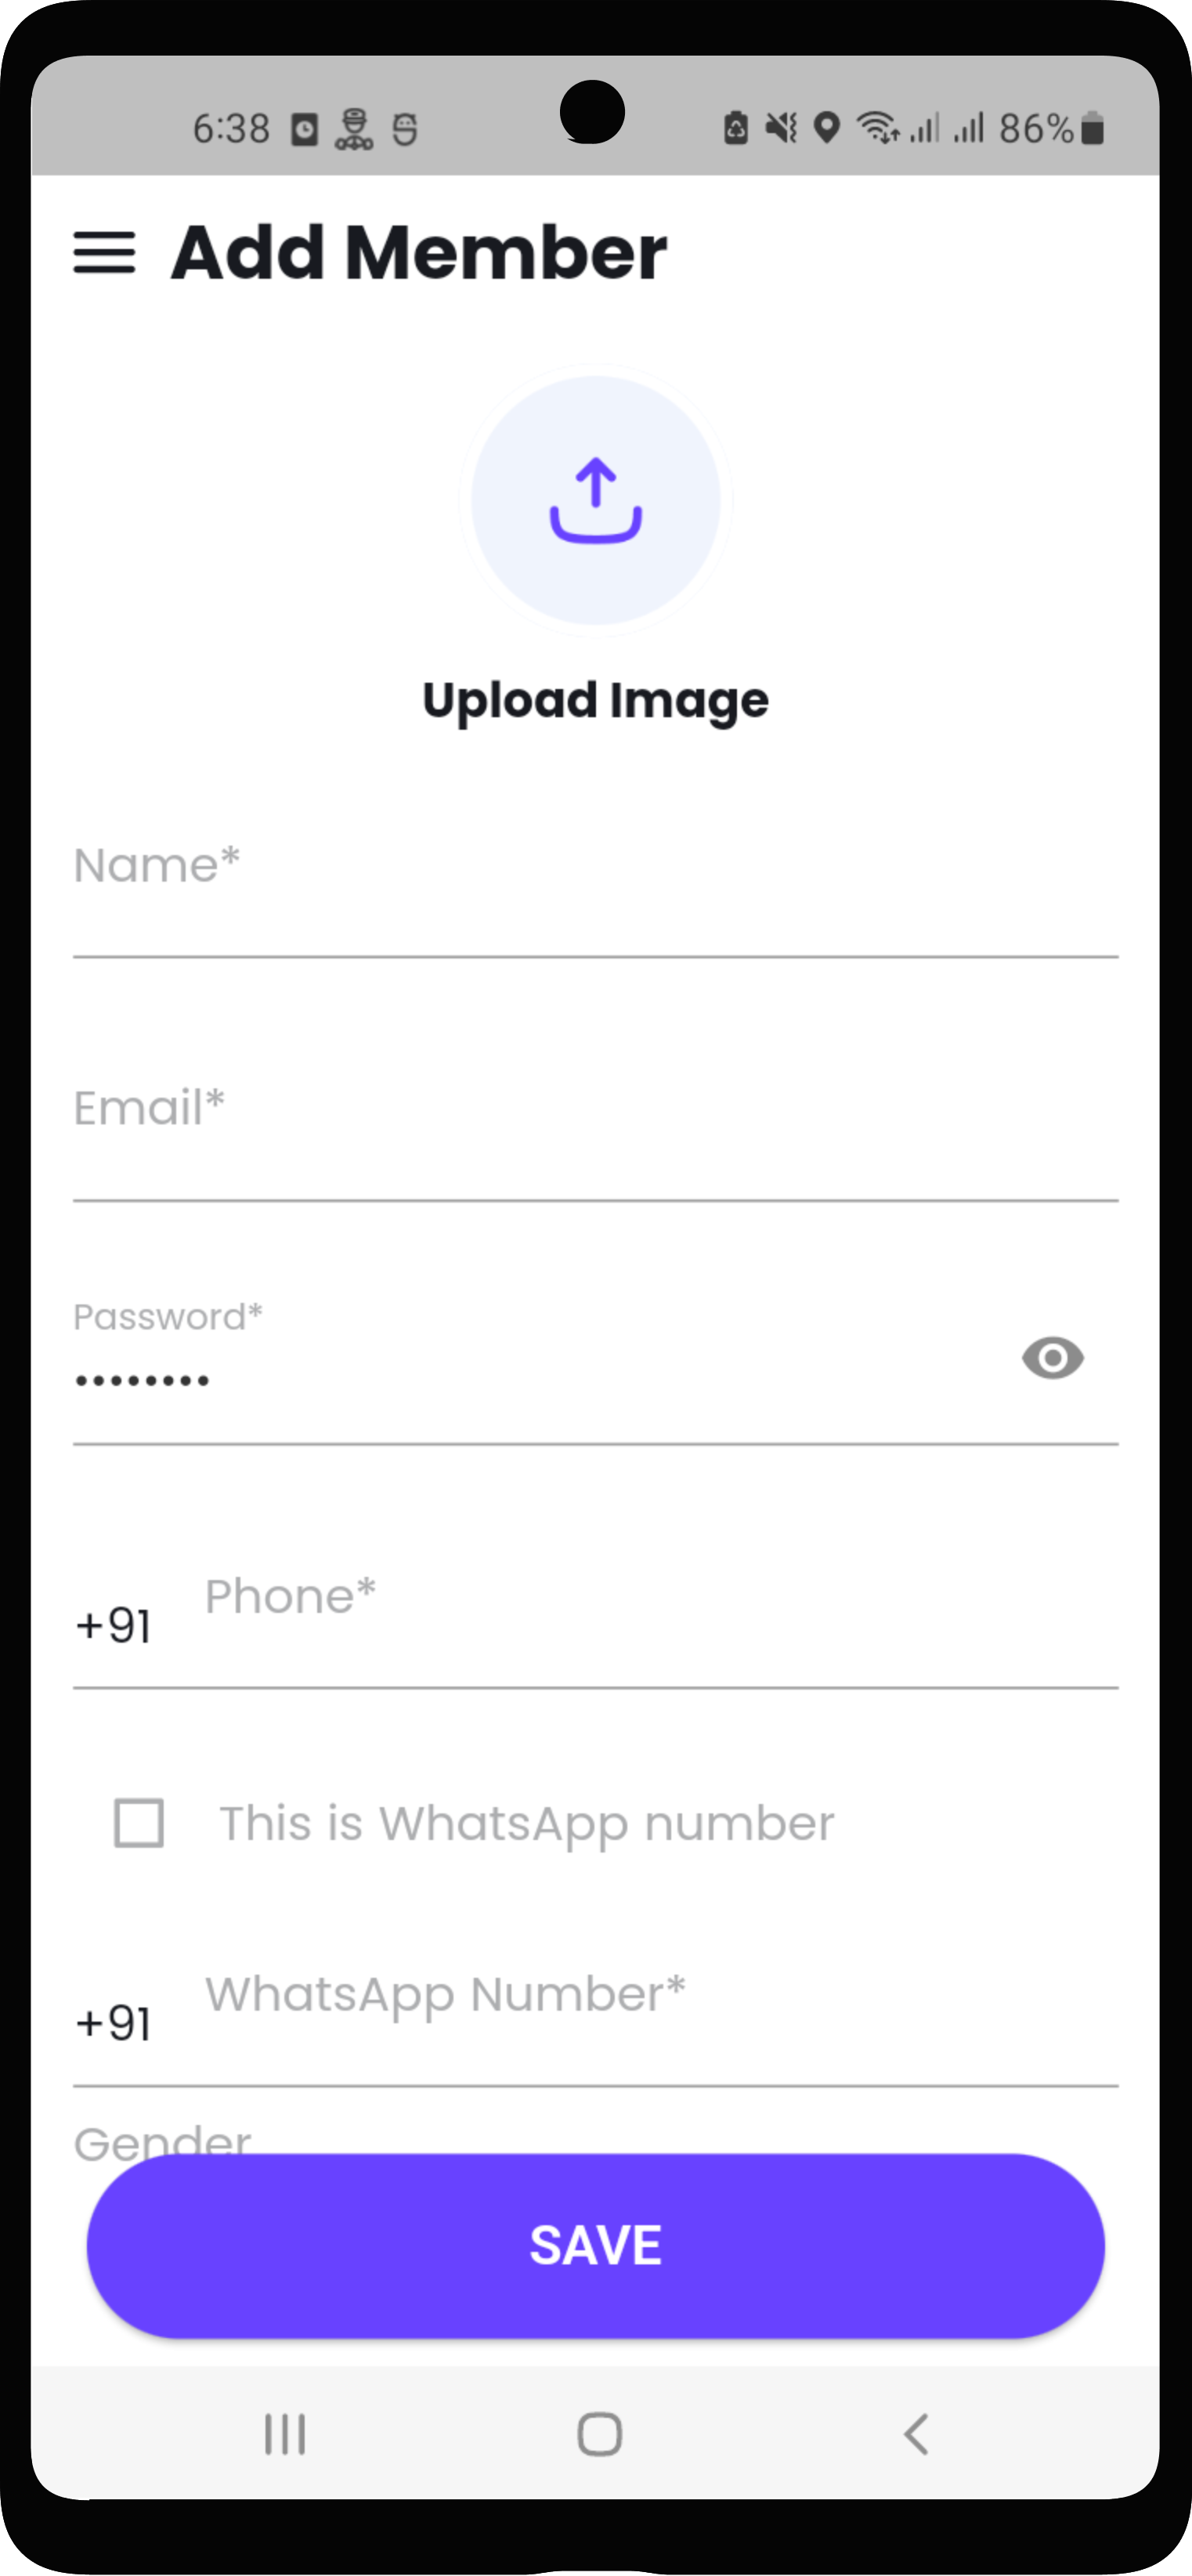
i) Add Member in Trainer
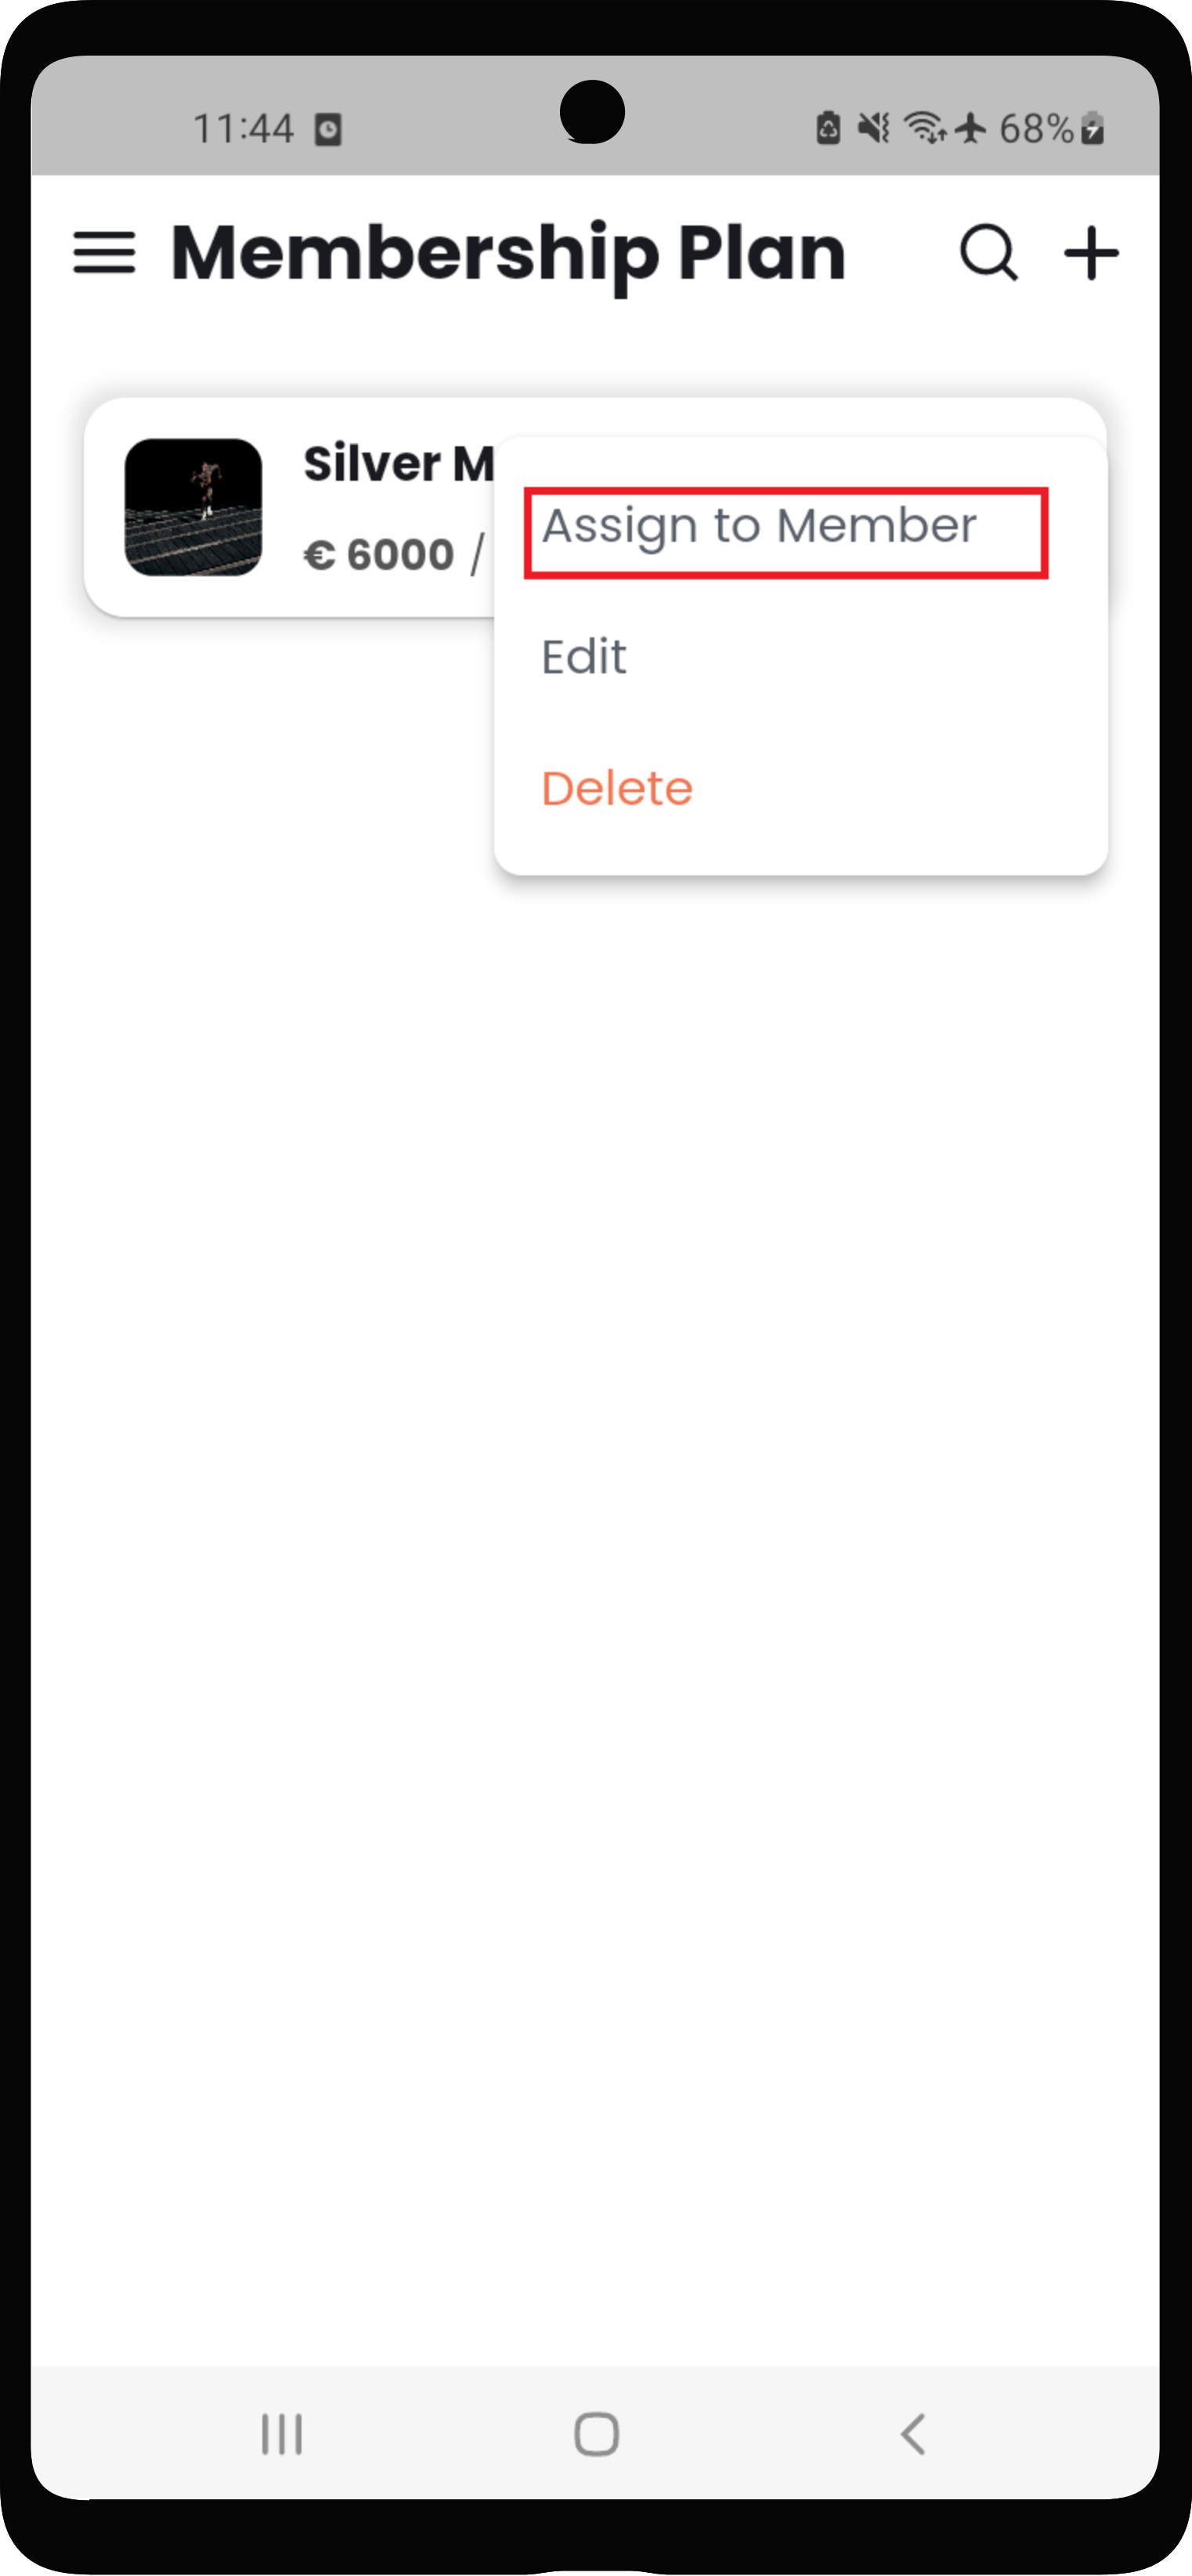
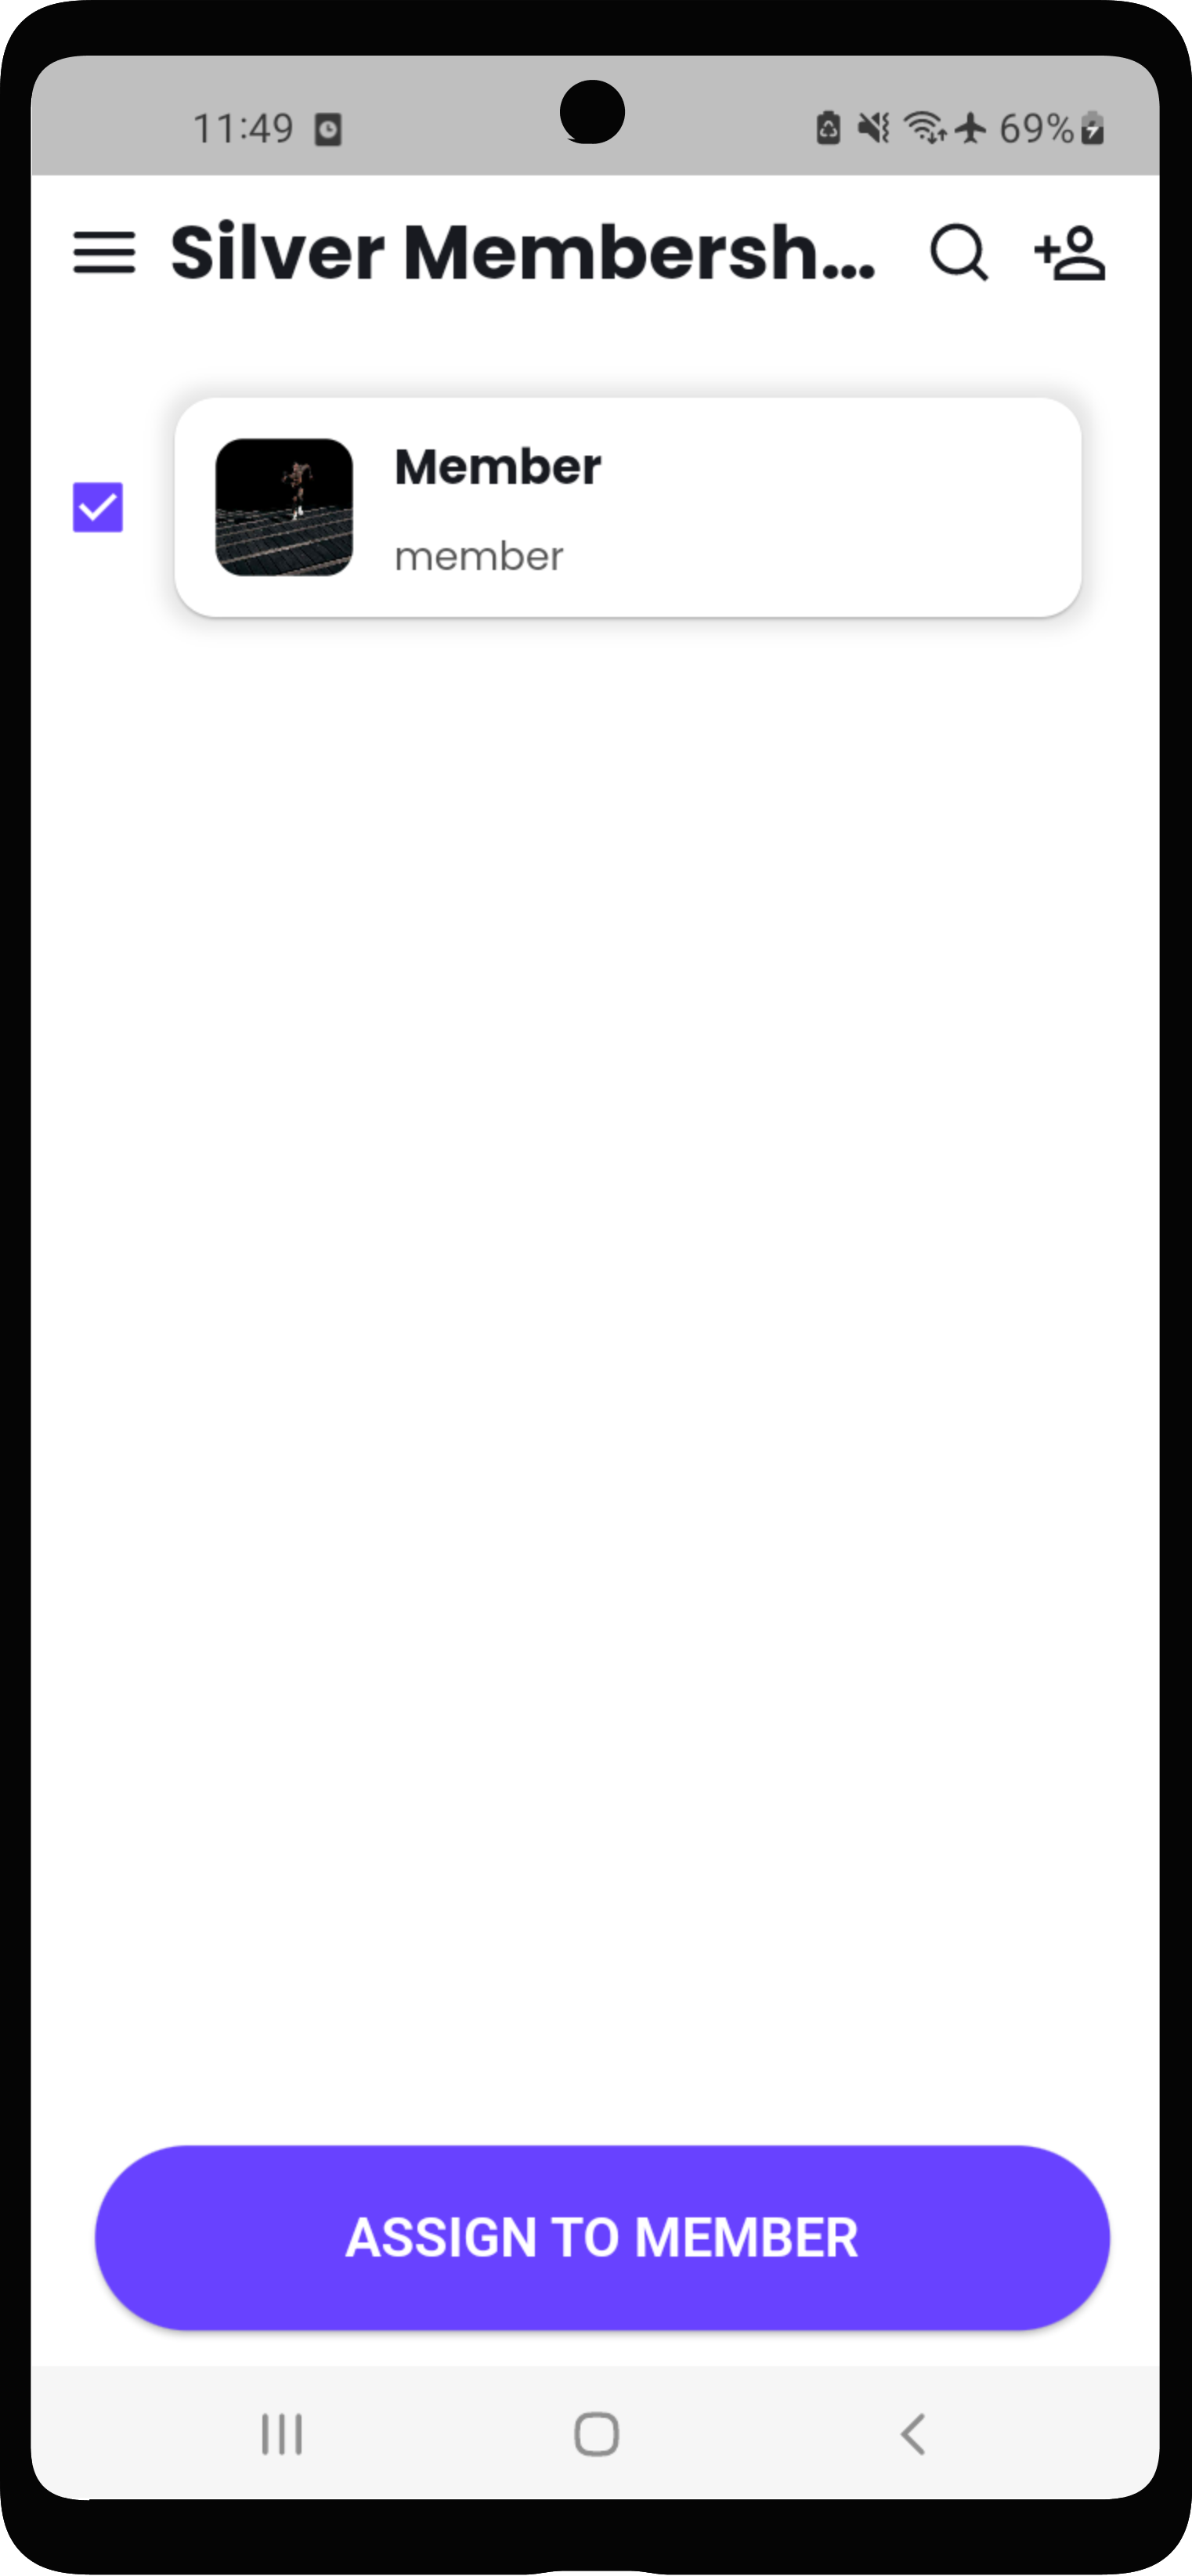
ii) Assign Membership in Trainer
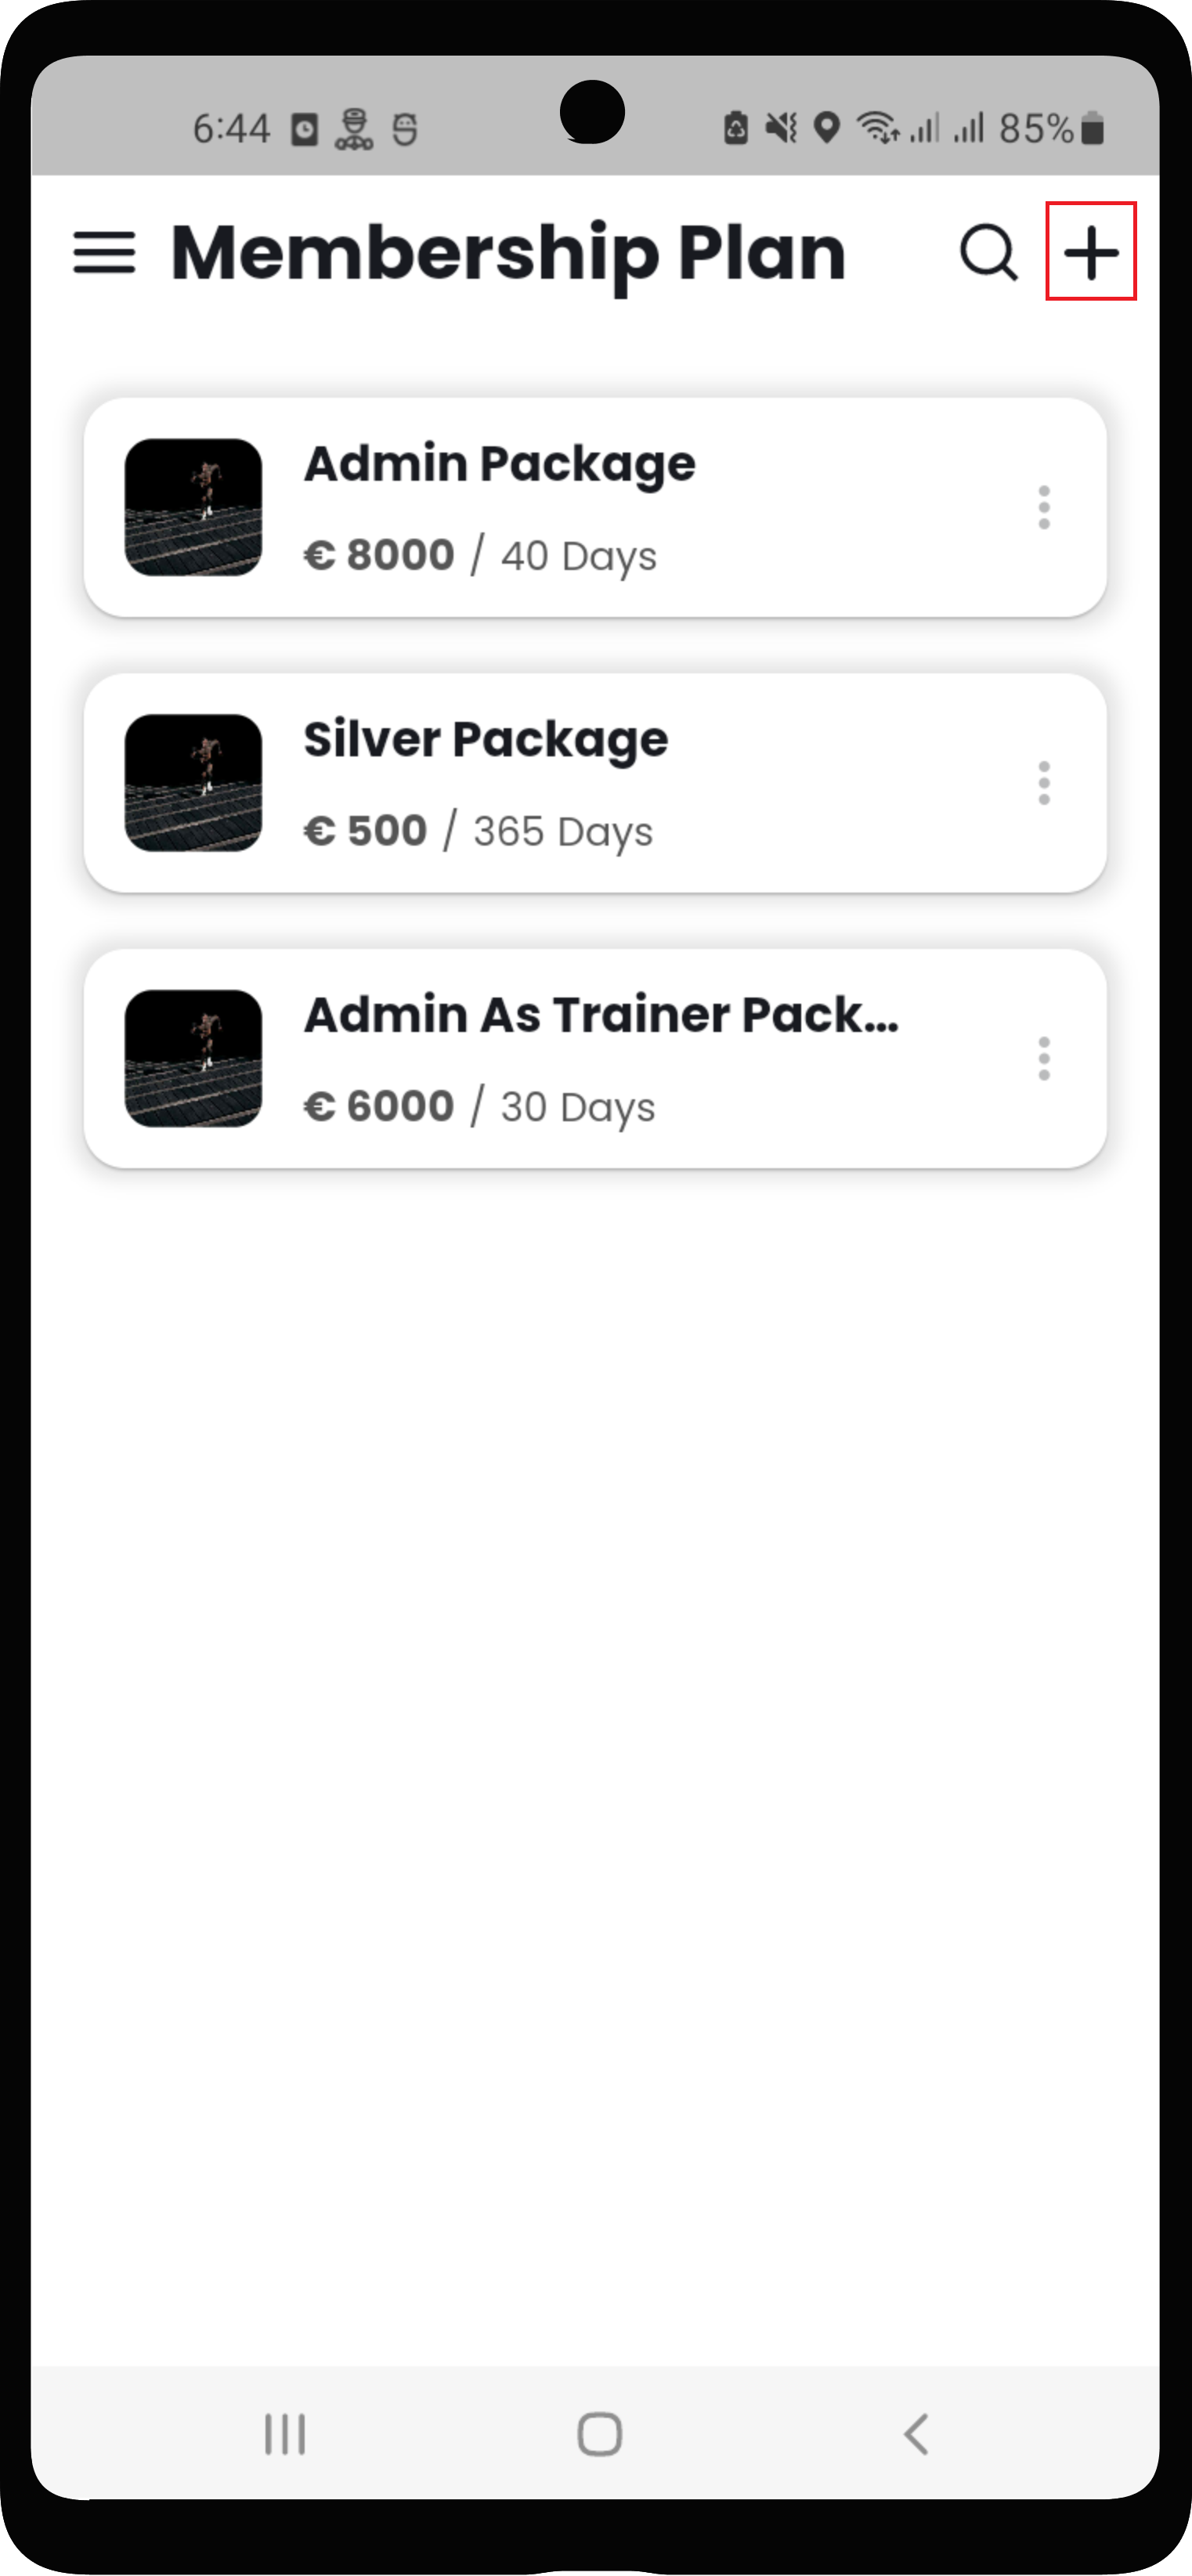
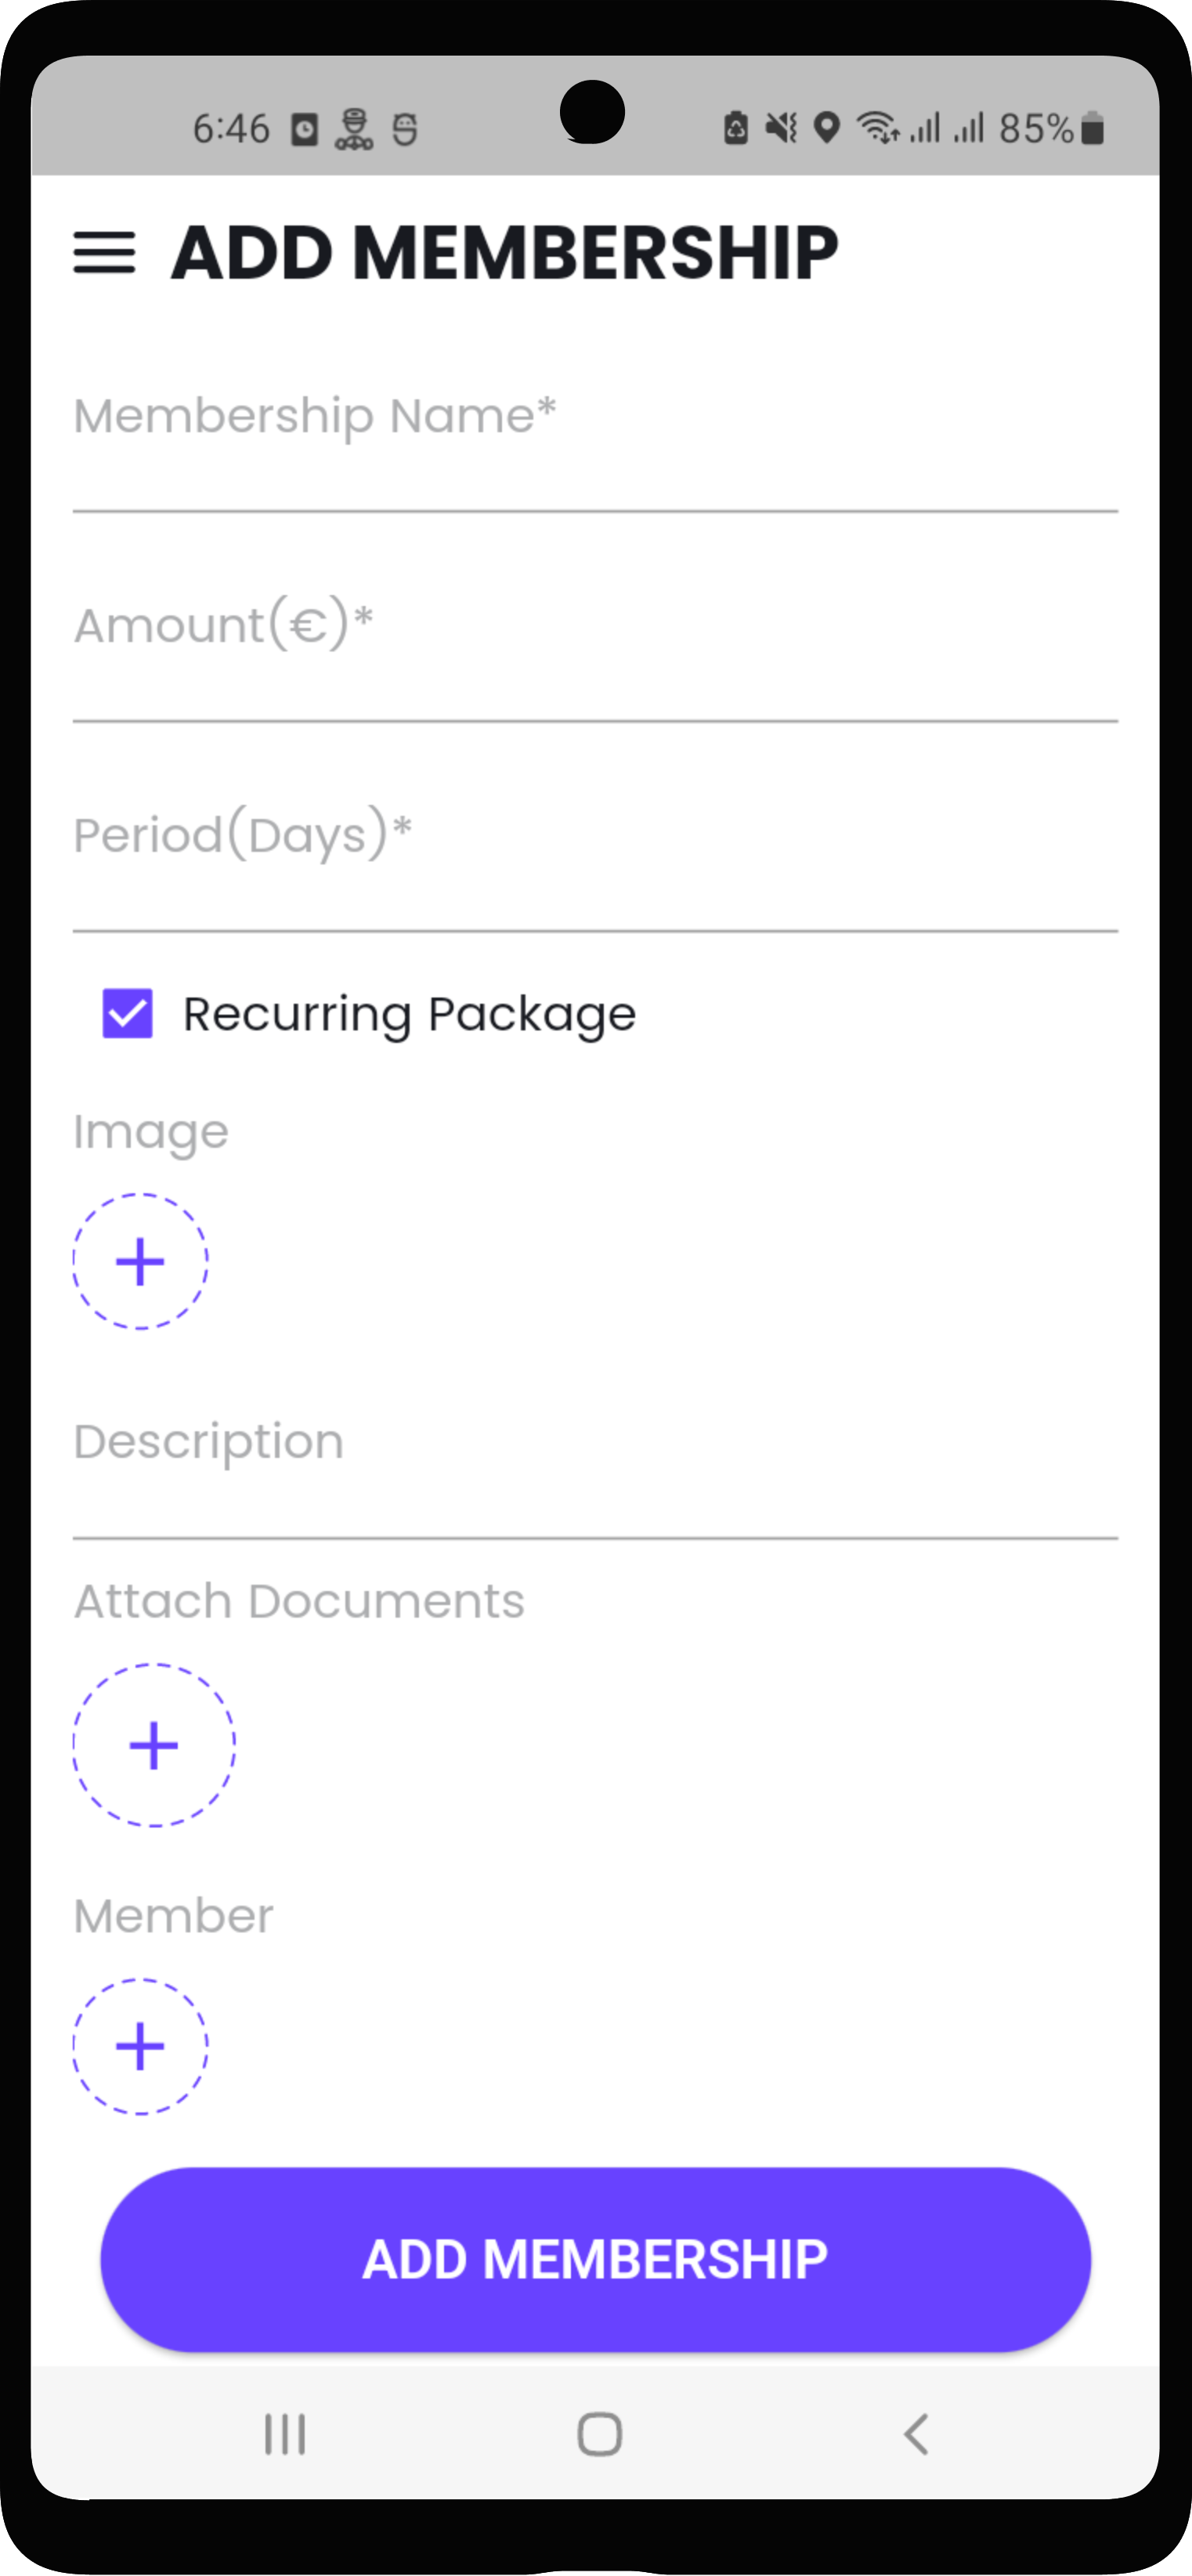
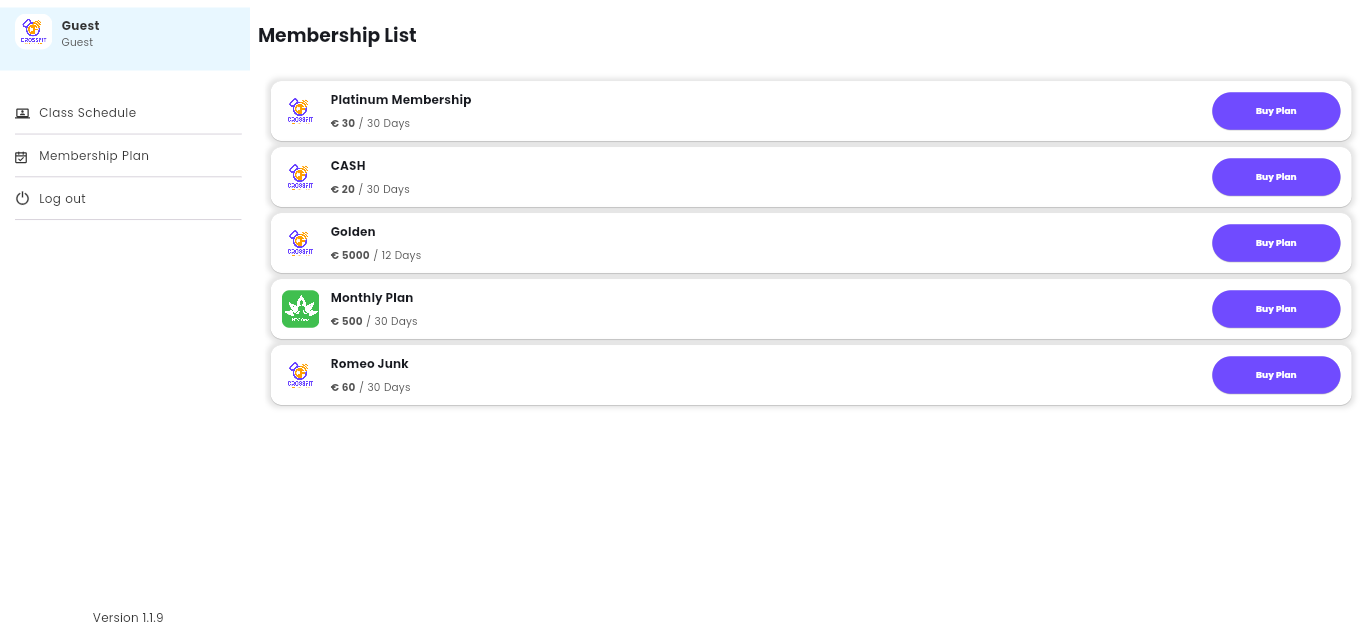
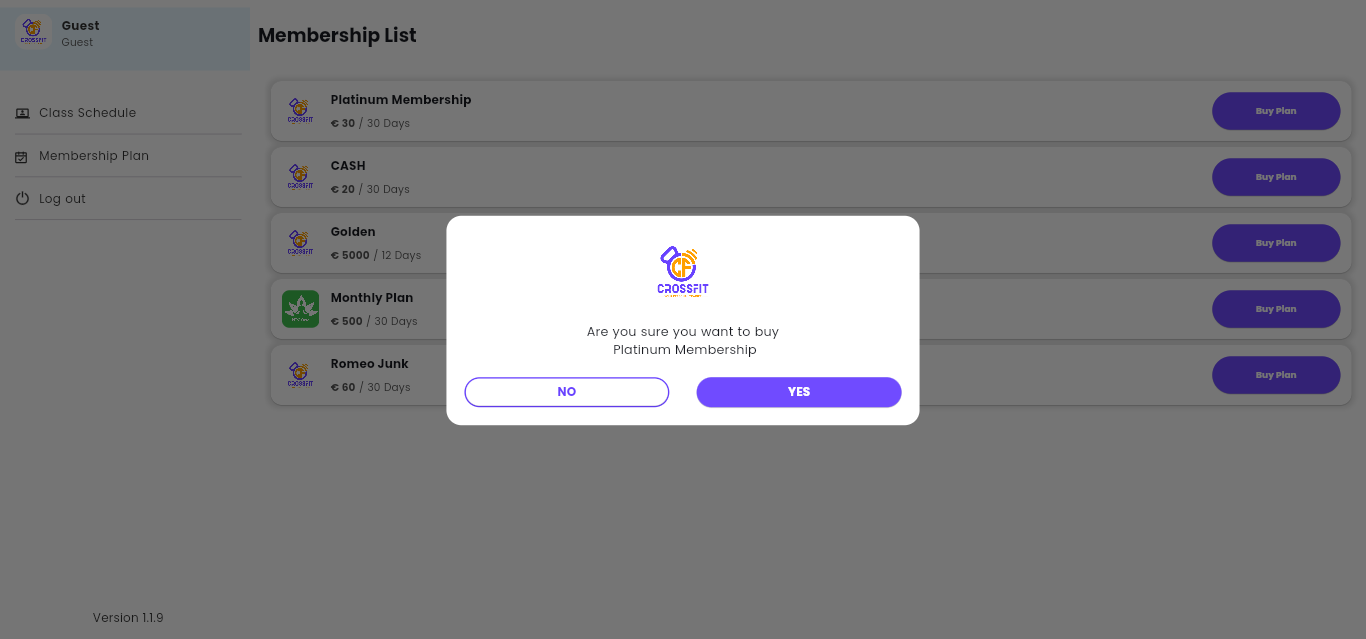
iii) Add Membership Plan in Trainer
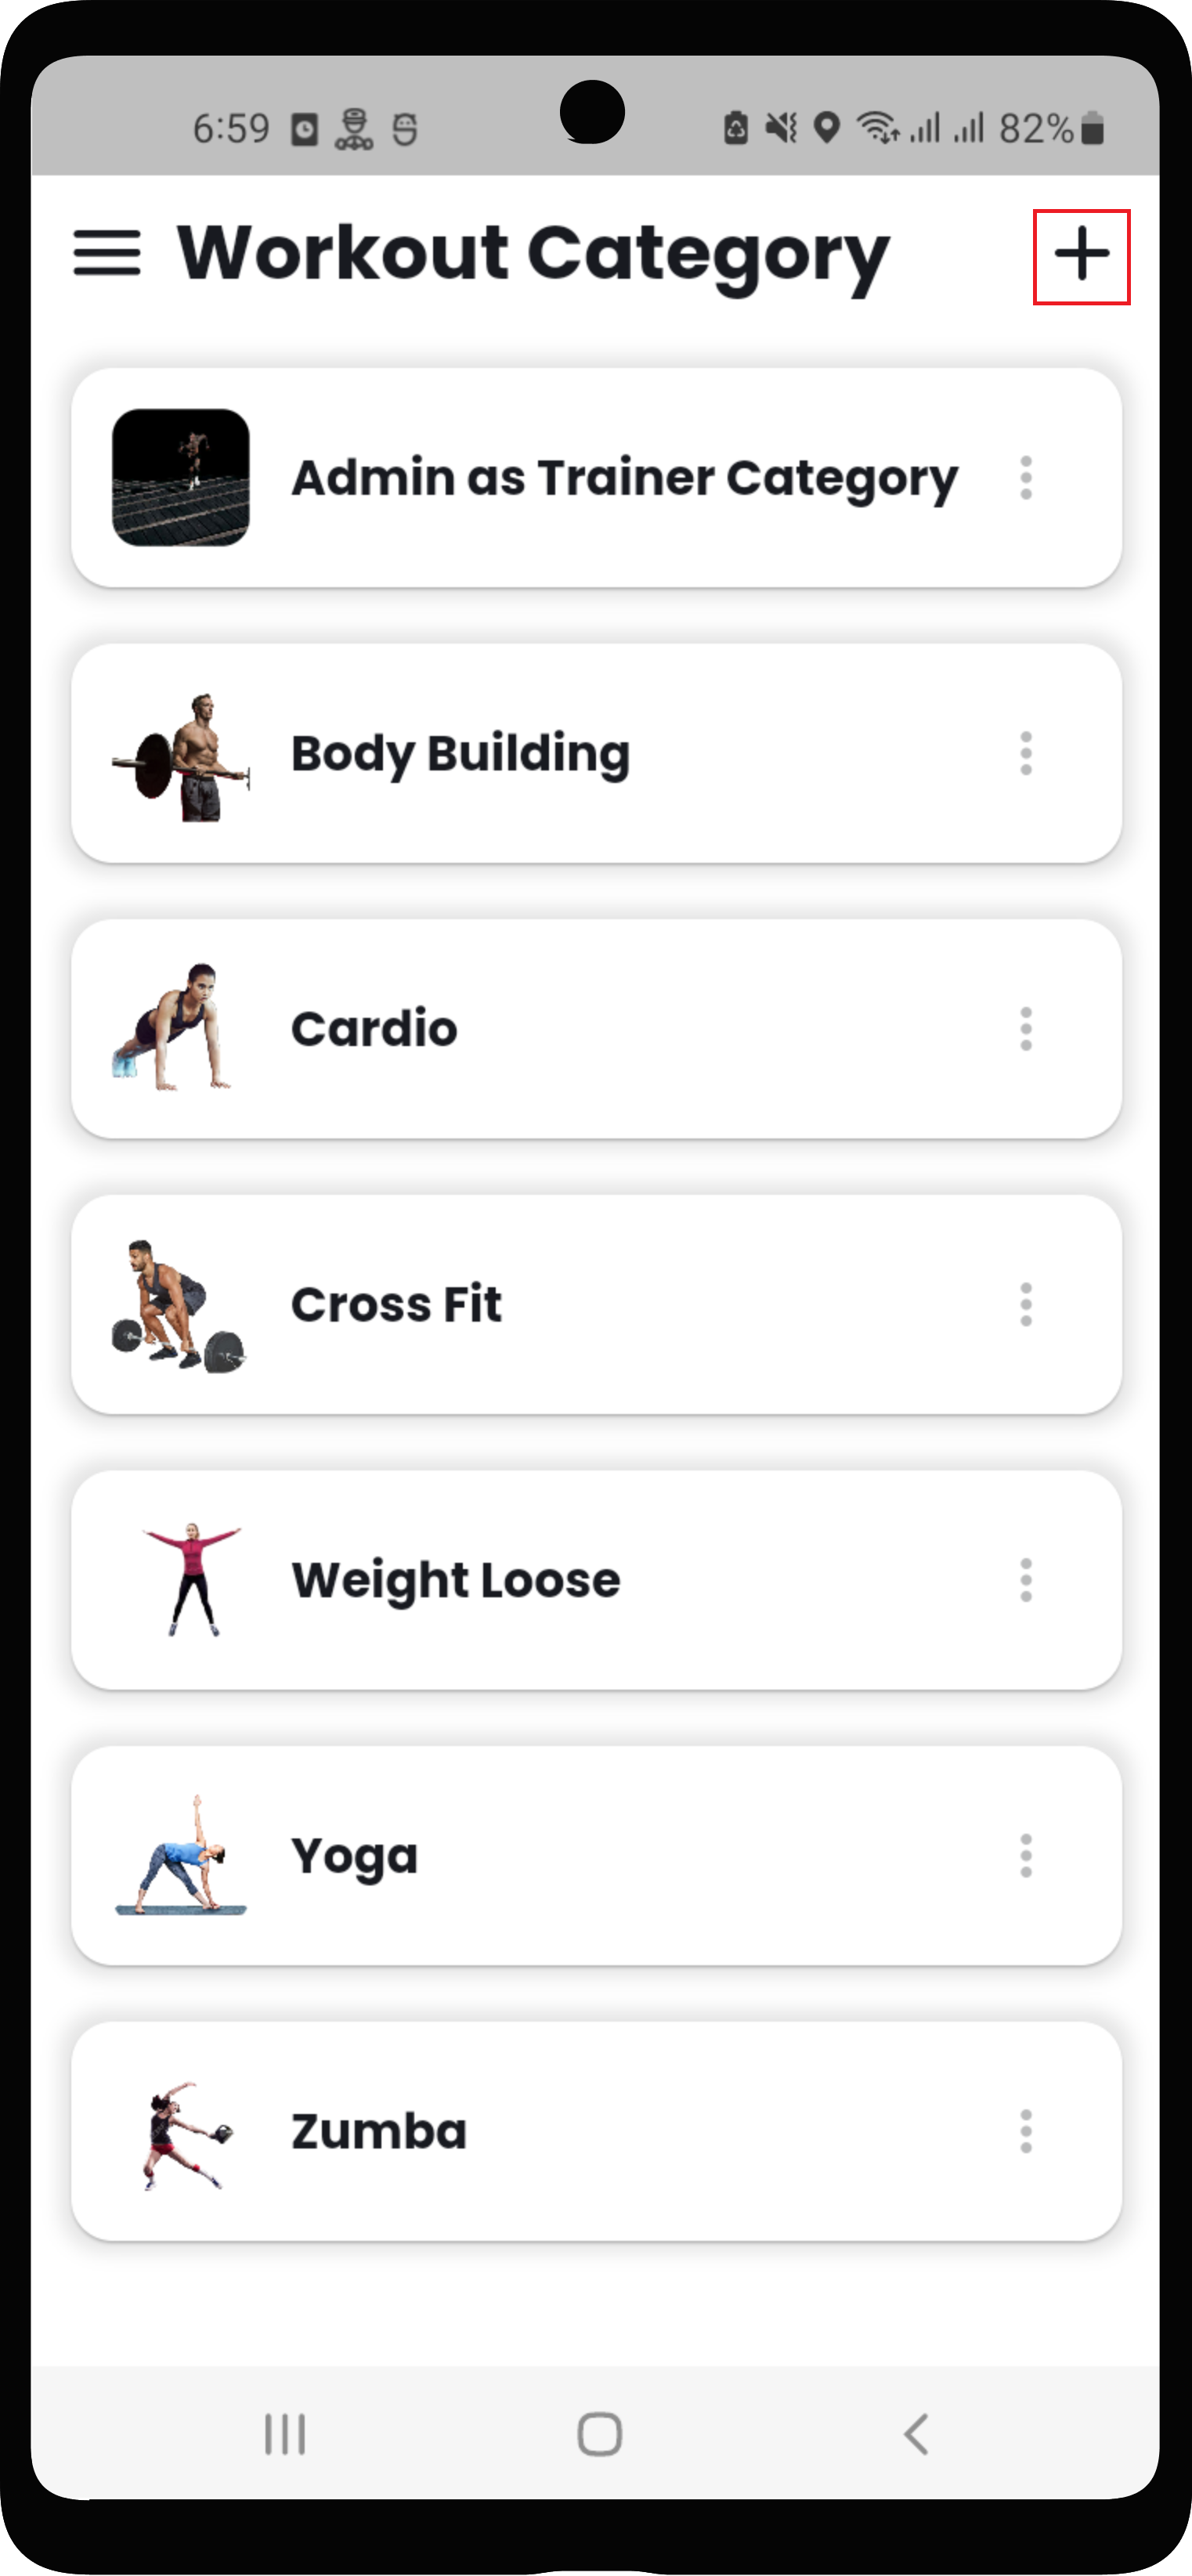
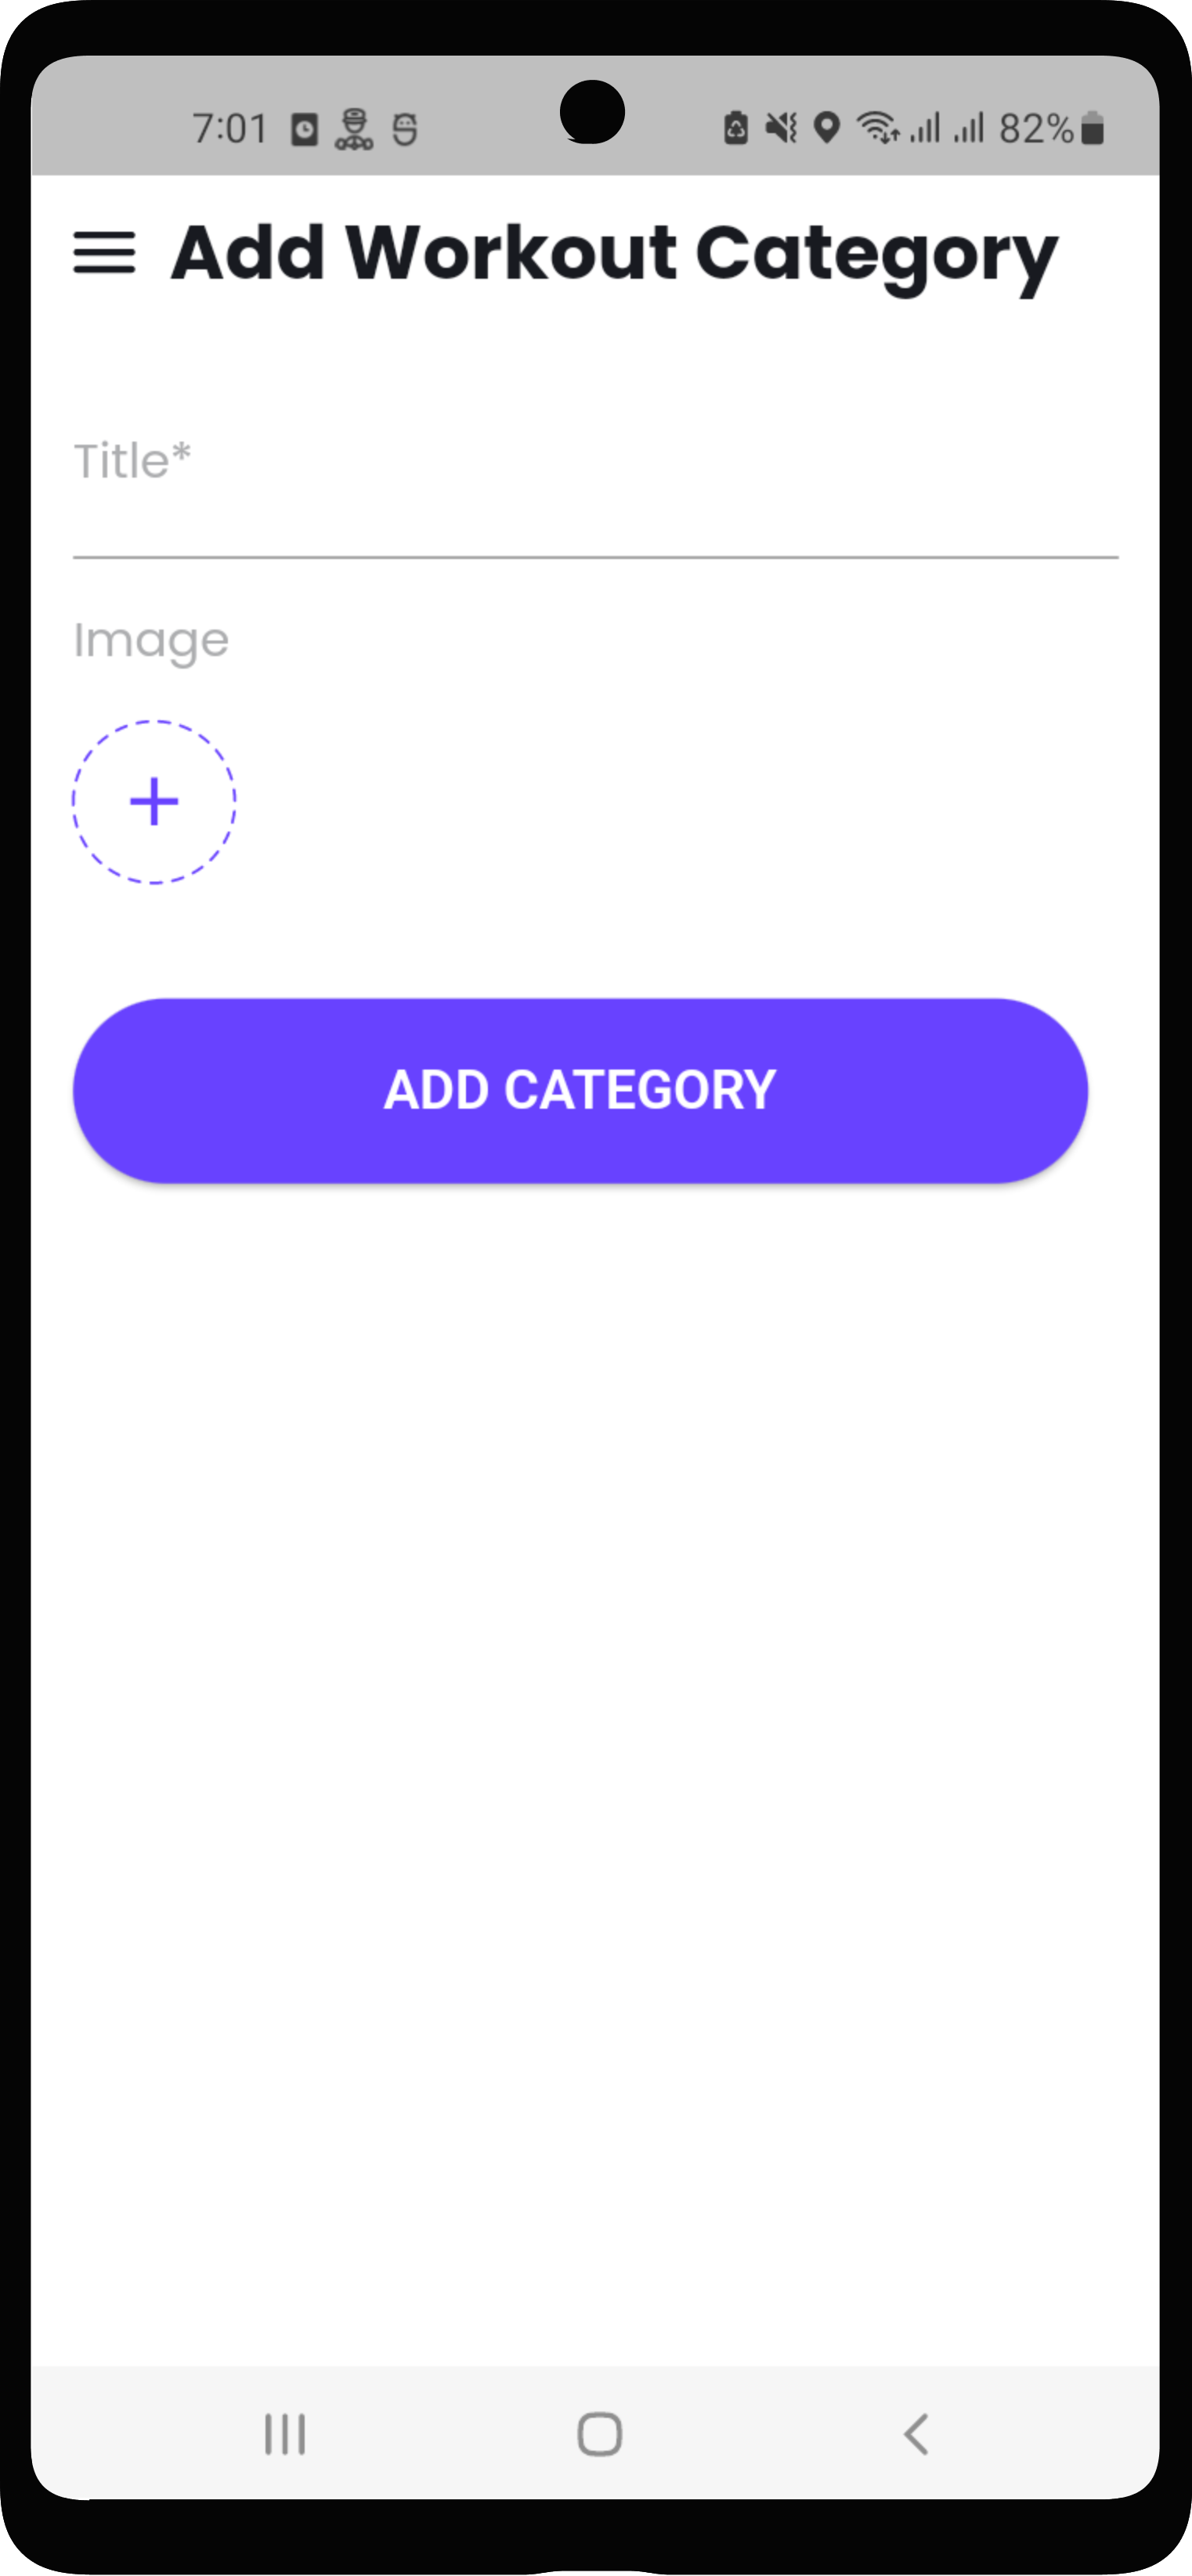
iv) Add Workout Category in Trainer
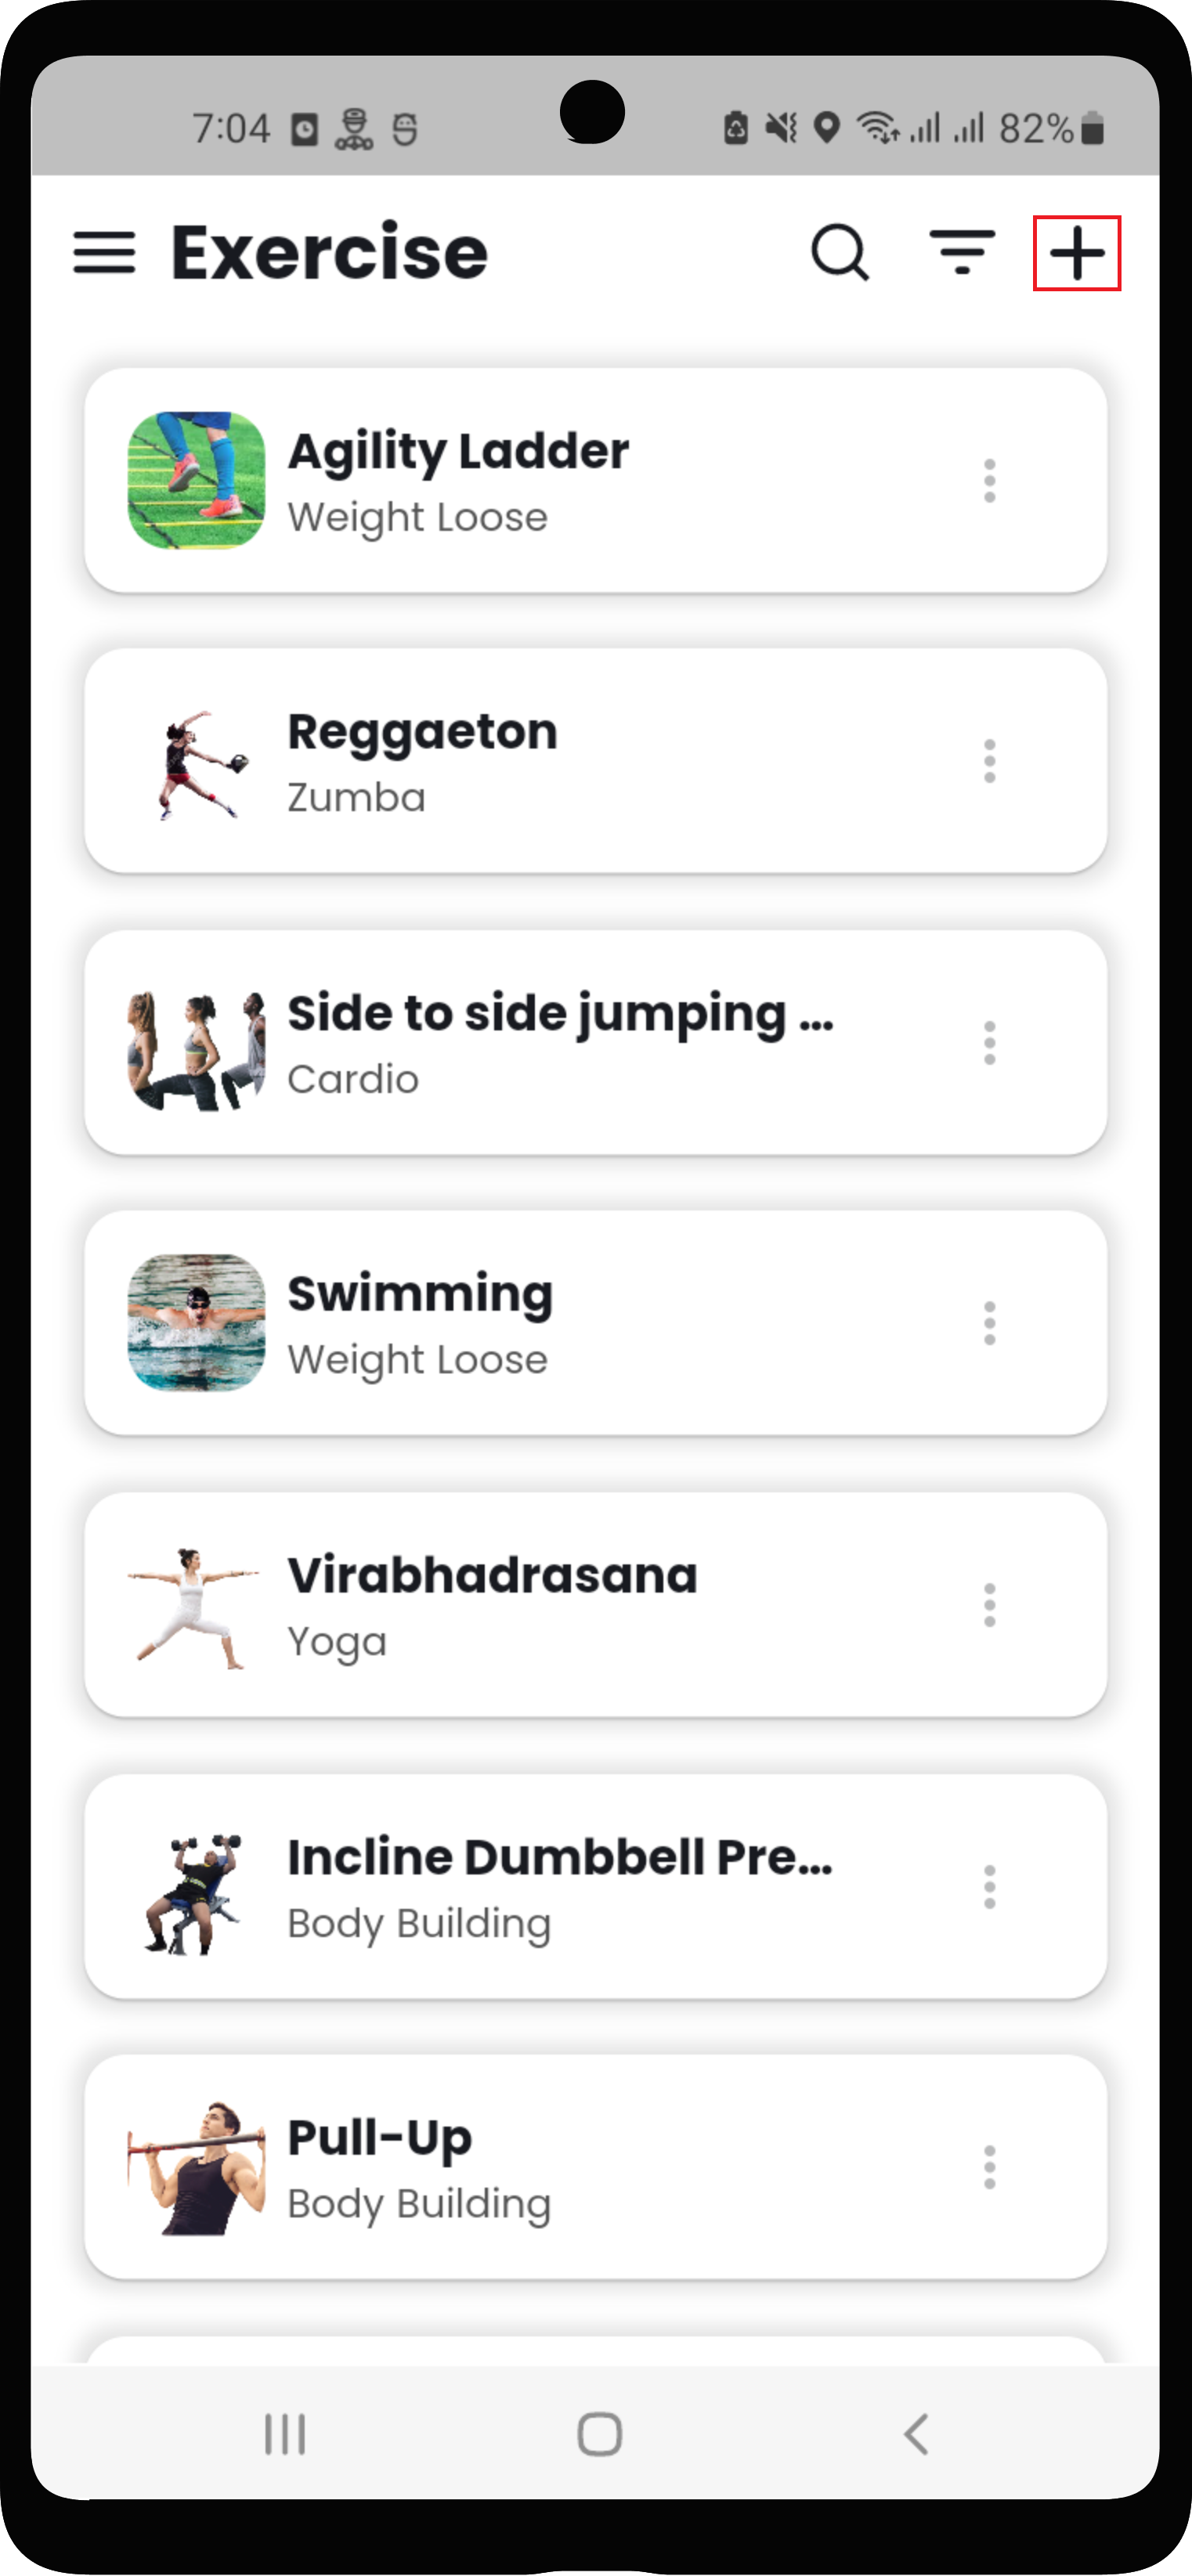
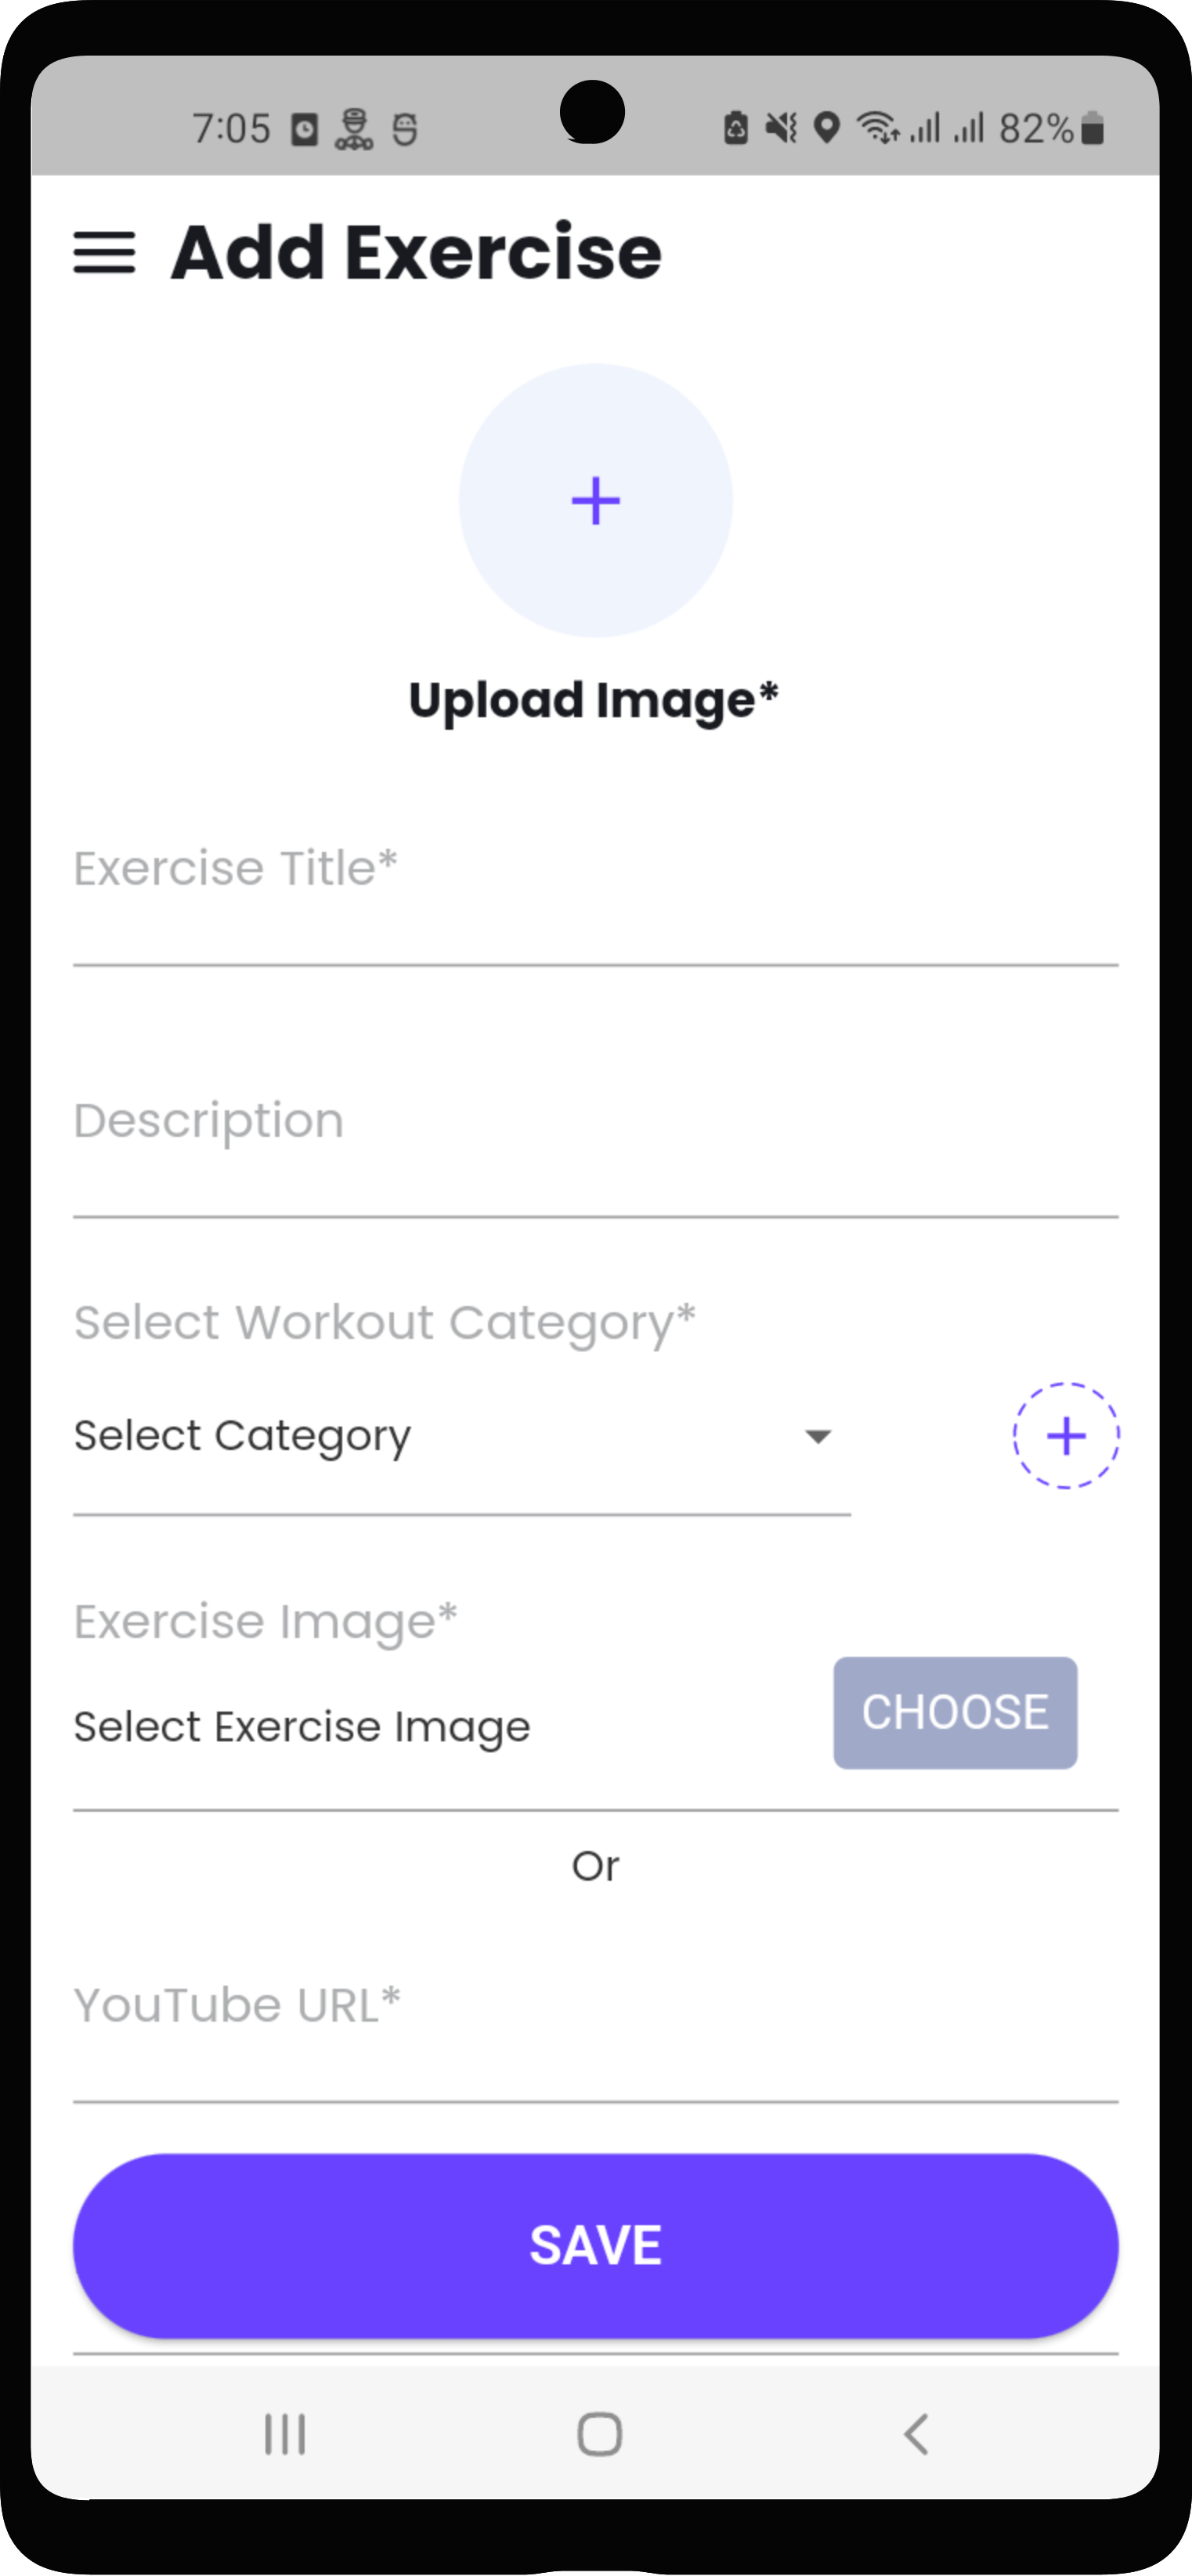
v) Add Exercise in Trainer
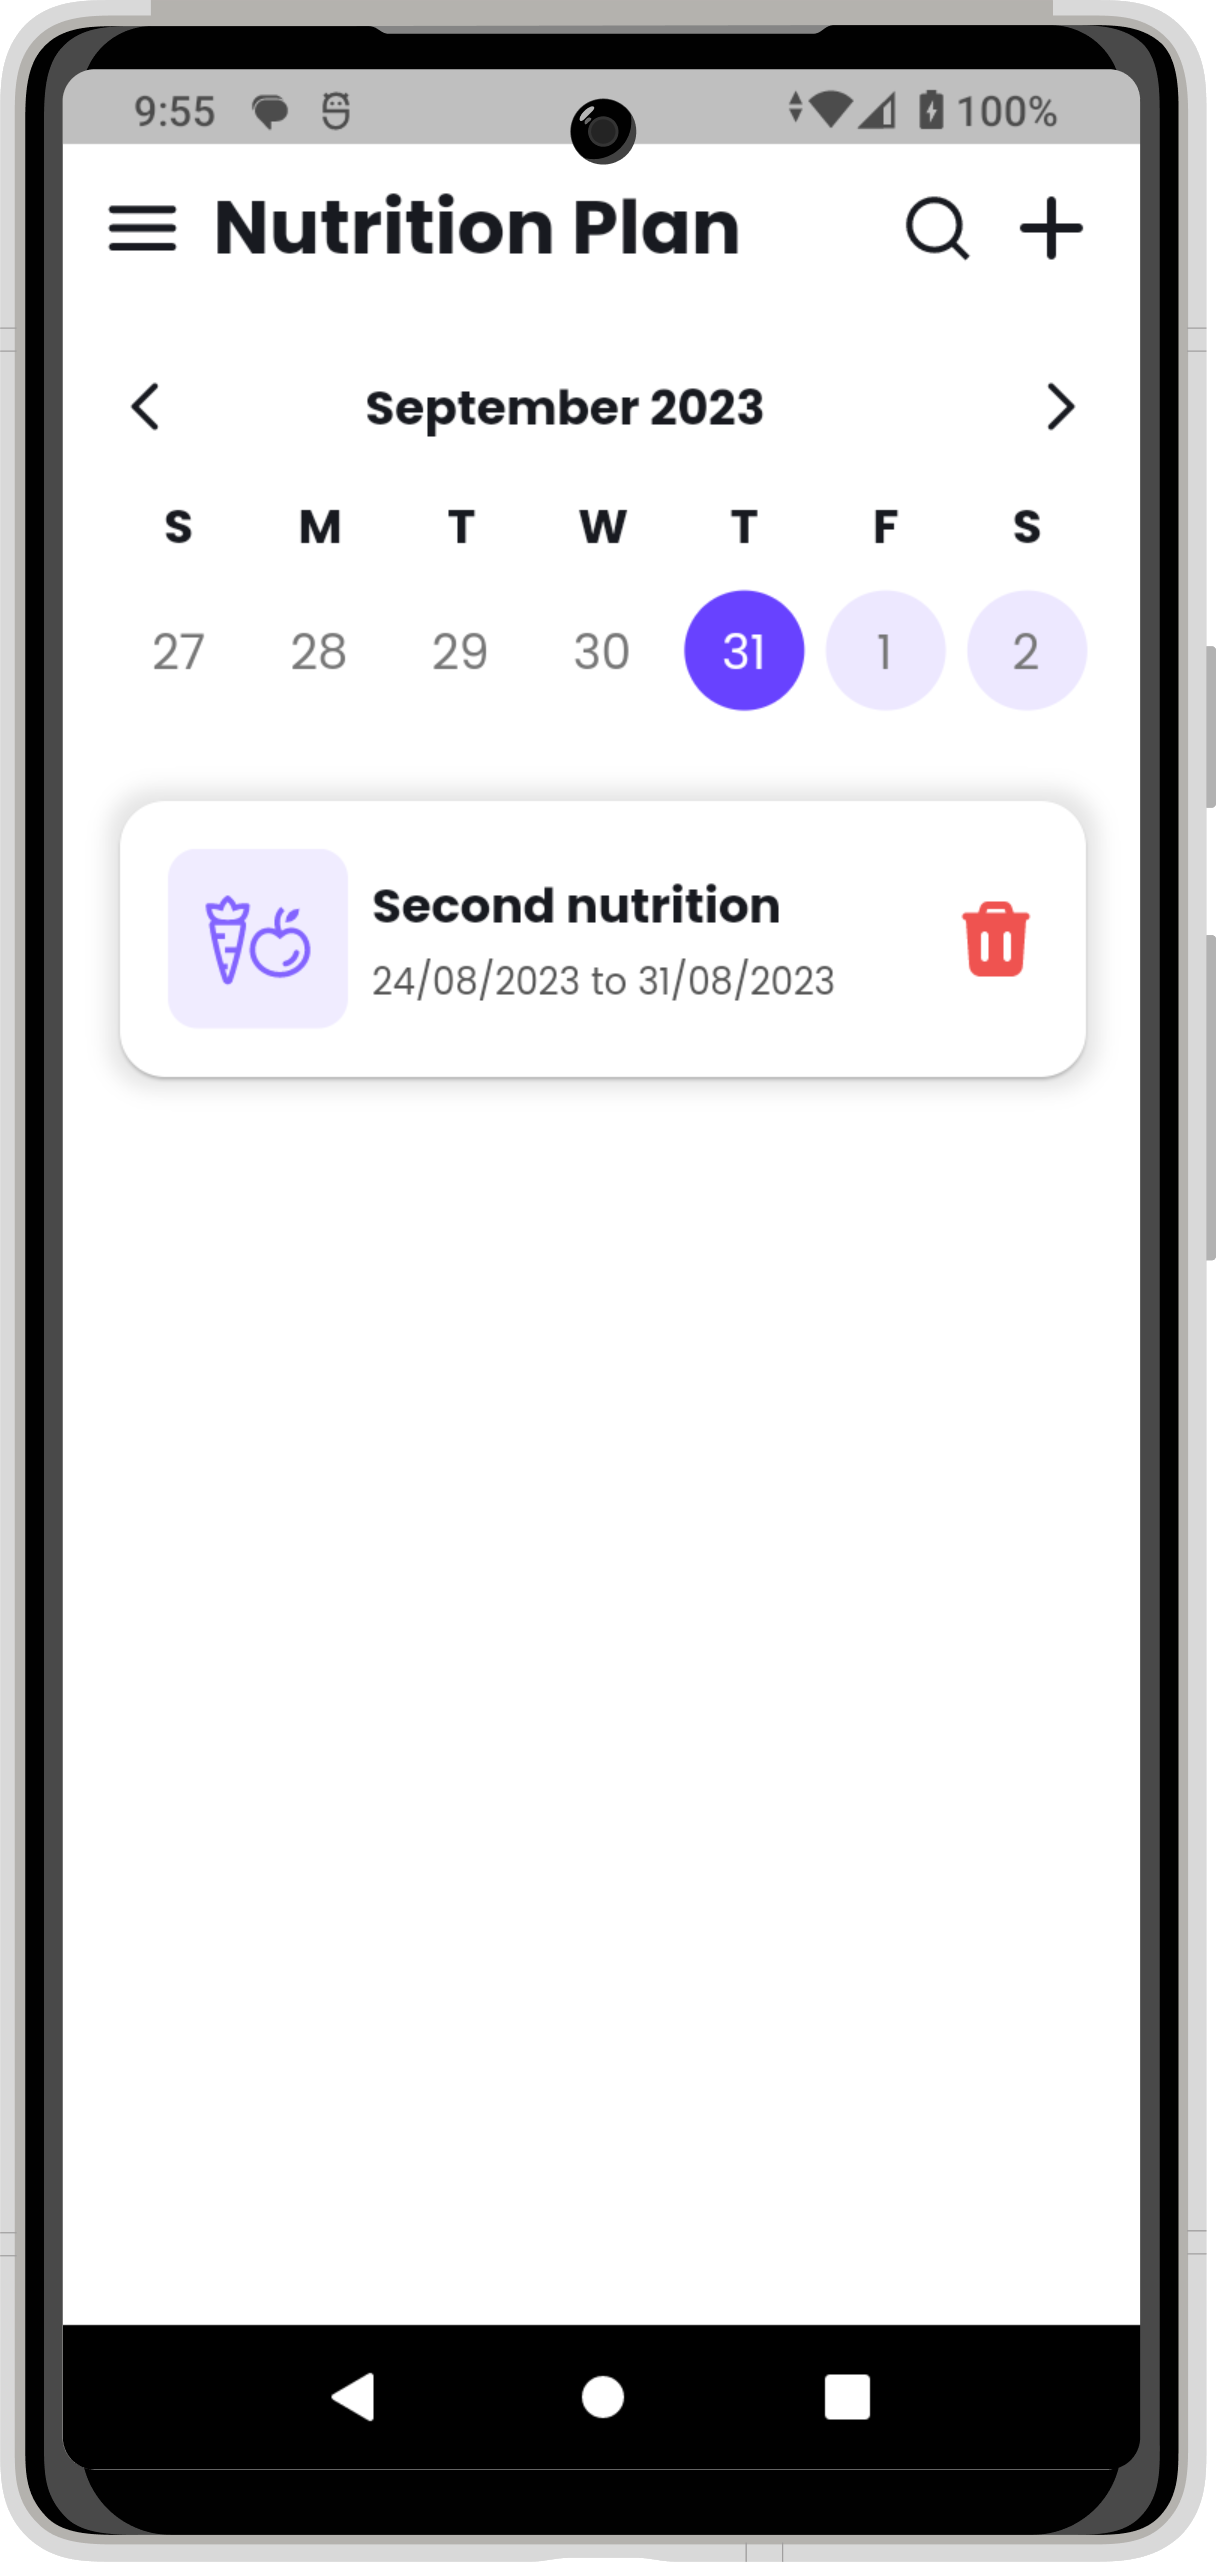
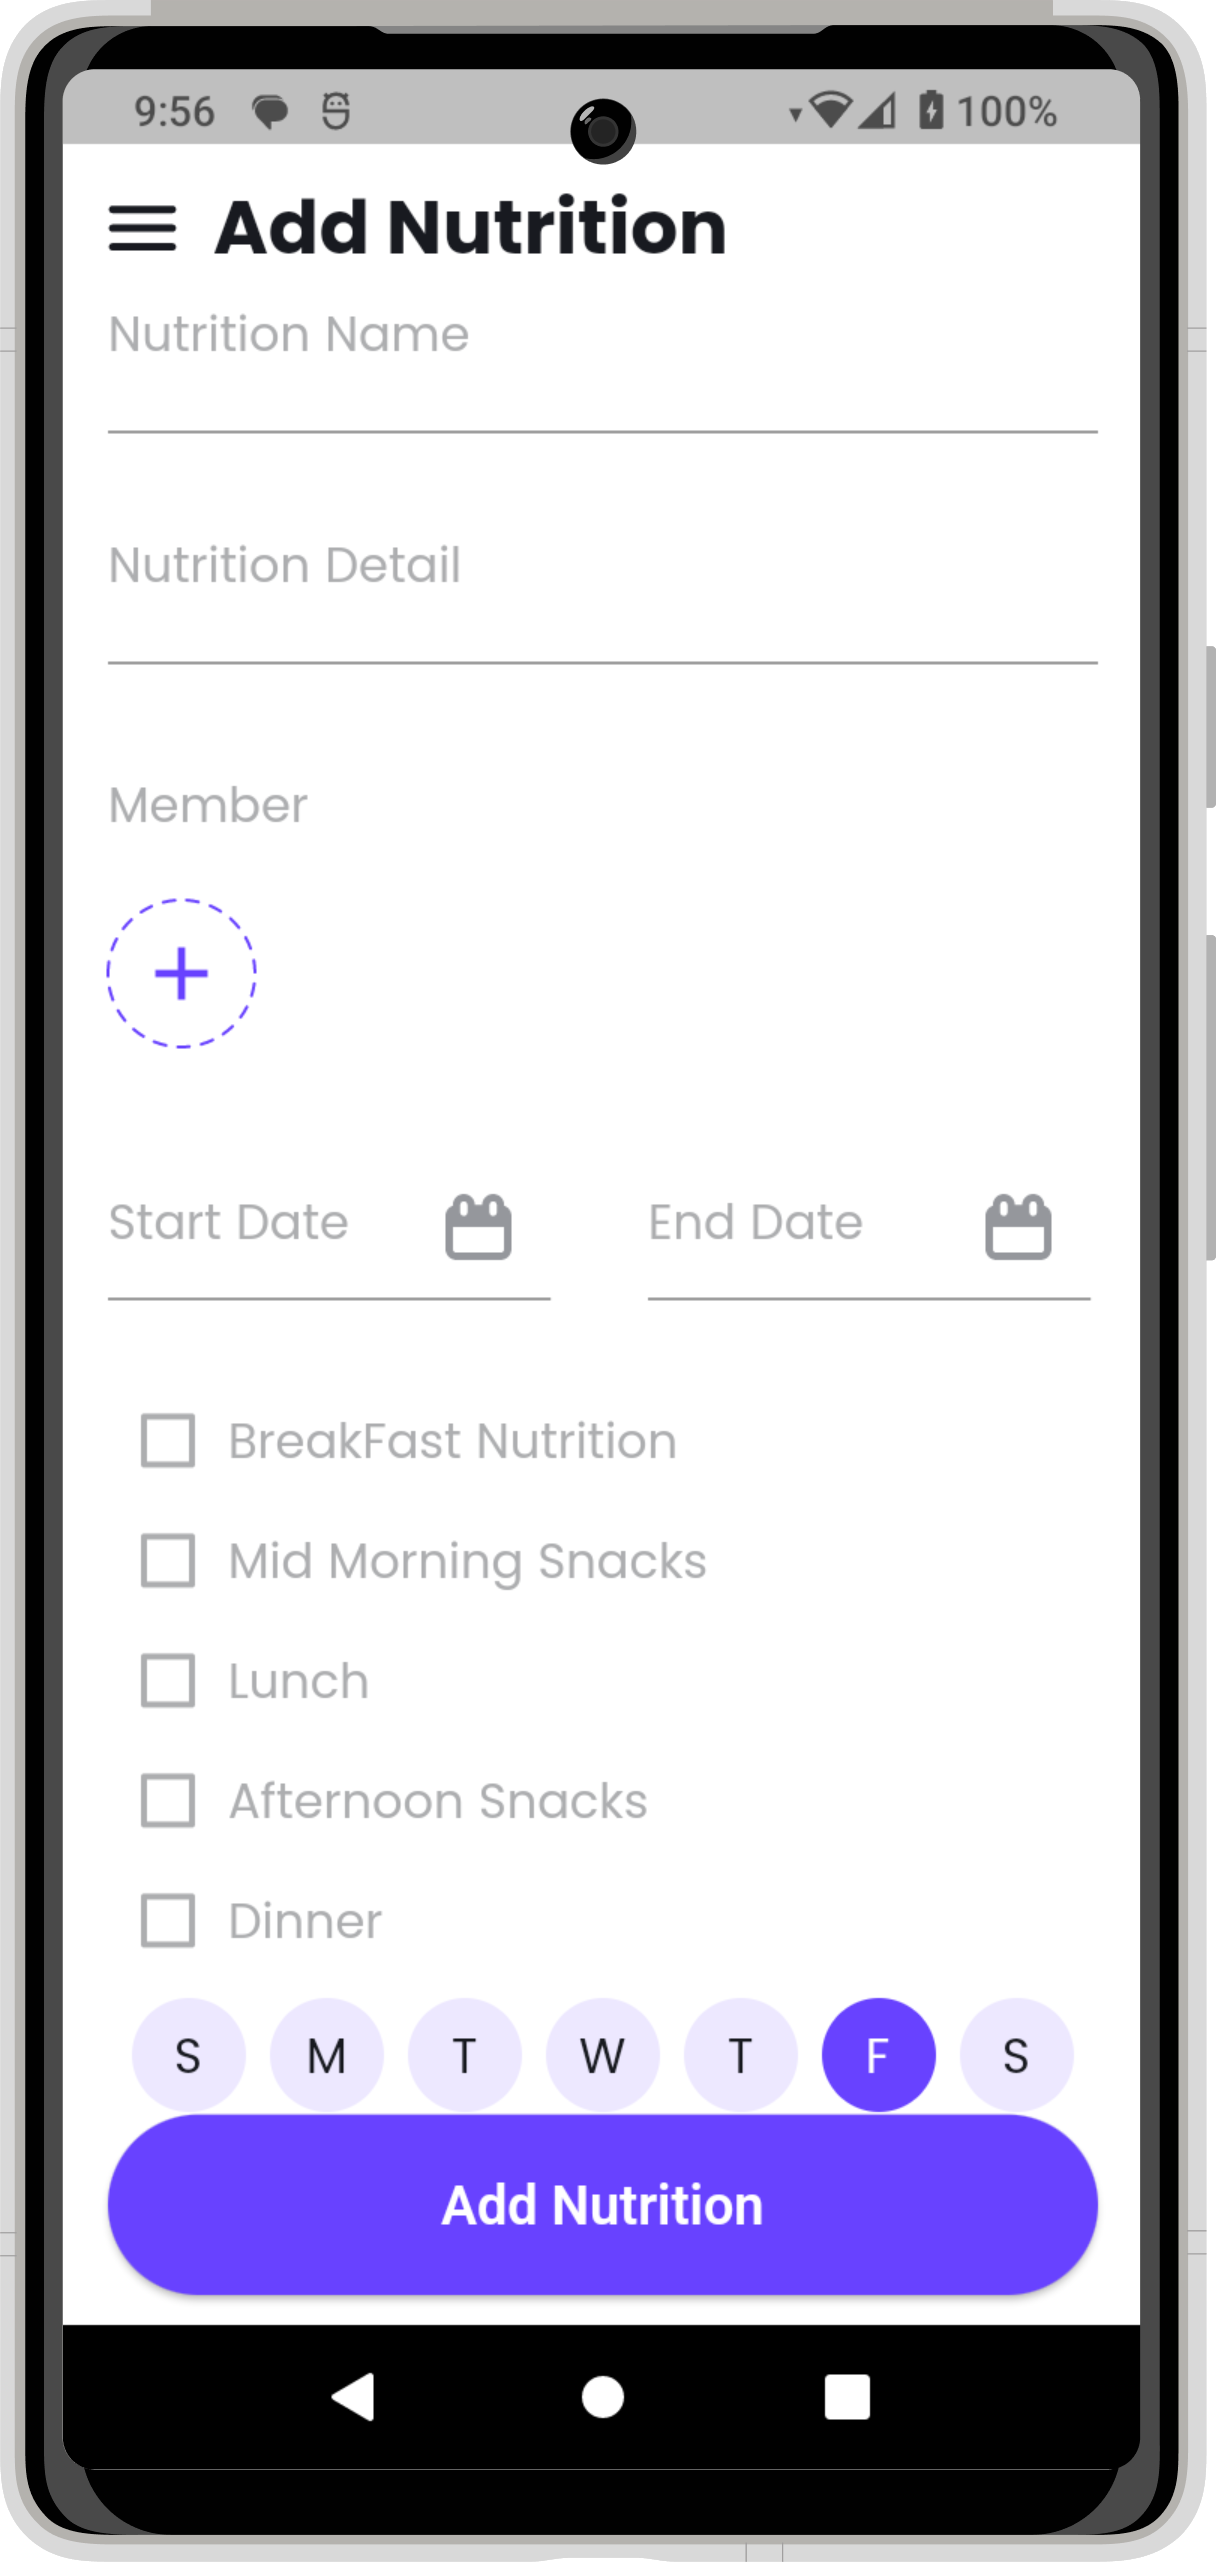
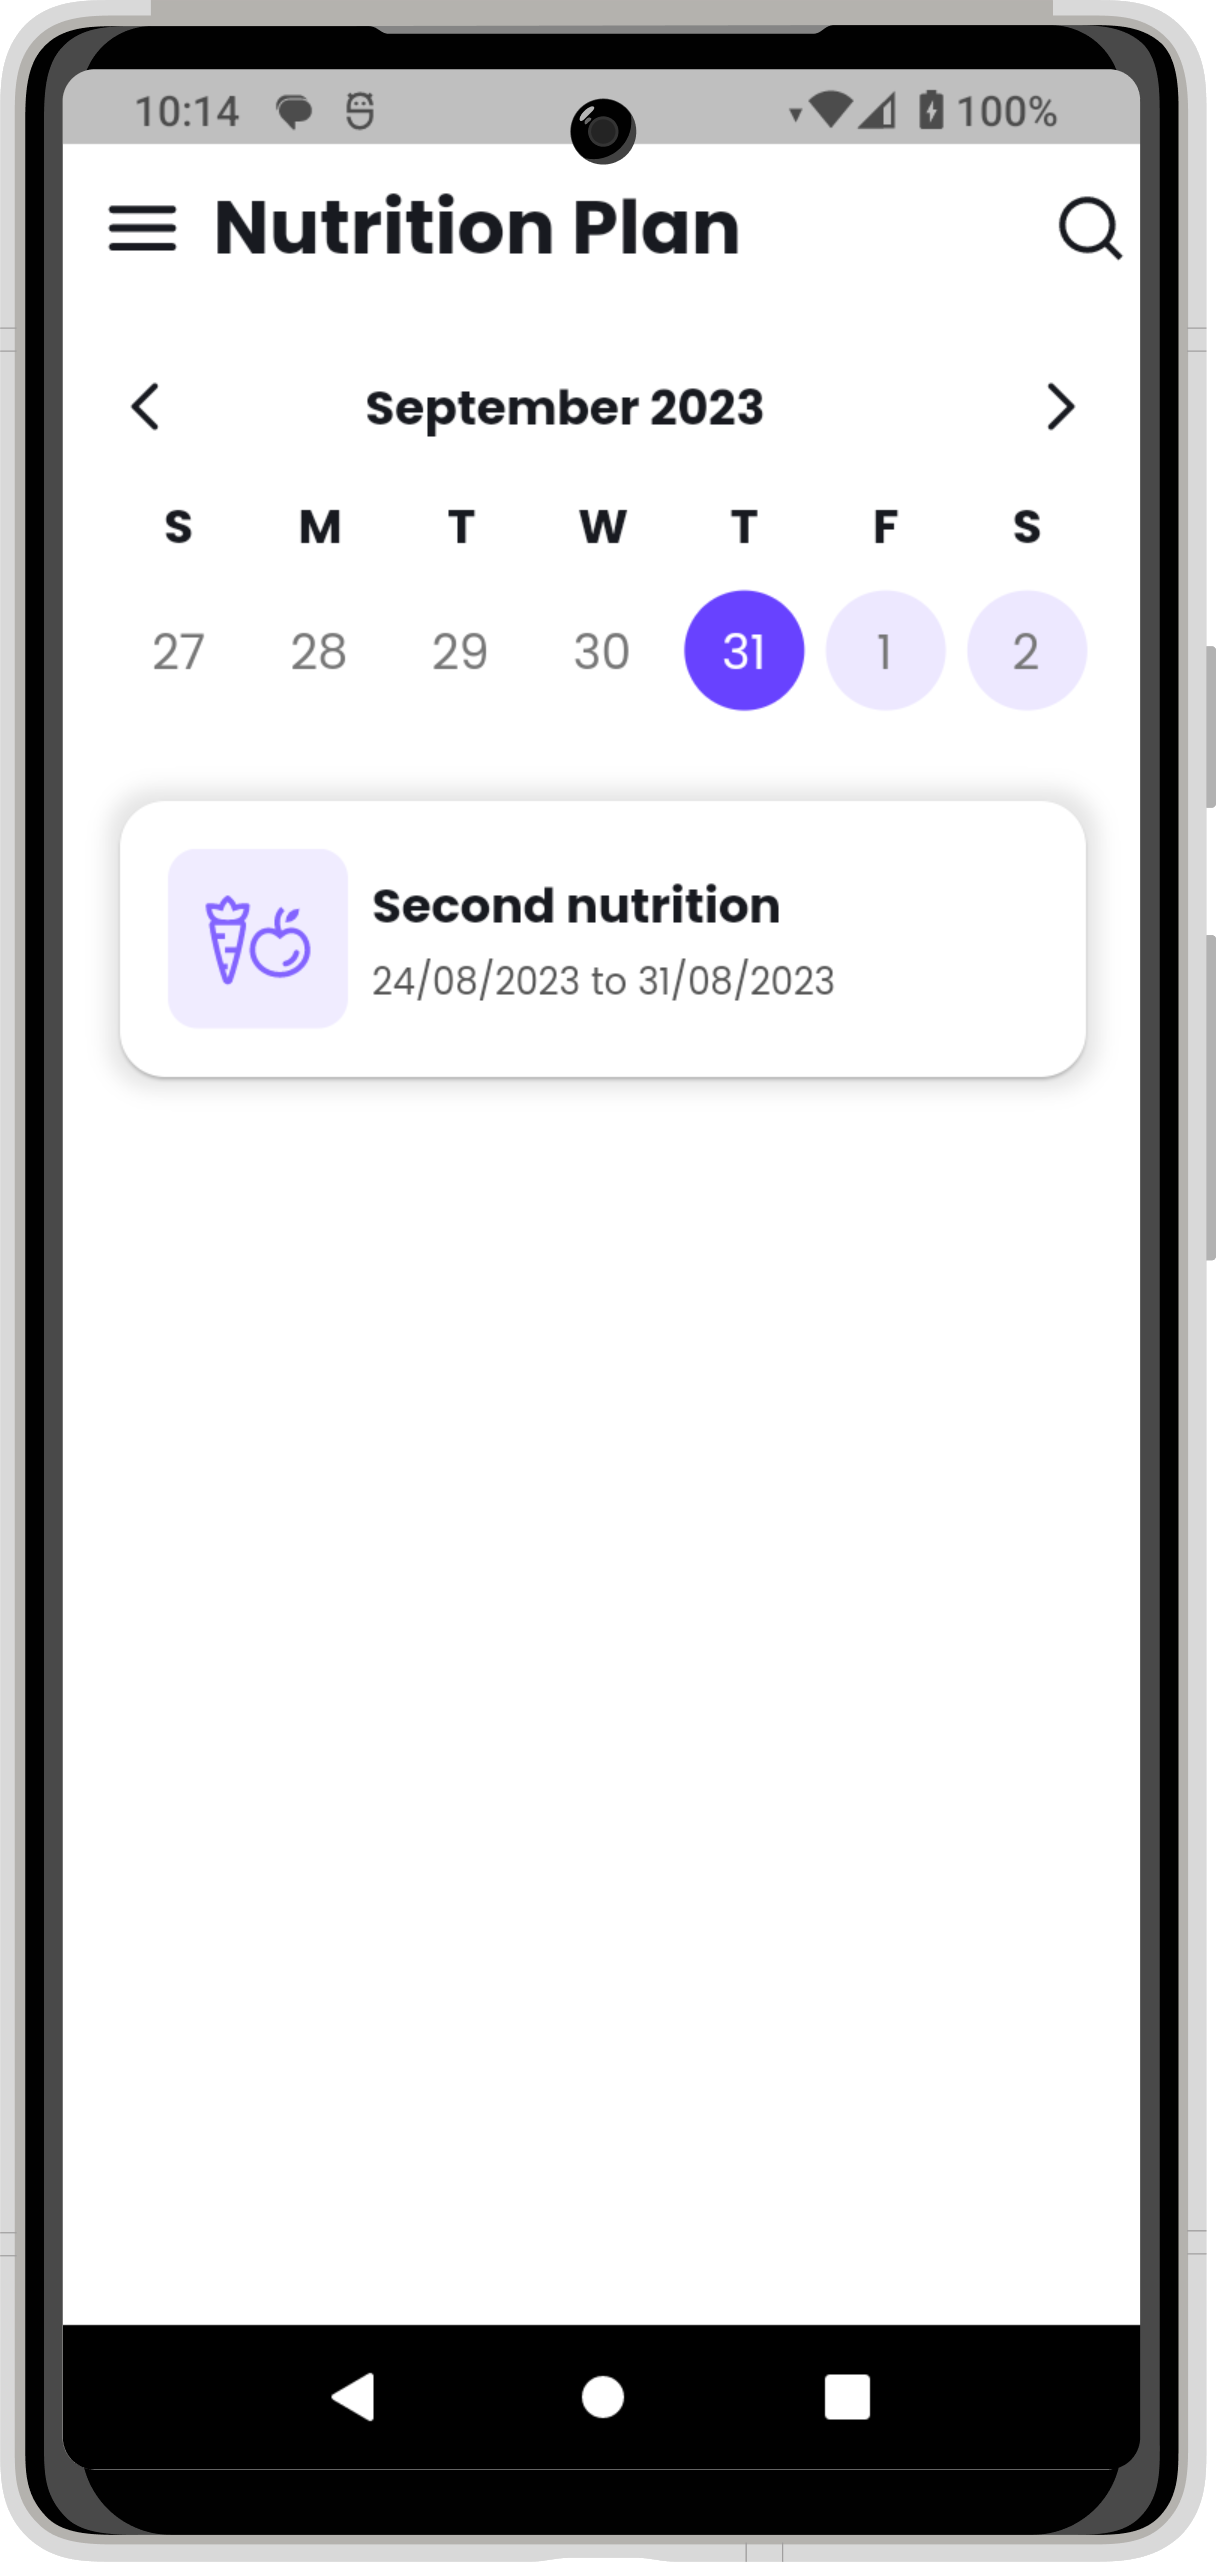
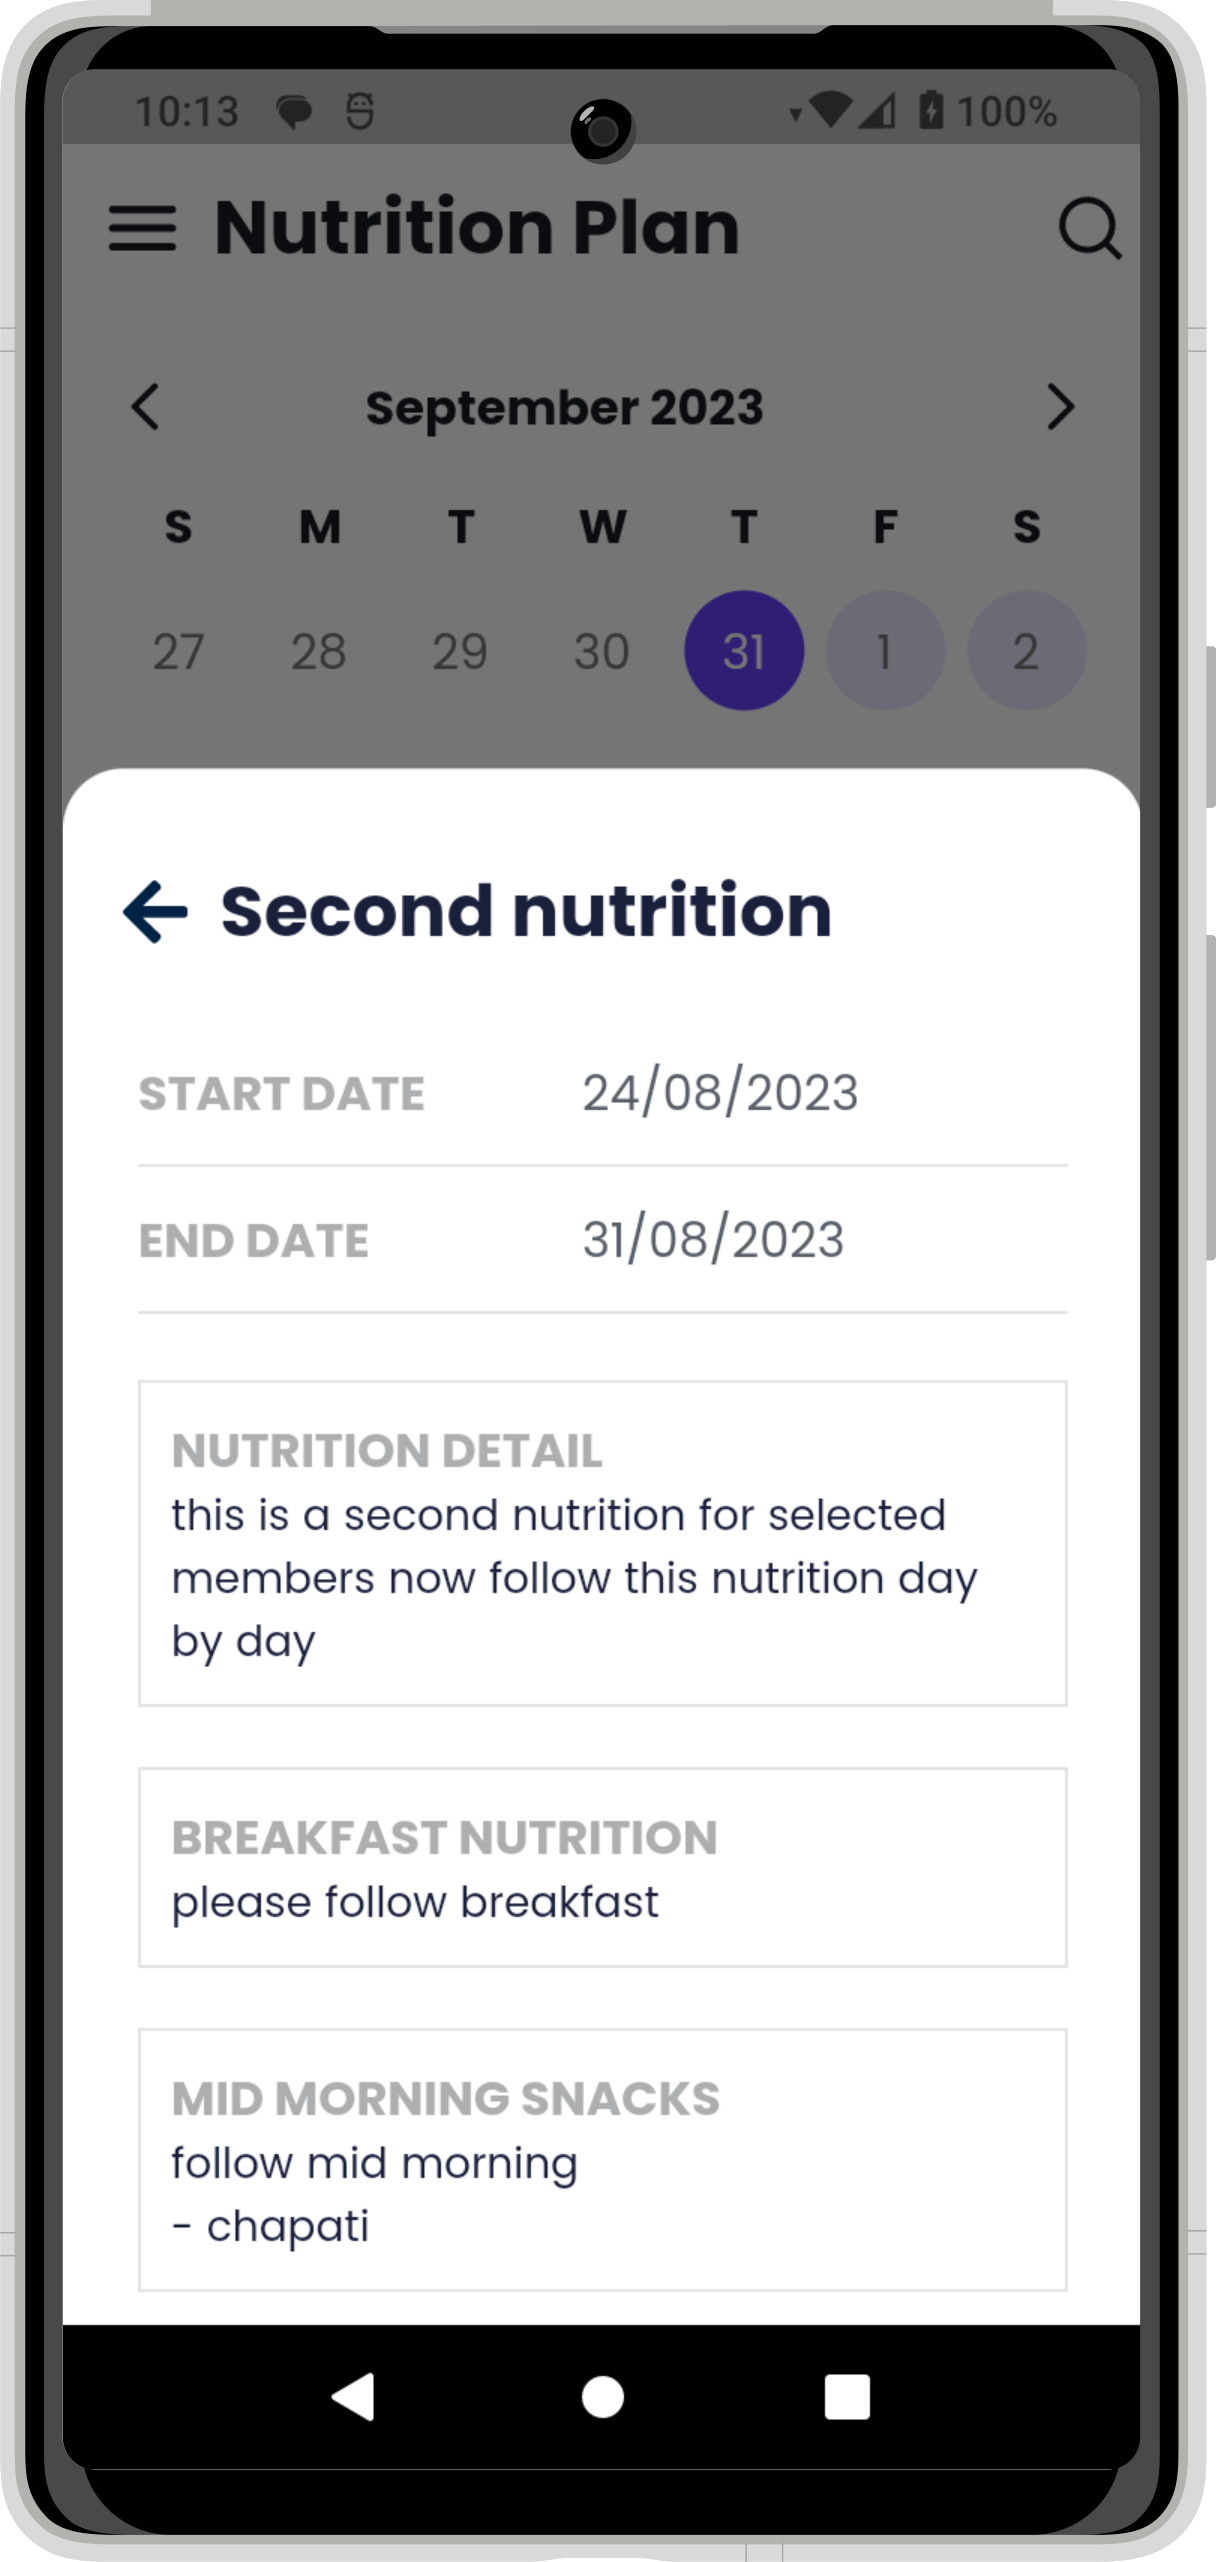
vi) Add Nutrition in Trainer
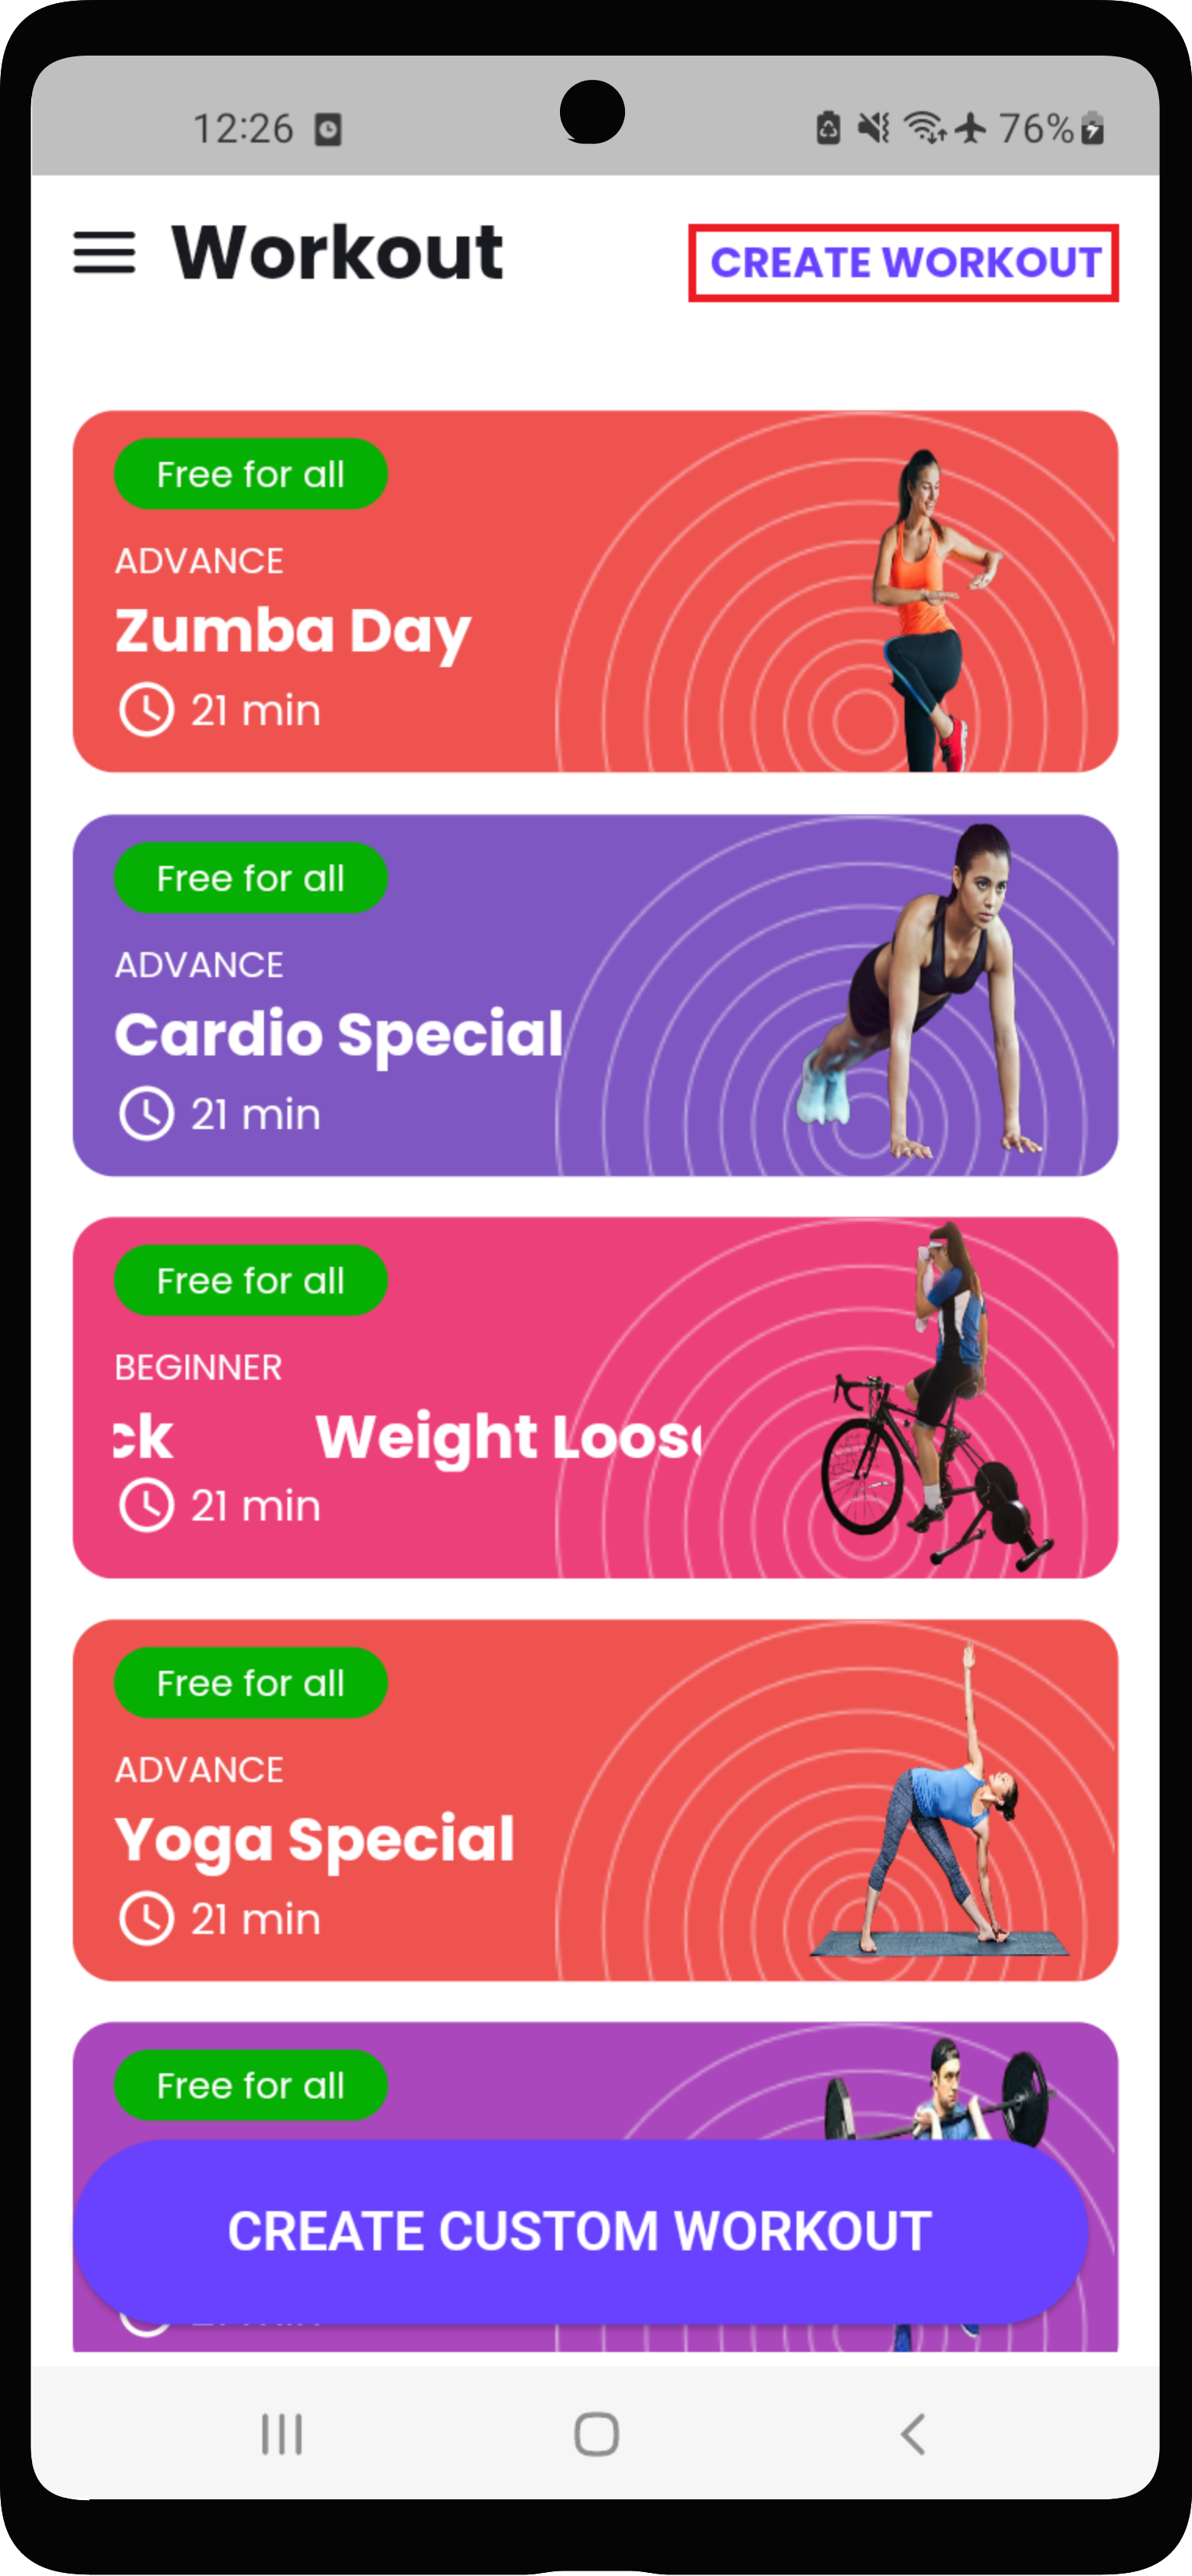
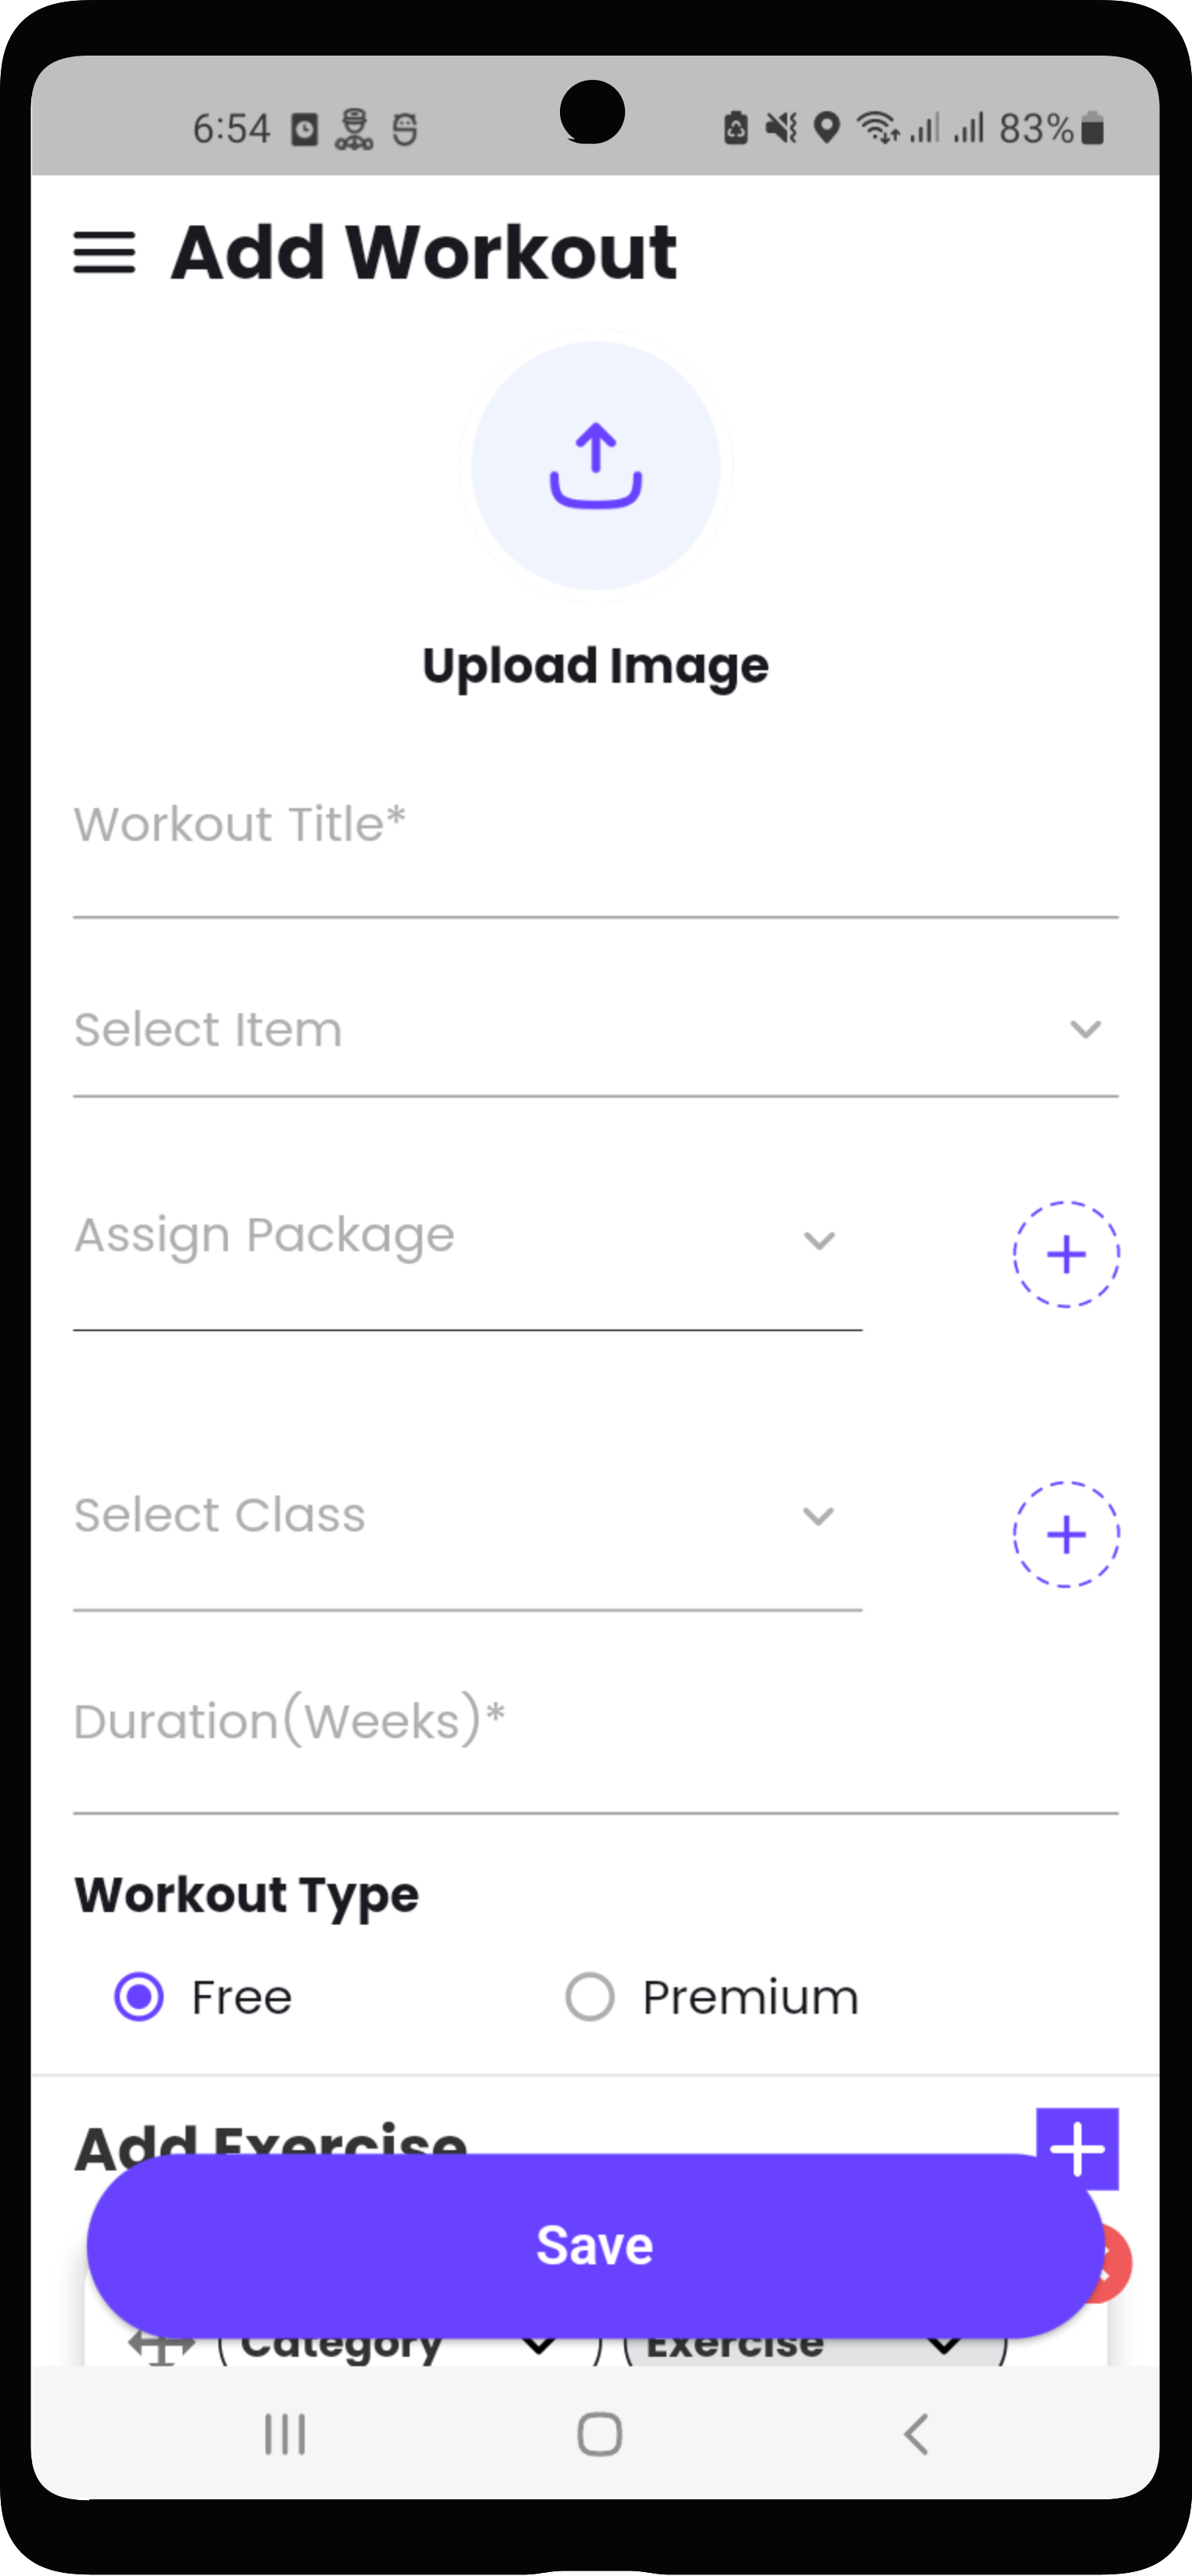
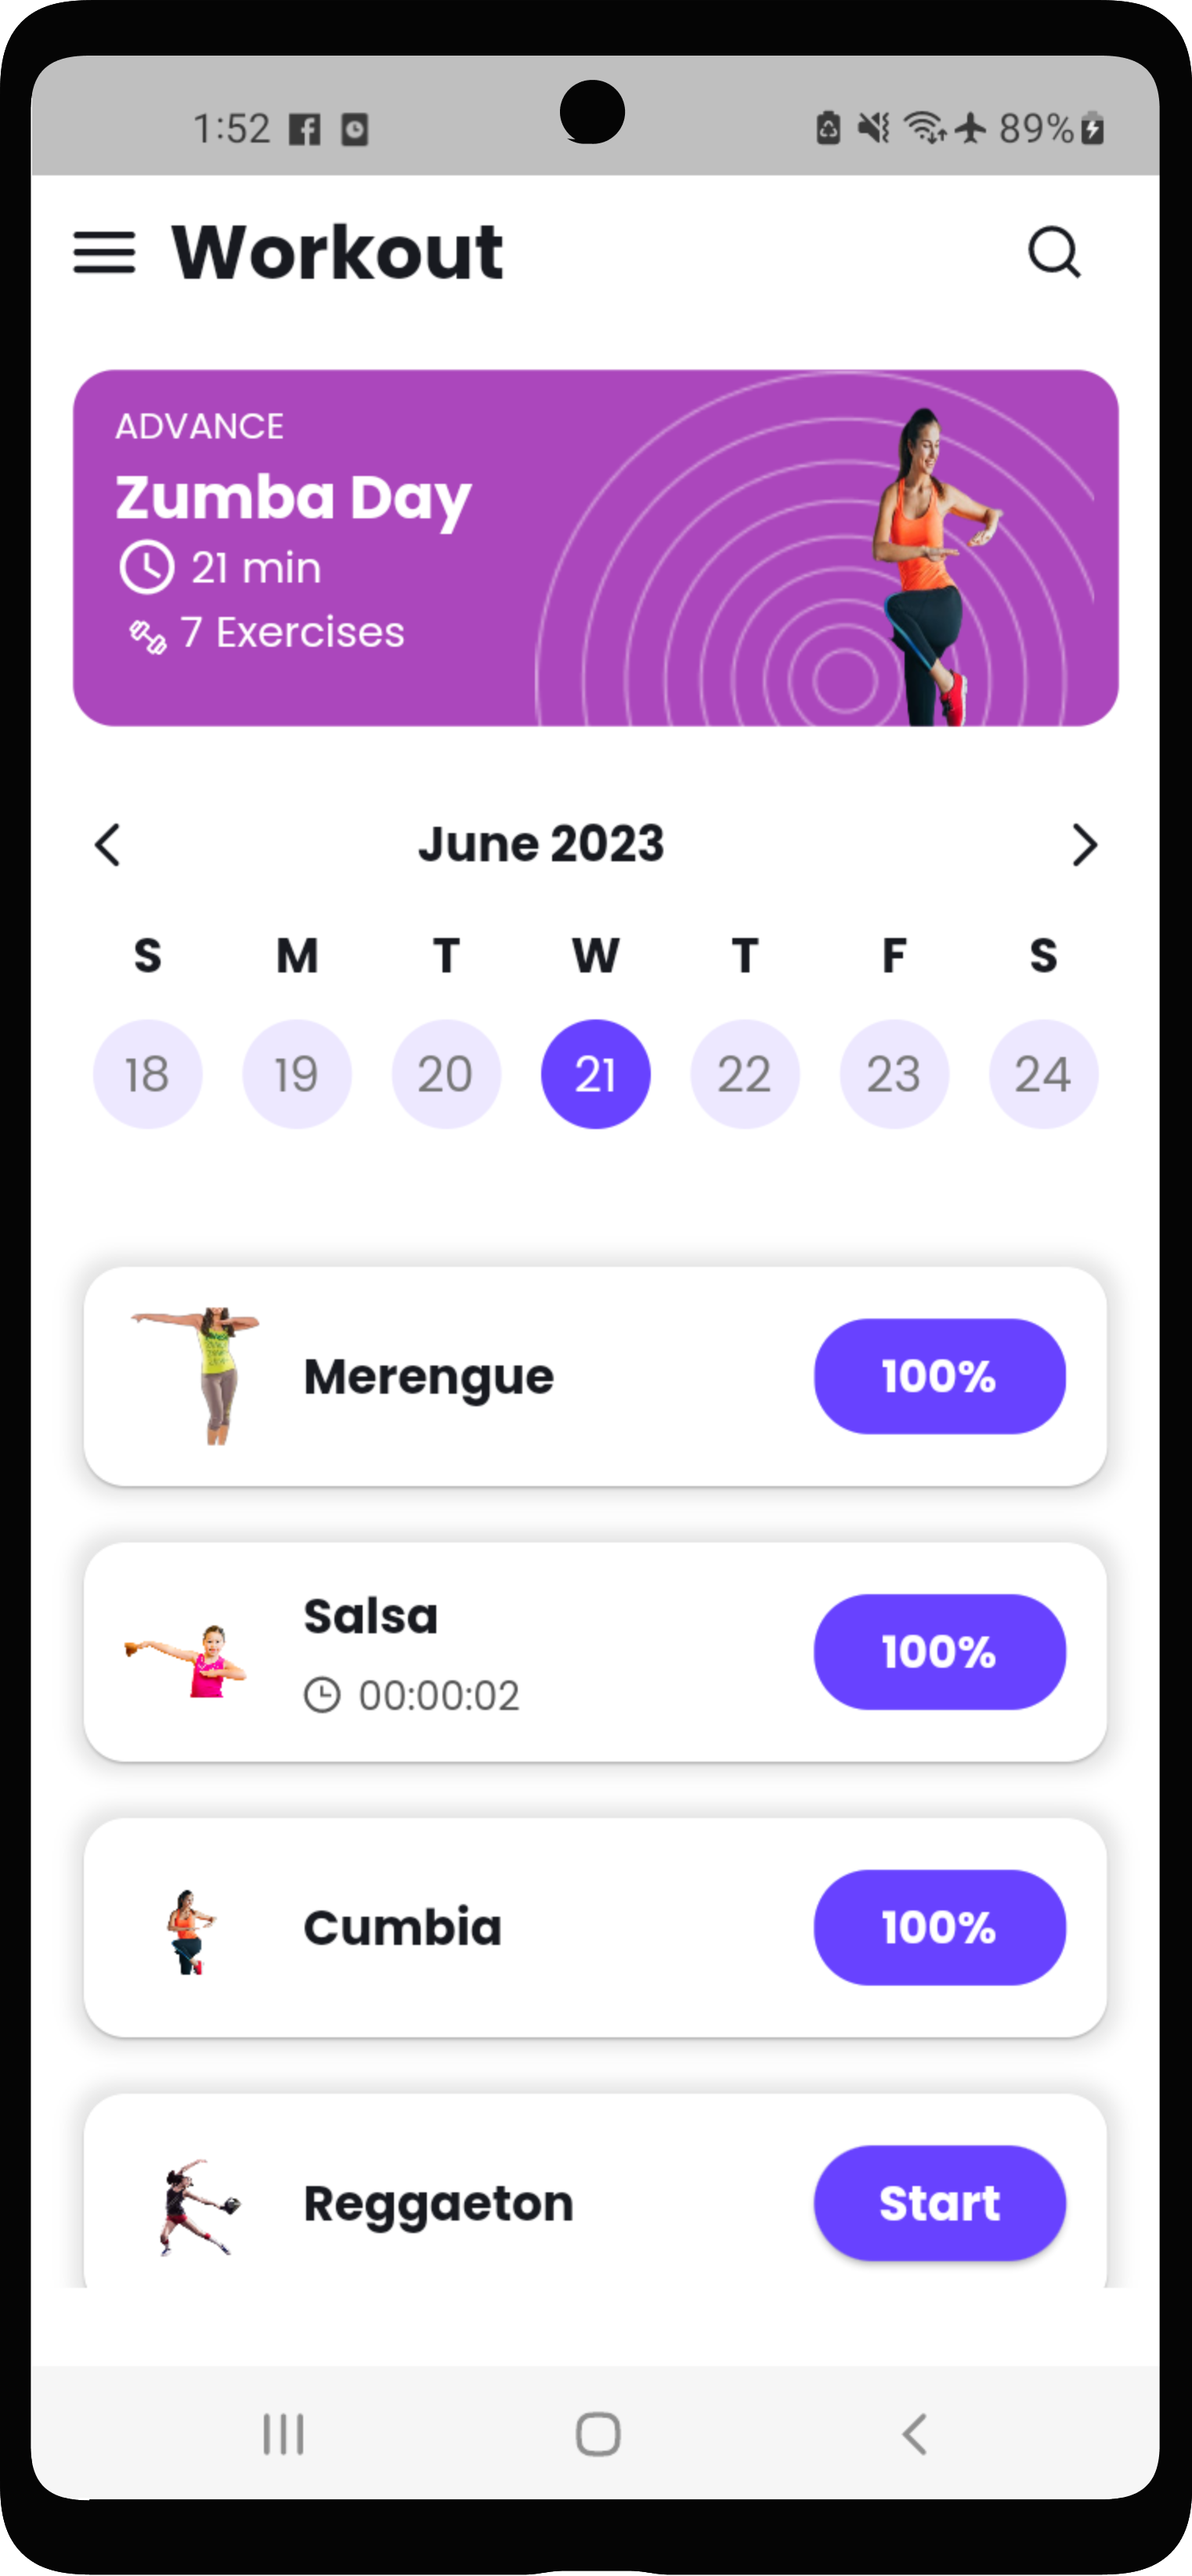
vii) Add Workout in Trainer
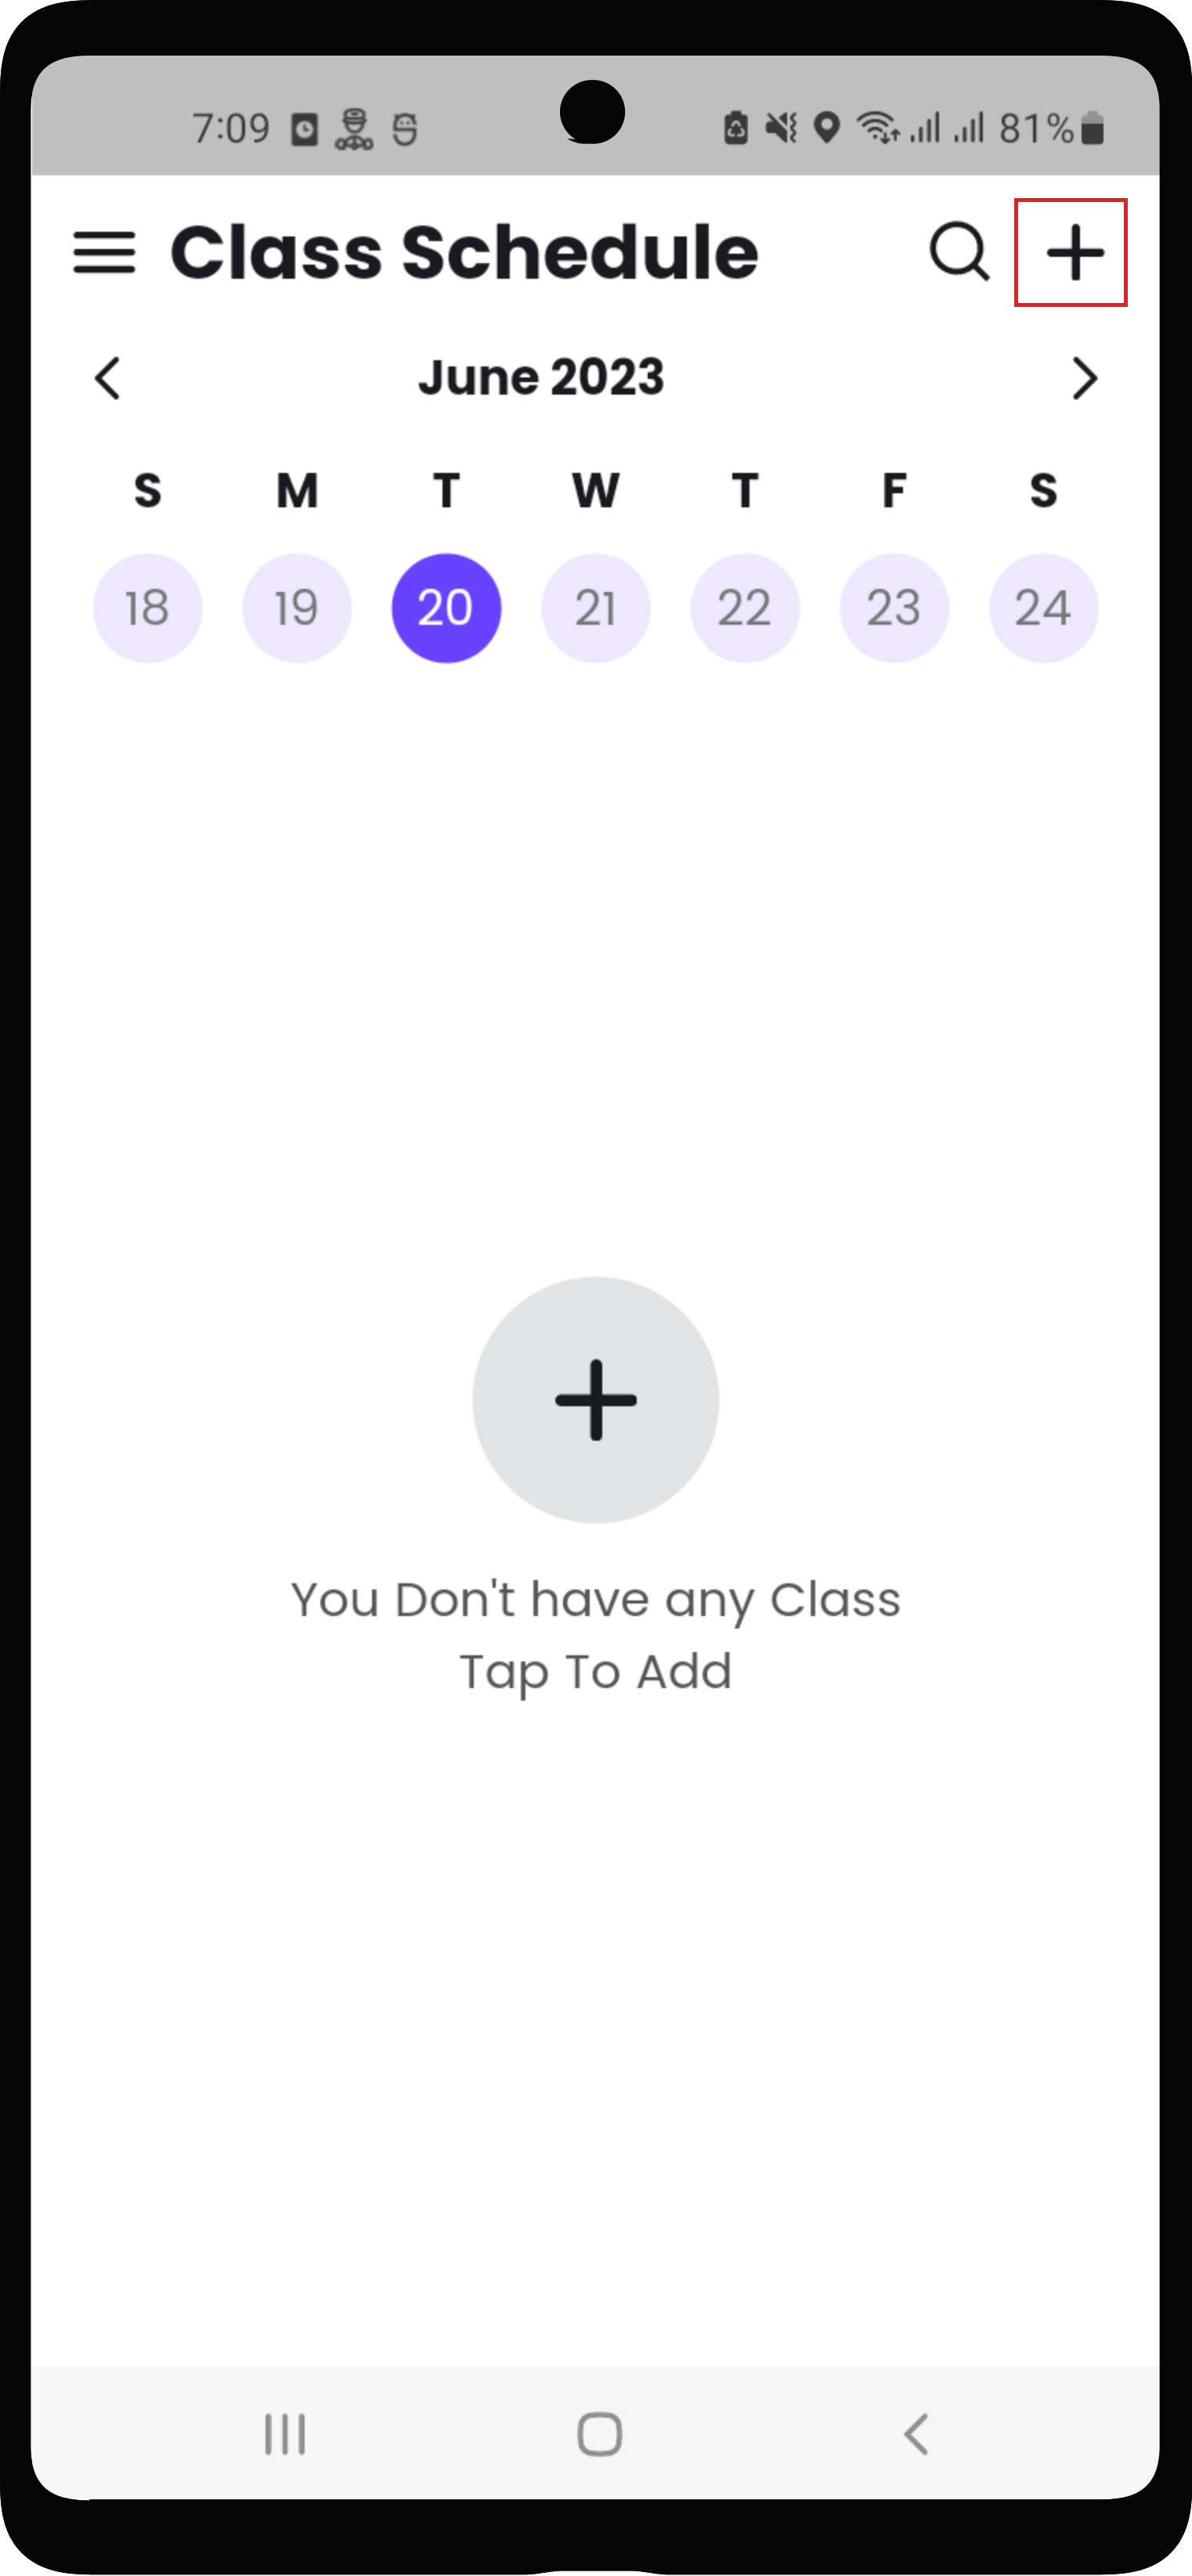
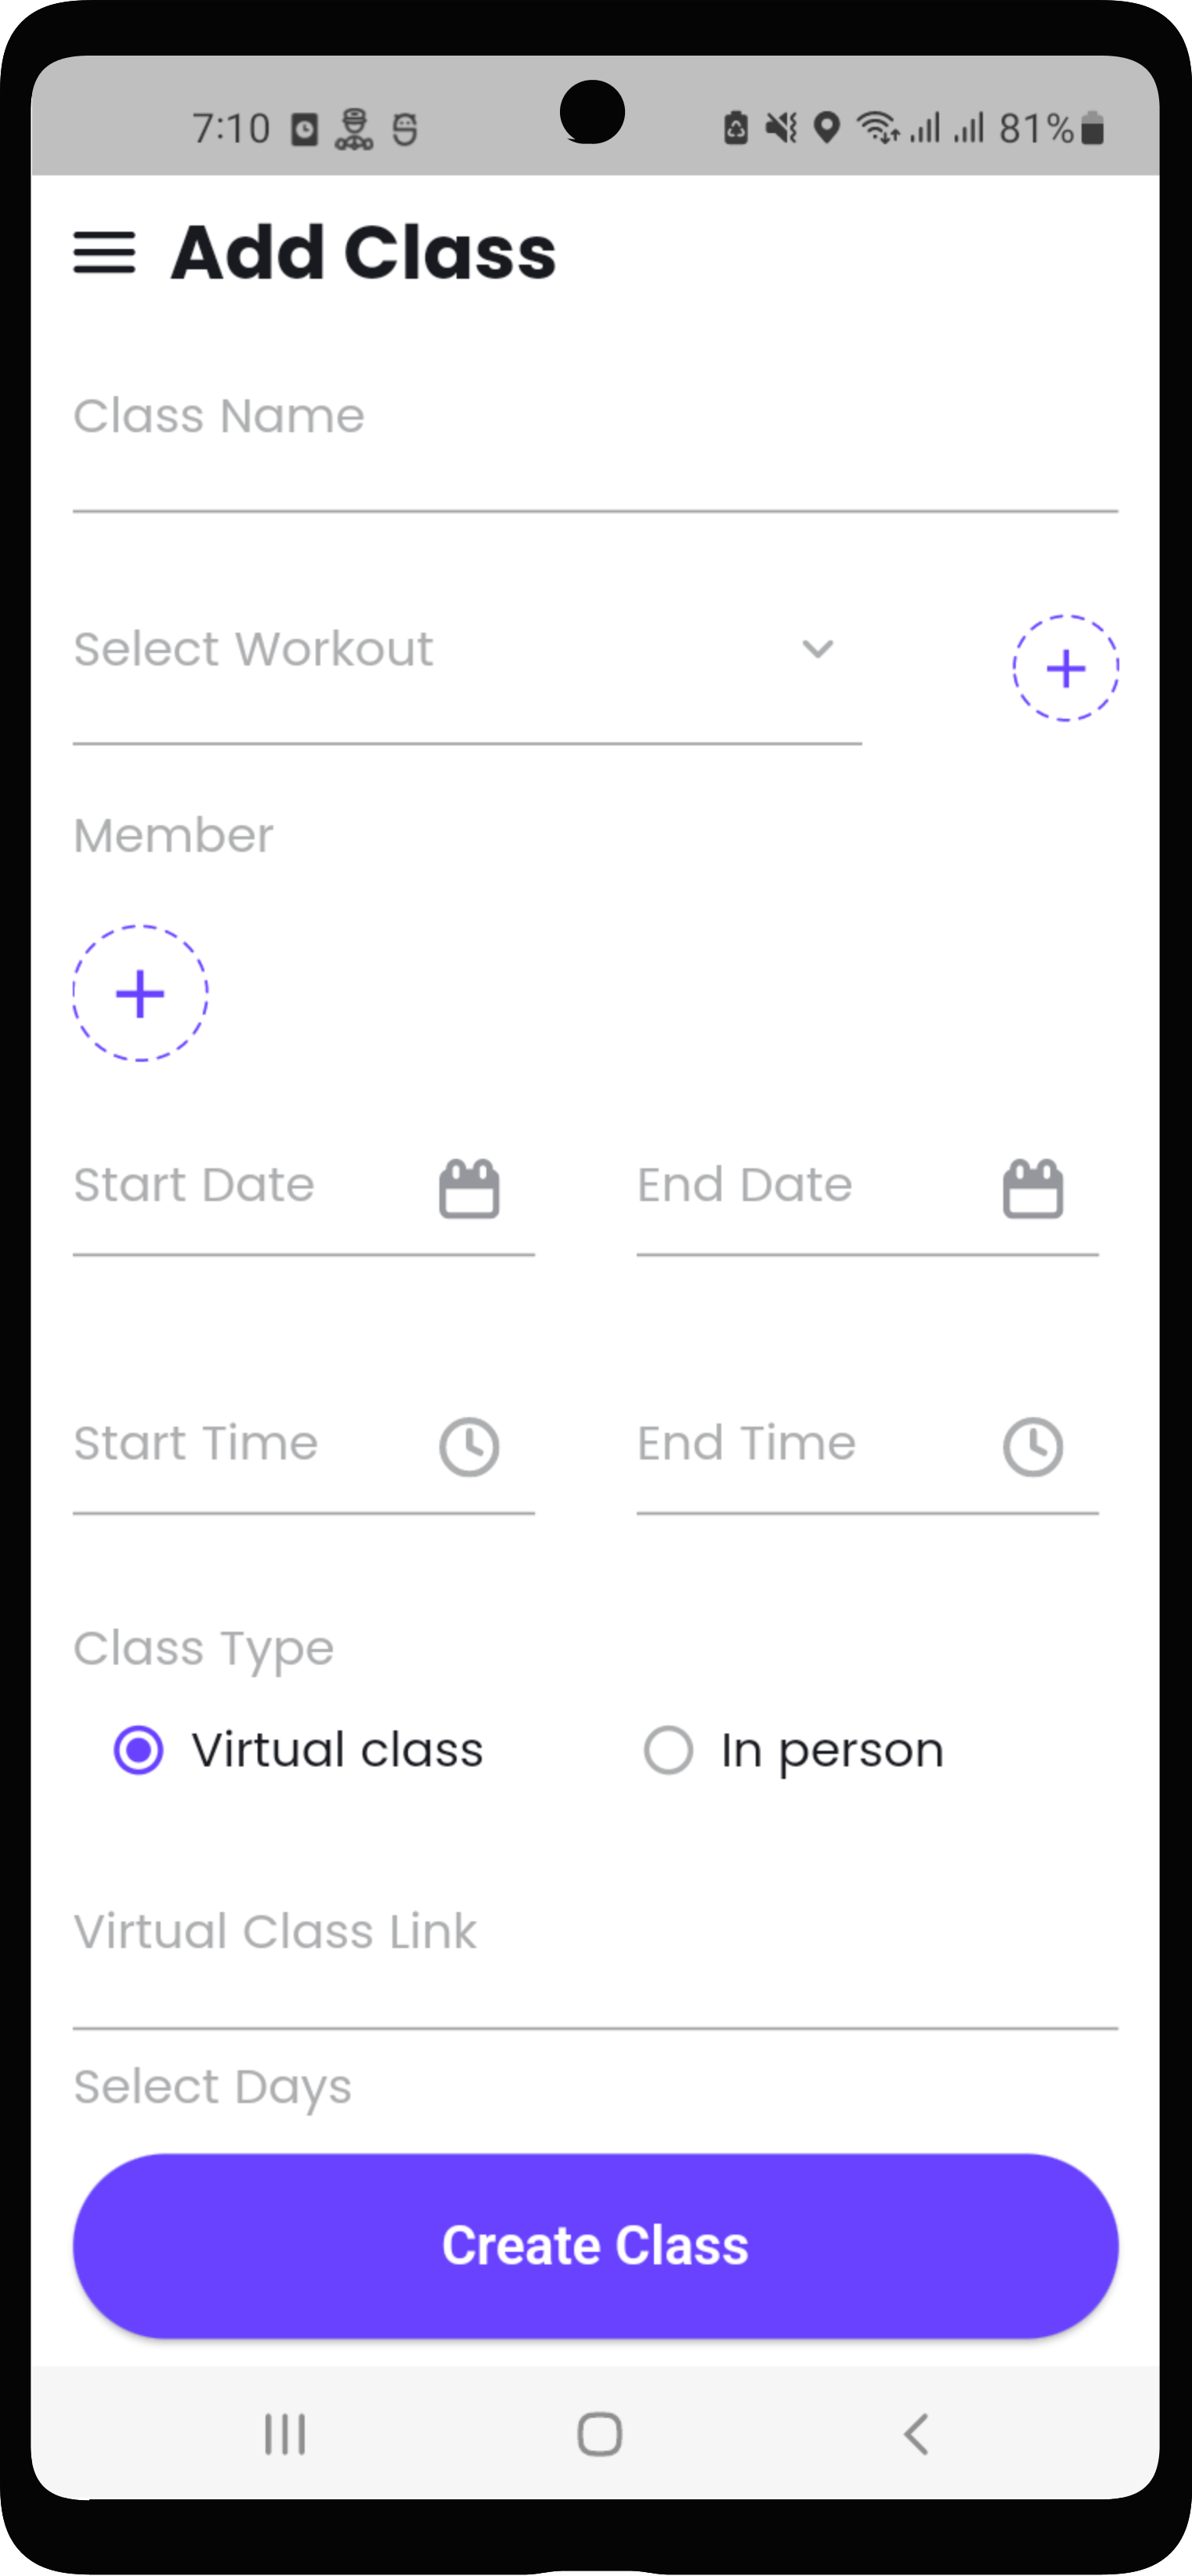
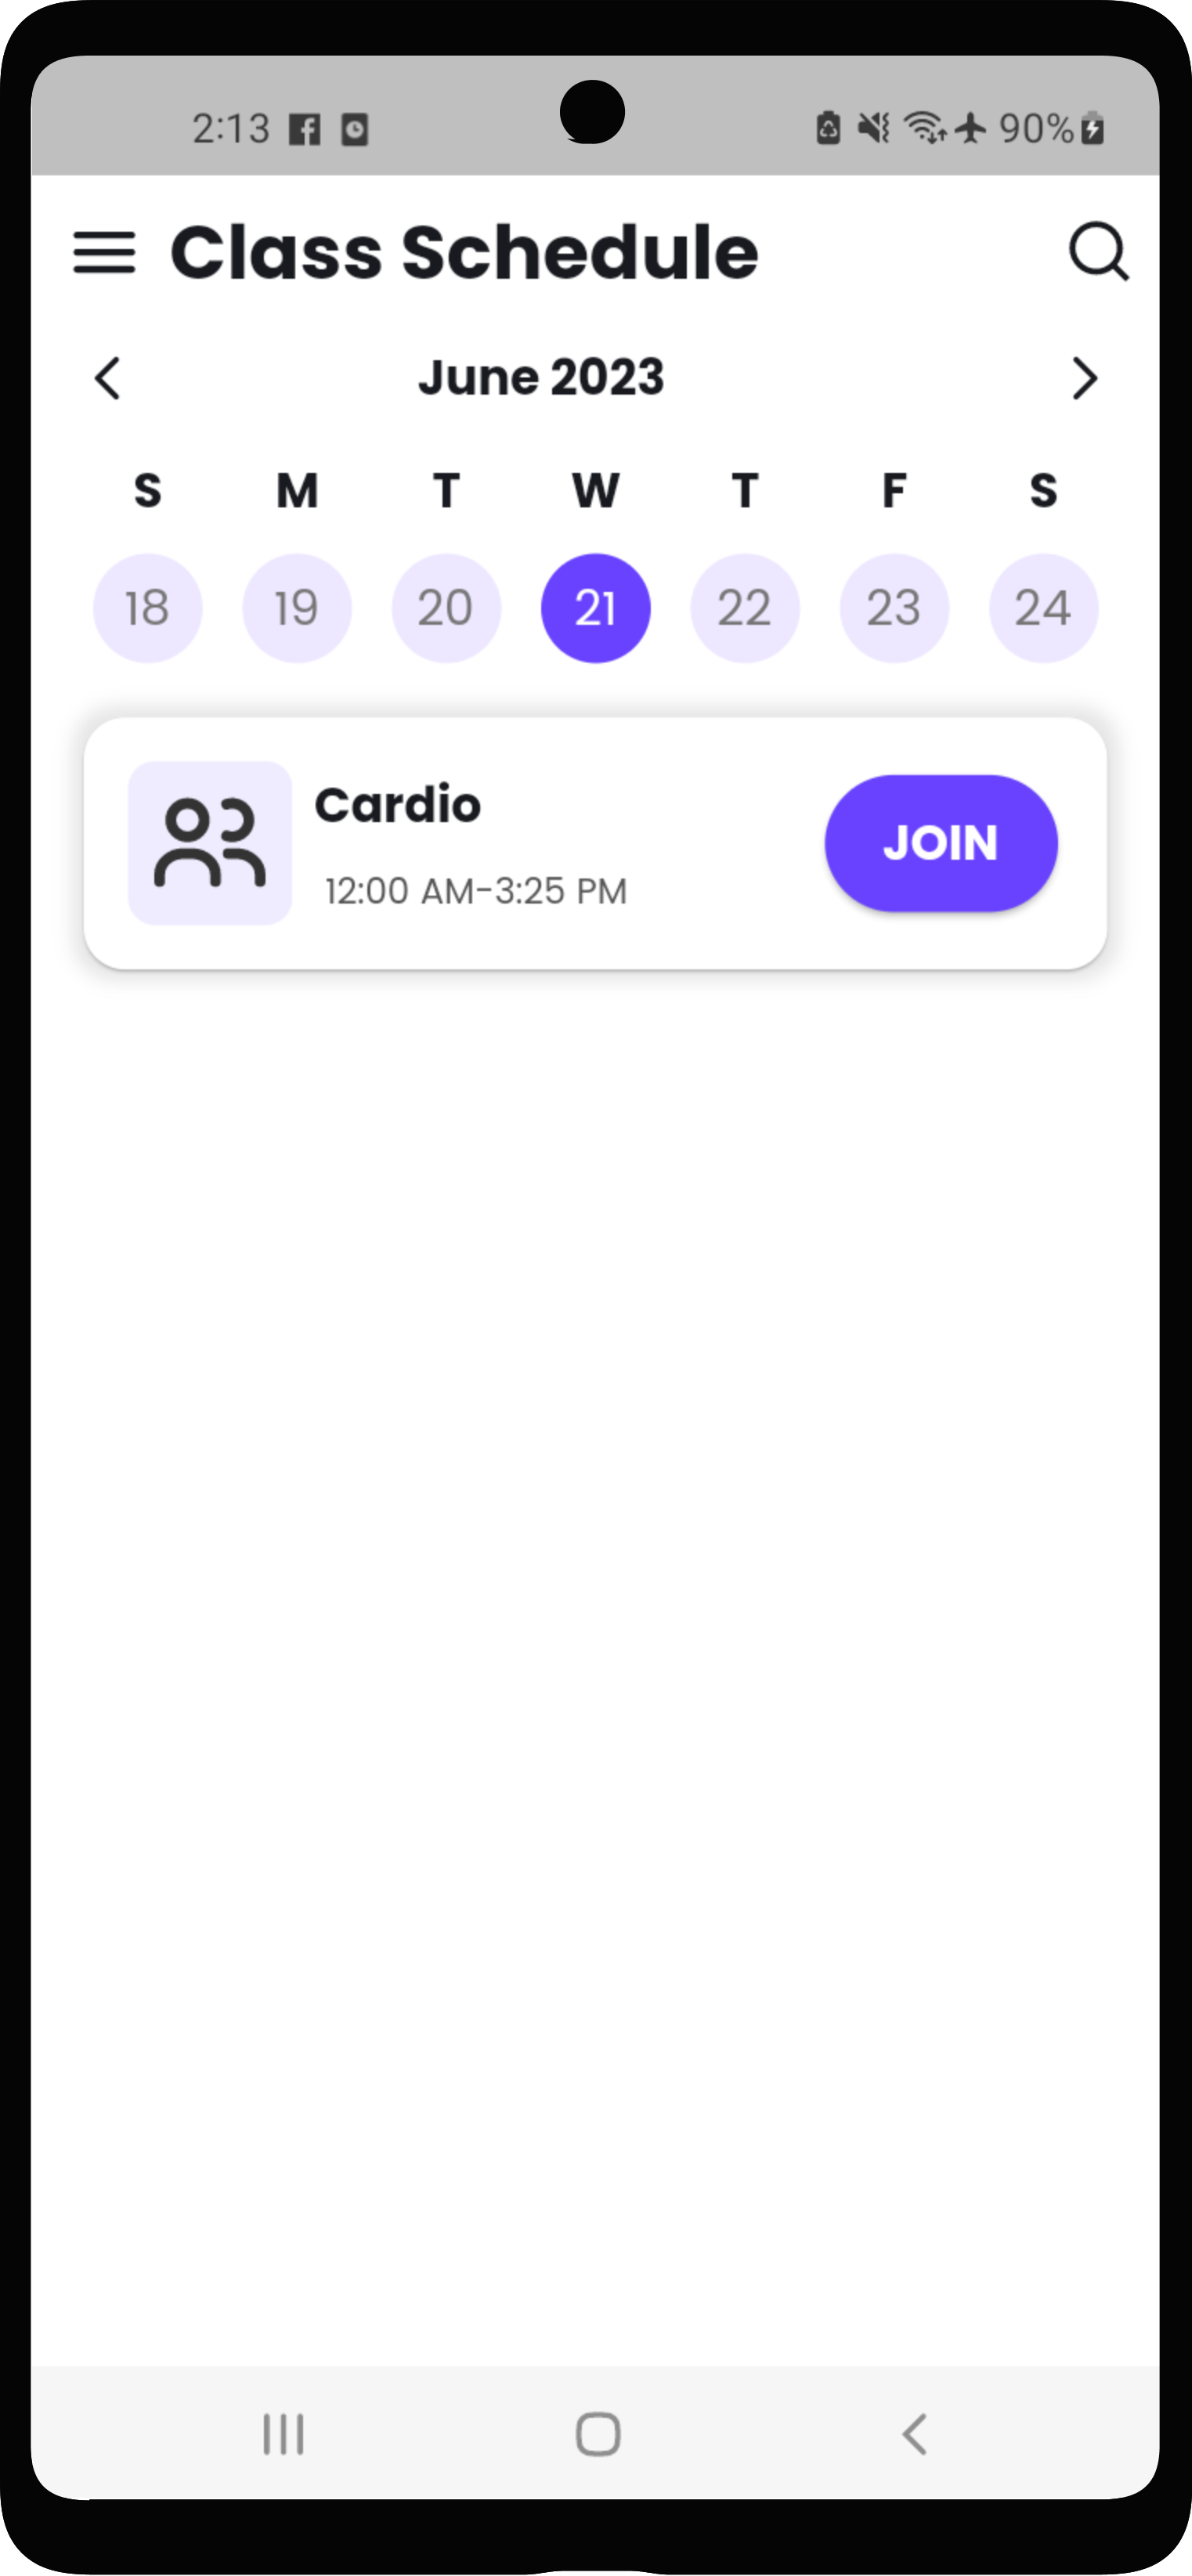
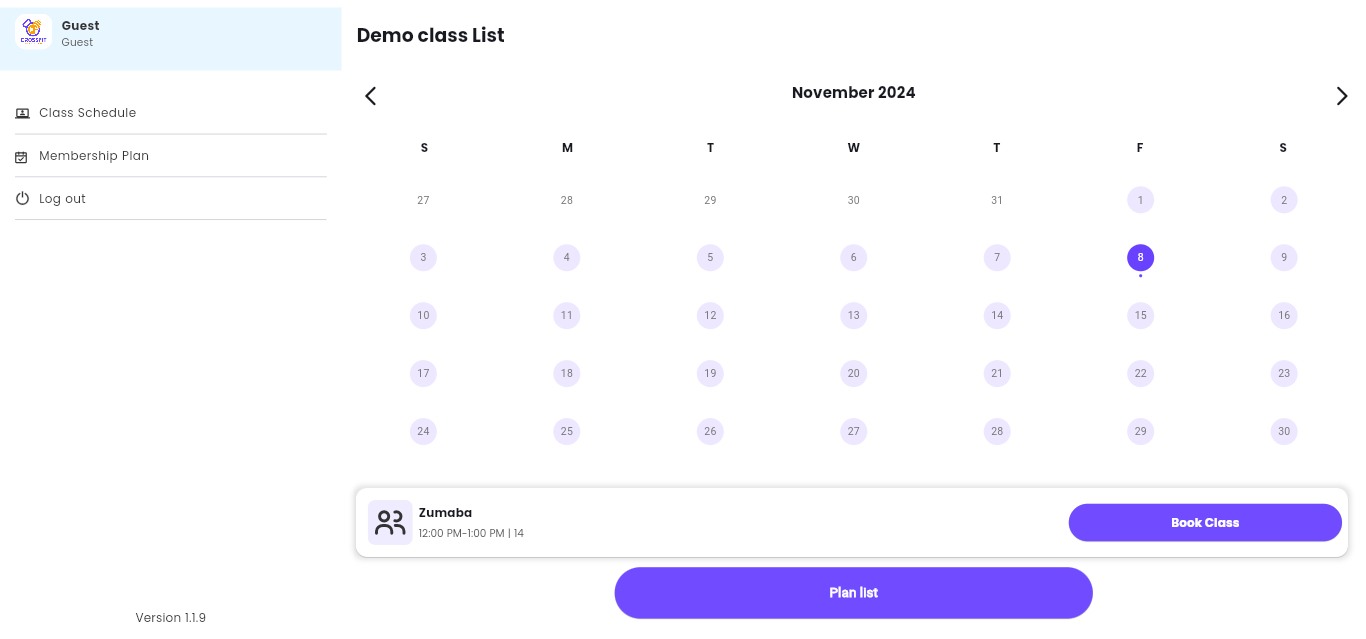
viii) Add Class Schedule in Trainer
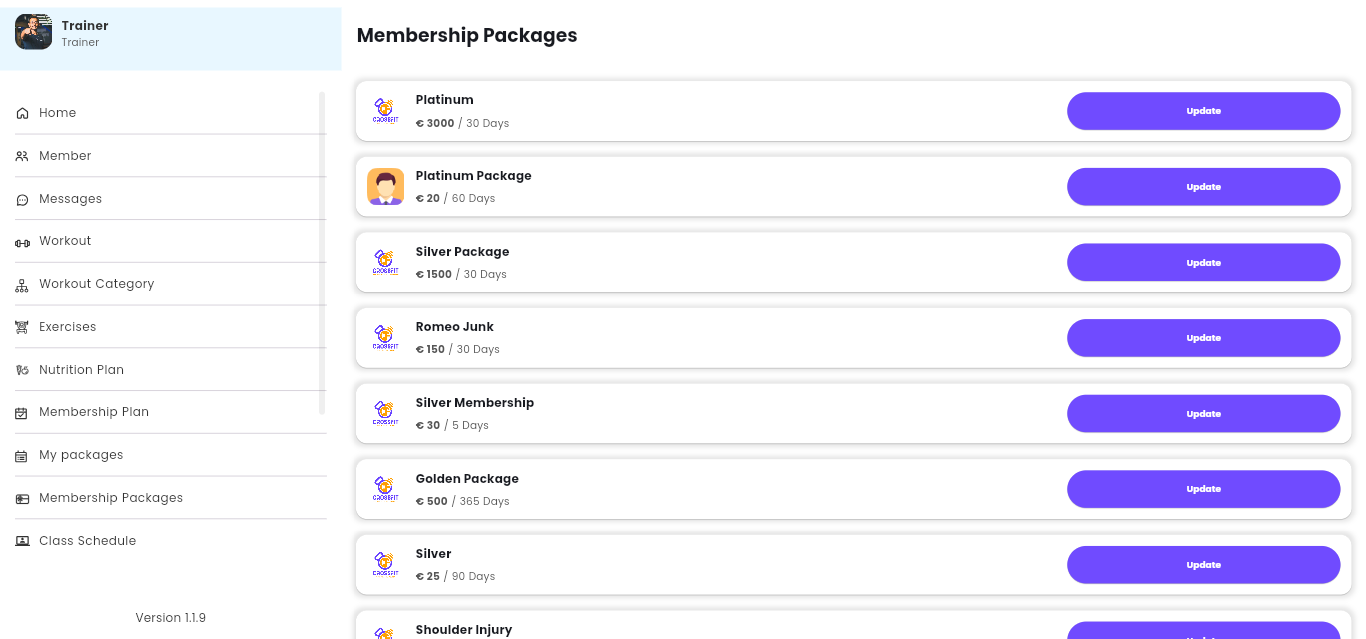
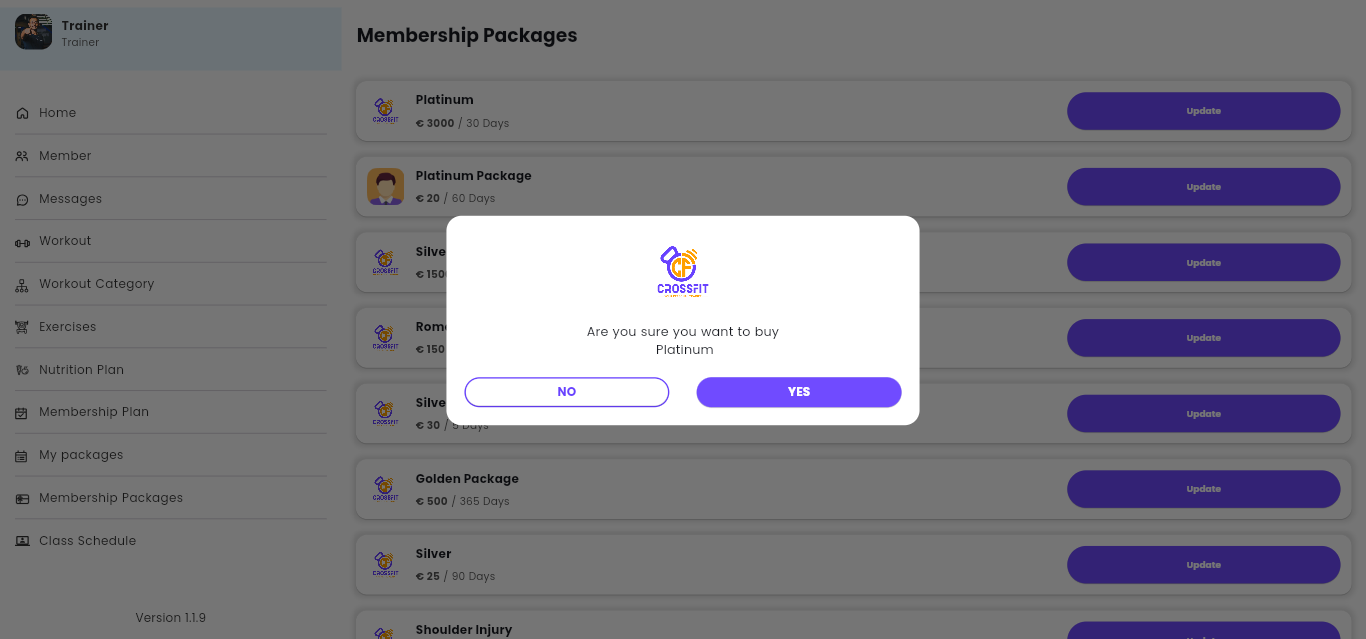
ix) Membership Package
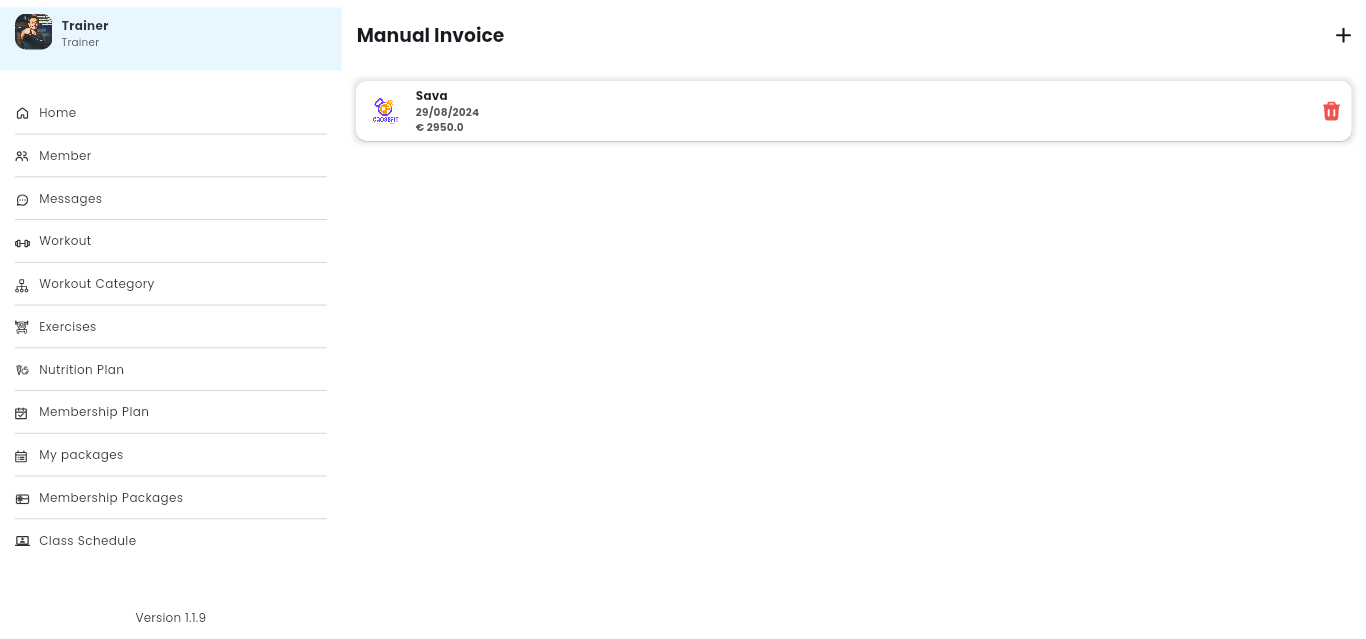
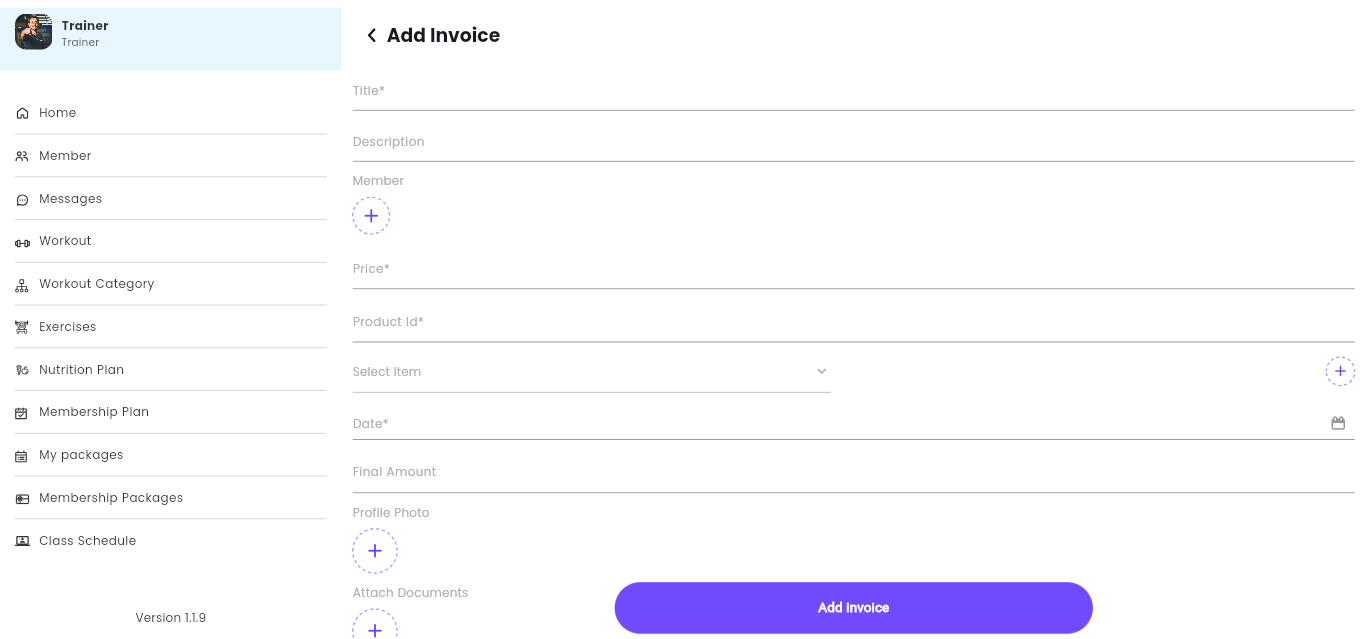
x) Manual Invoice
D) Member
Login Membre ID And Password For Demo Email :member@gmail.com
Password :member

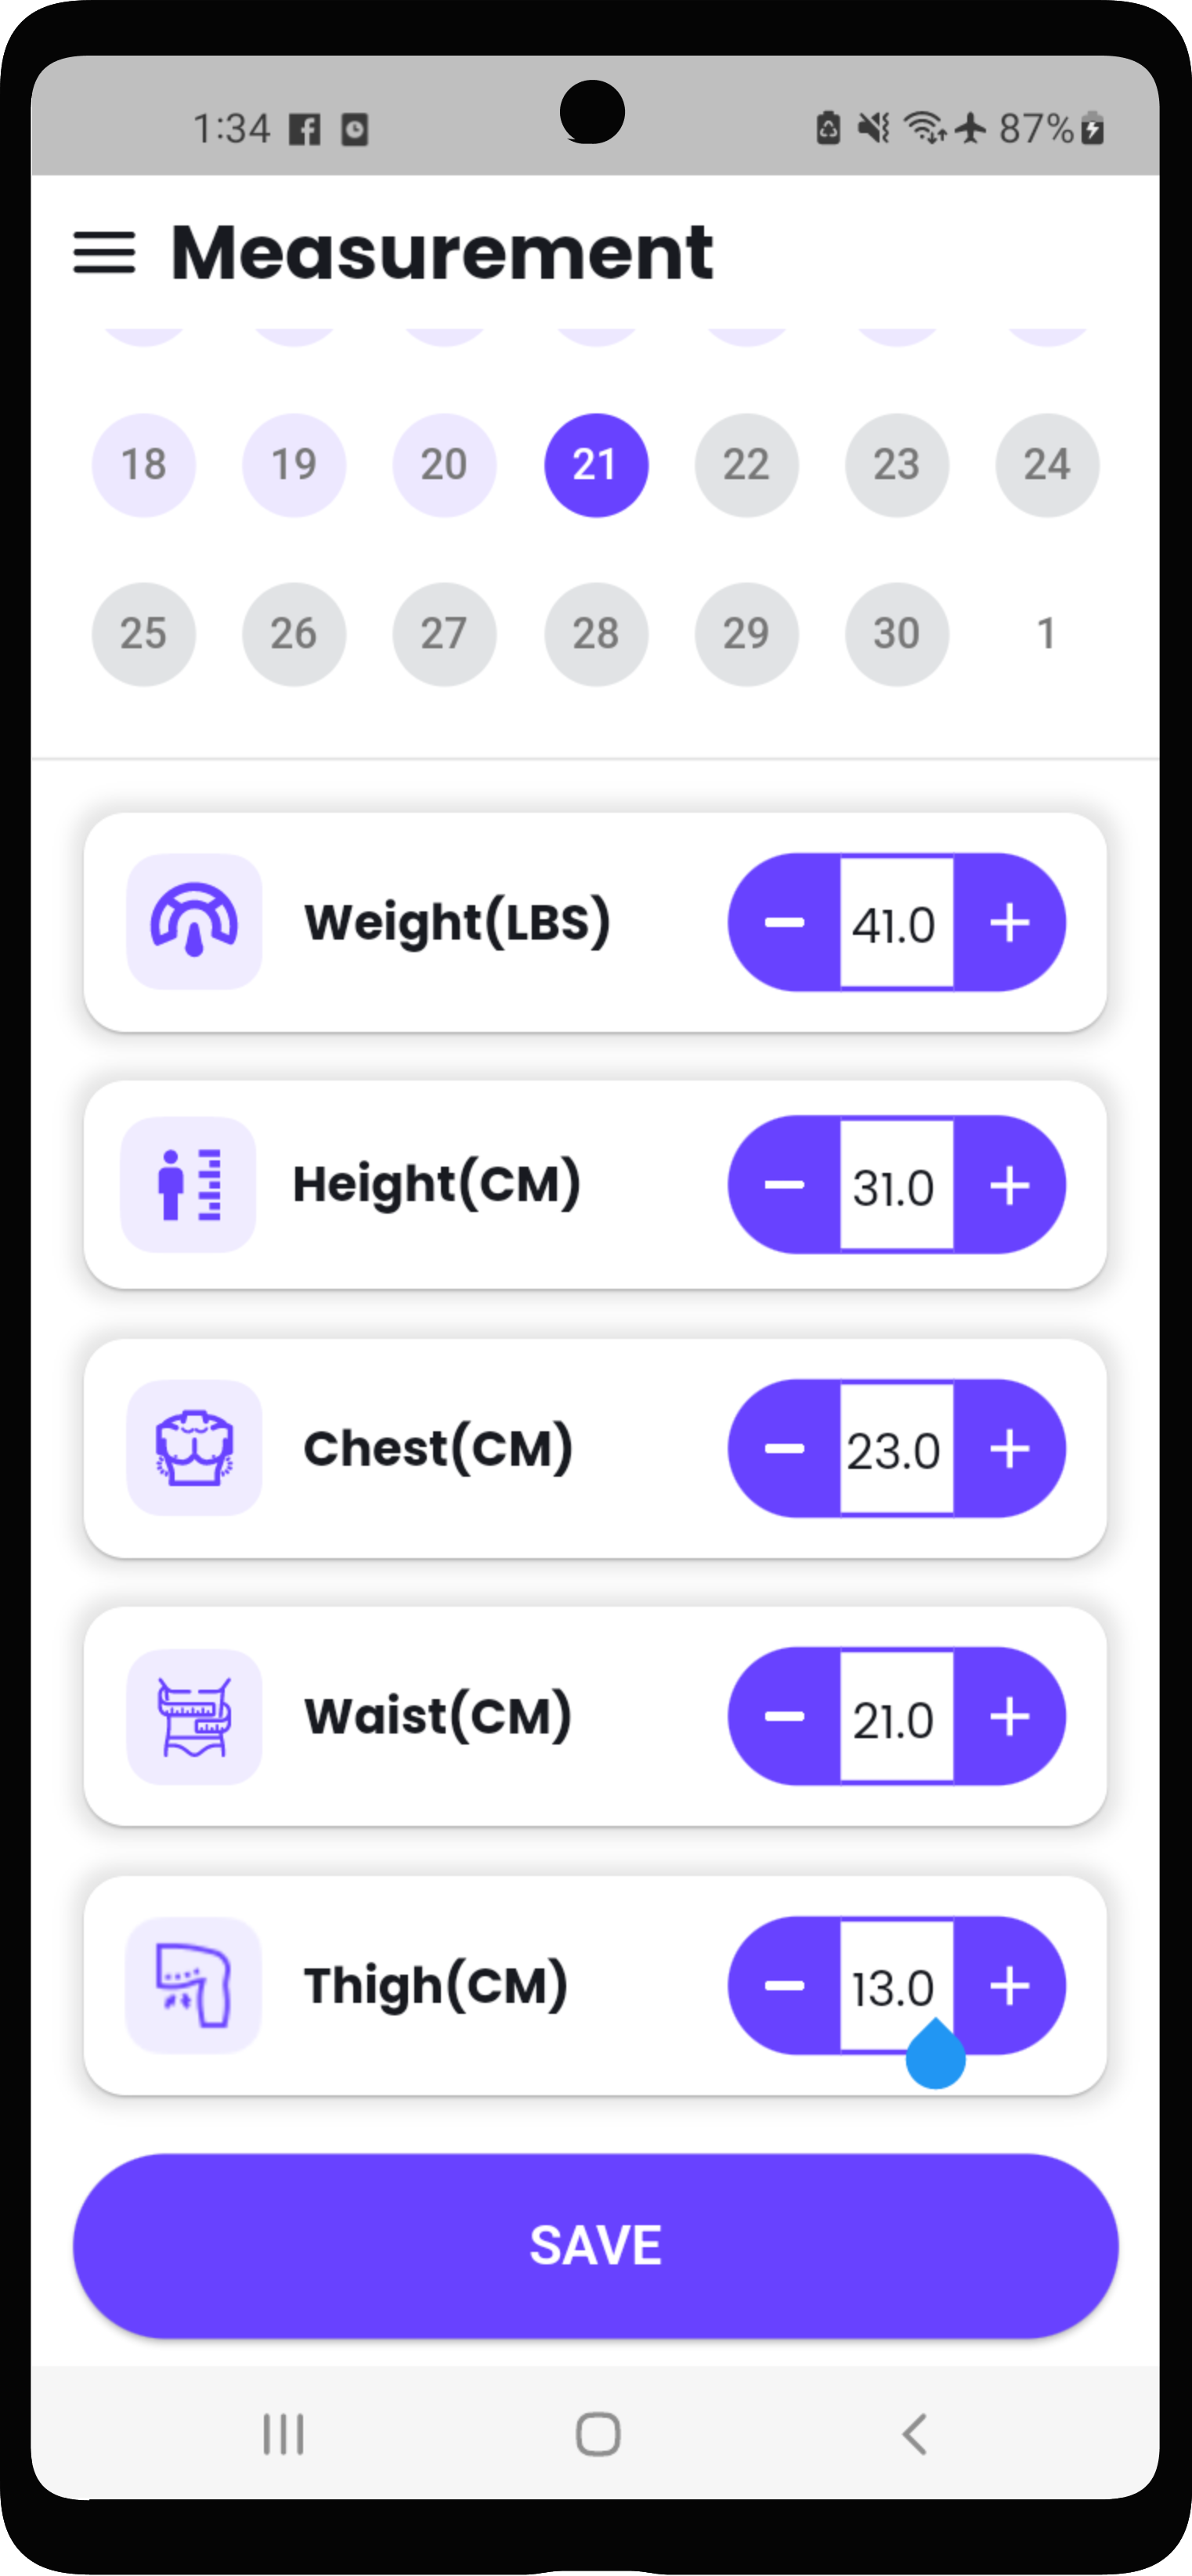
i) Add Measurement of Member
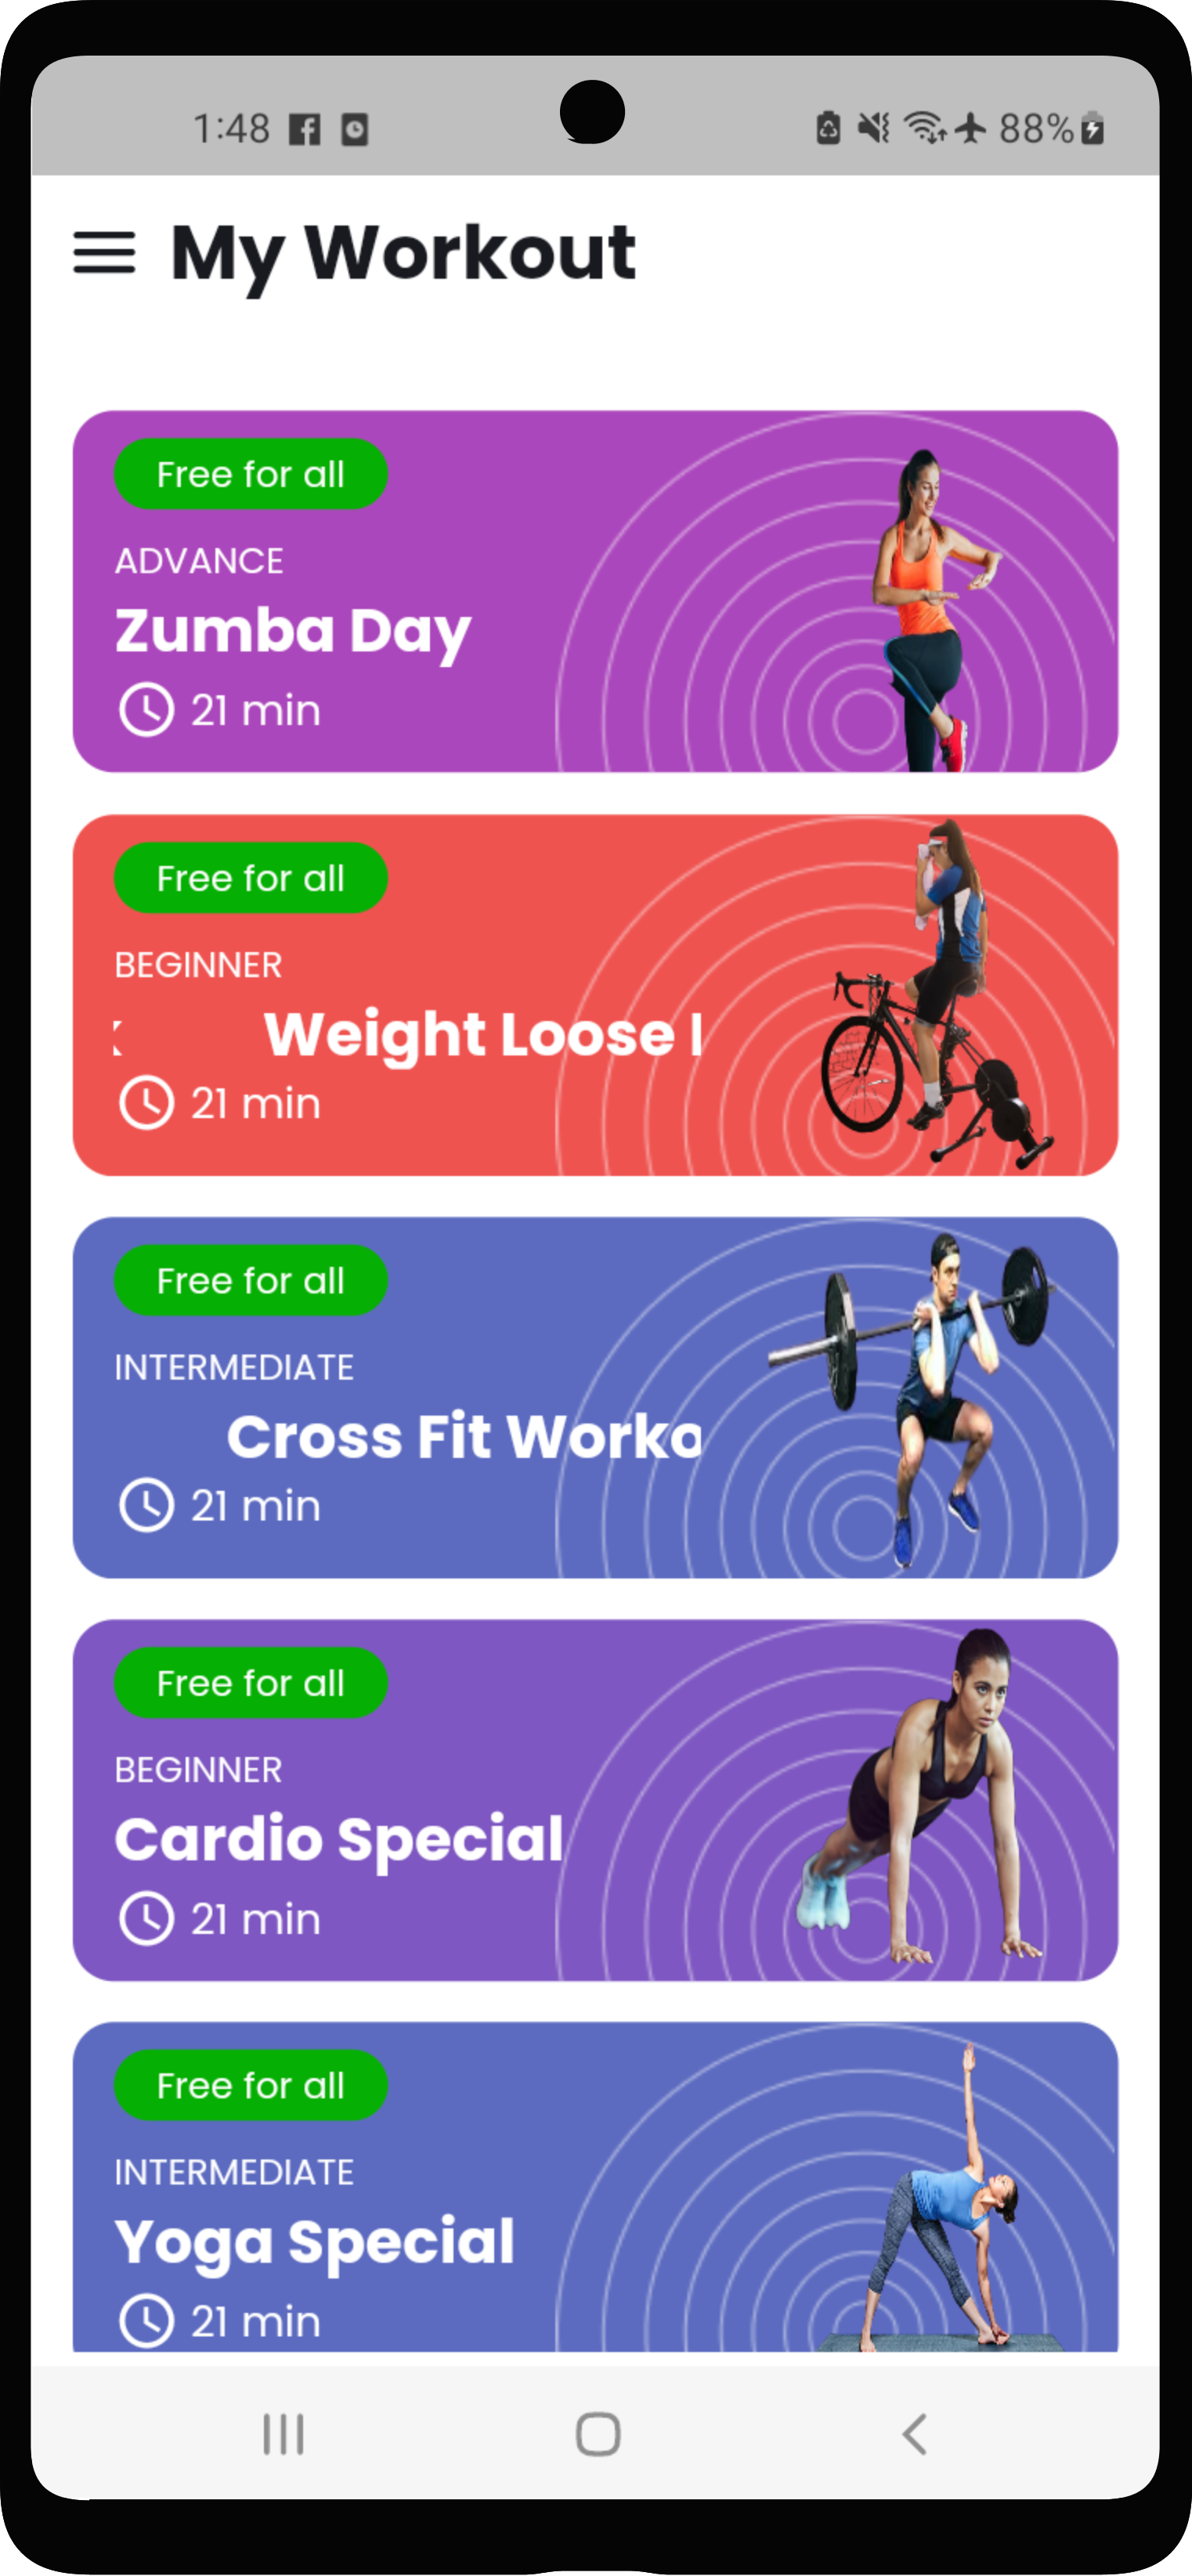
ii) Workout of Member
iii) View Nutrition in Member
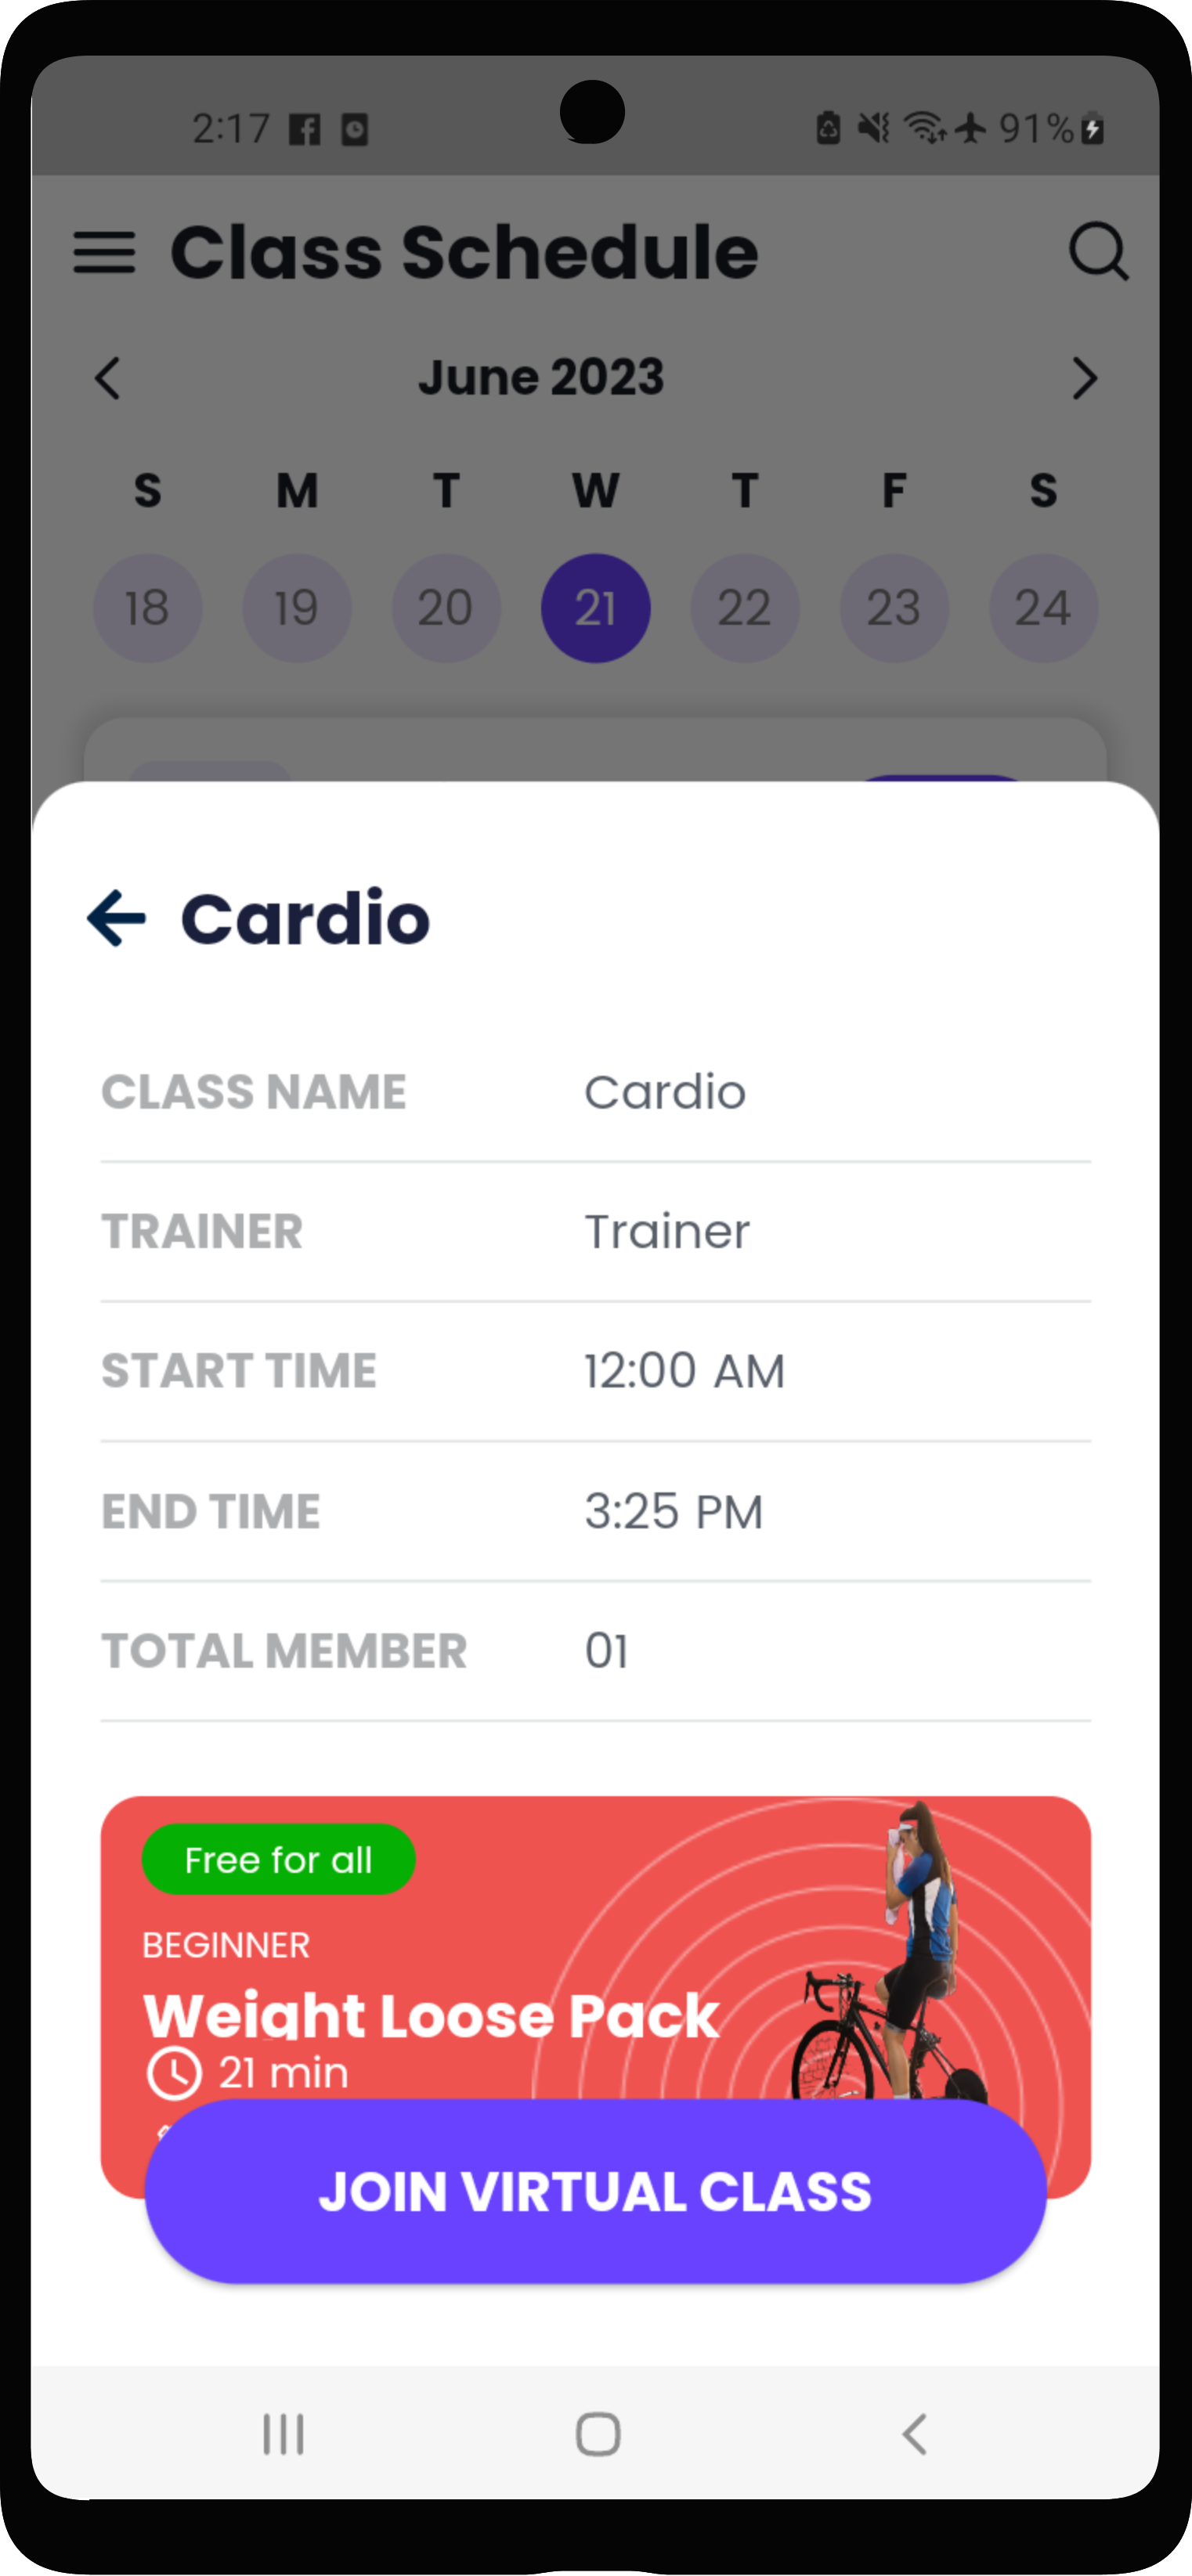
iv) Join Class in Member
iv) Membership Package
E) Guest
Login Screen:
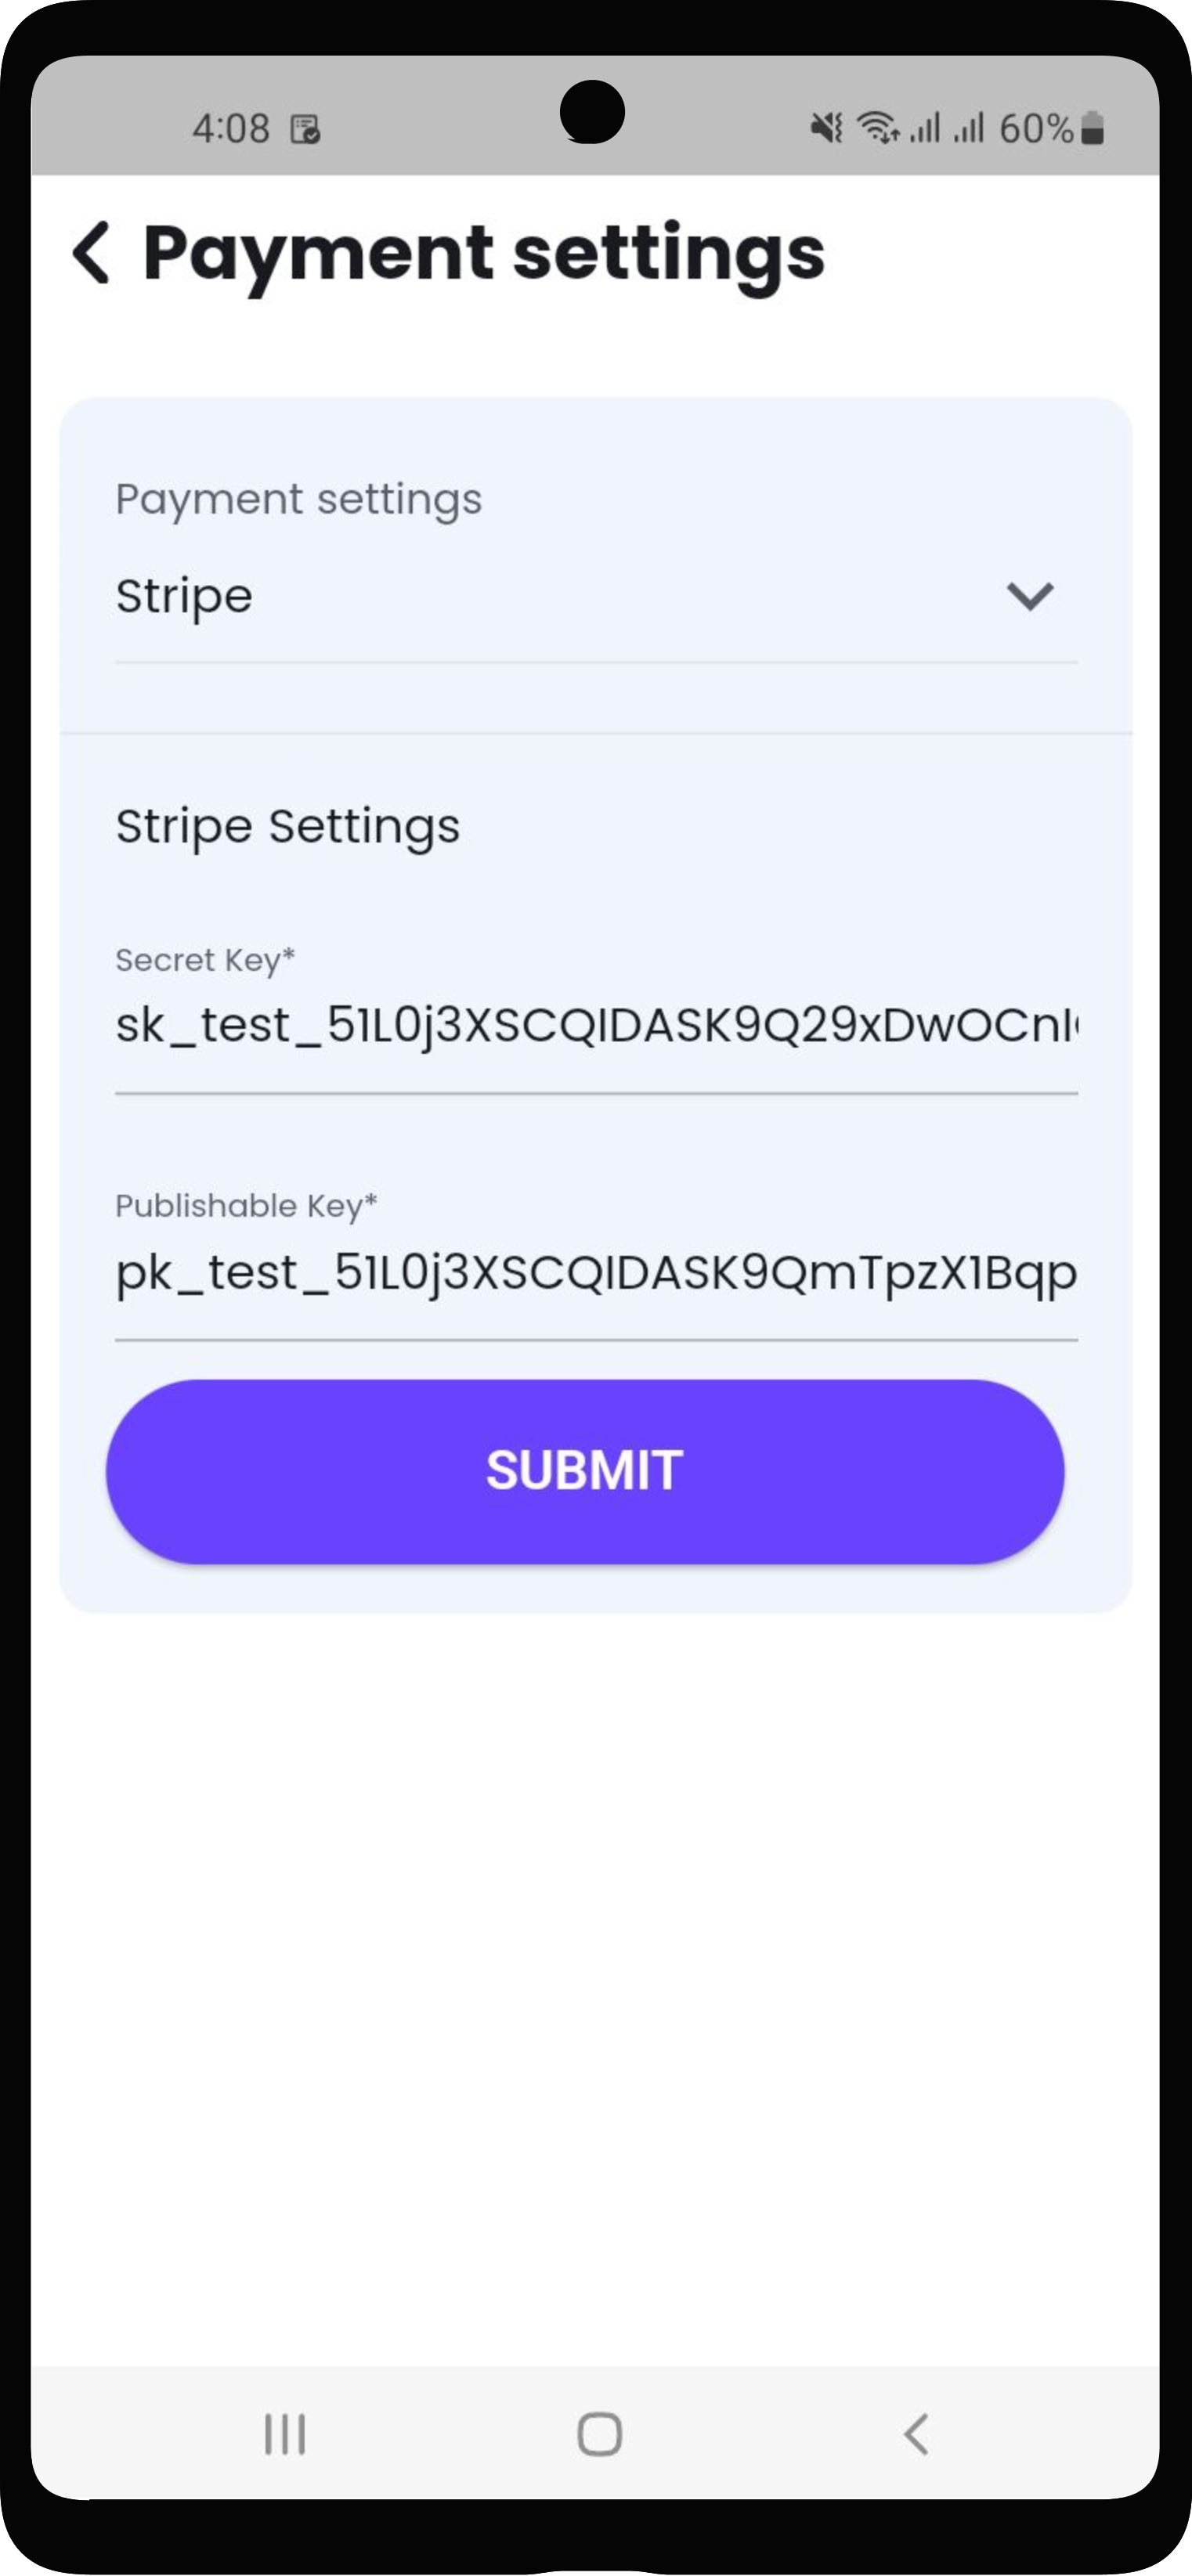
11) Stripe Payment GateWay Set up
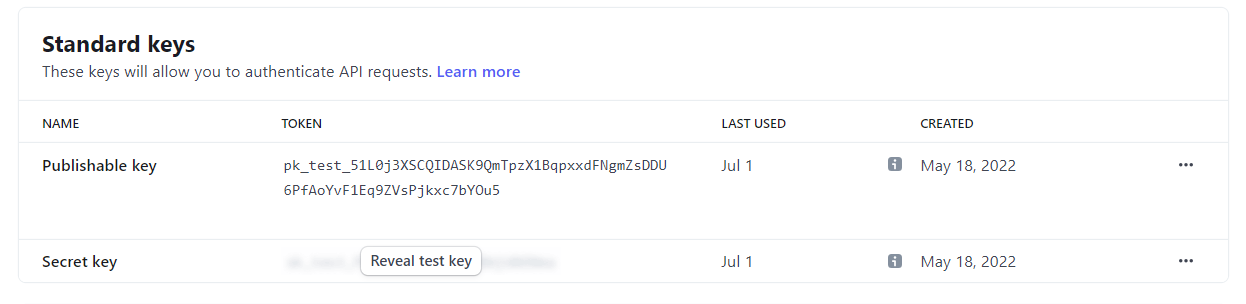
1) Create a Stripe Account: Go to the Stripe website (stripe.com) and sign up for an account. Provide the necessary information, including your business details and banking information.
2) Verify Your Email: Once you sign up, Stripe will send you an email to verify your email address. Click on the verification link in the email to proceed.
3) Activate Your Account: Complete the account activation process by providing any additional information required by Stripe, such as your business address and identification details. This step may vary depending on your location and business type.
4) Set Up Payment Methods: In your Stripe dashboard, navigate to the "Payments" or "Payment Methods" section. Here, you can choose which payment methods you want to enable, such as credit cards, digital wallets (e.g., Apple Pay or Google Pay), or bank transfers. Follow the instructions provided by Stripe to configure the payment methods you desire.
5) Test Payments: Before going live, it's crucial to test your payment setup. Stripe offers a "test mode" that allows you to simulate transactions without charging real money. This step helps ensure that your integration is functioning correctly and that you can handle payments smoothly.
6) Enable Live Payments: Once you have tested your payment setup and are satisfied with the results, you can switch your Stripe account to live mode. In live mode, actual payments will be processed, and your customers will be charged.
7) Monitor and Manage Payments: Use the Stripe dashboard to monitor transactions, manage refunds, view reports, and perform other payment-related tasks. Stripe provides a comprehensive set of tools and features to help you manage your payments efficiently.
12) PayPal Payment GateWay Set up
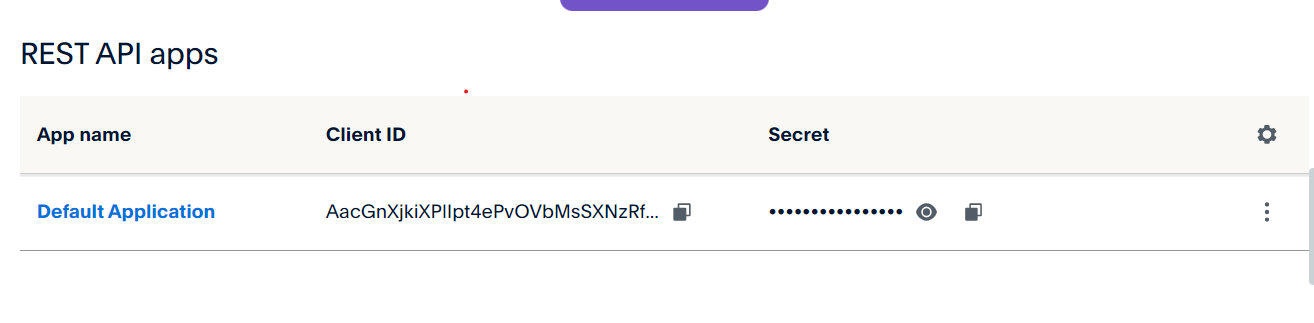
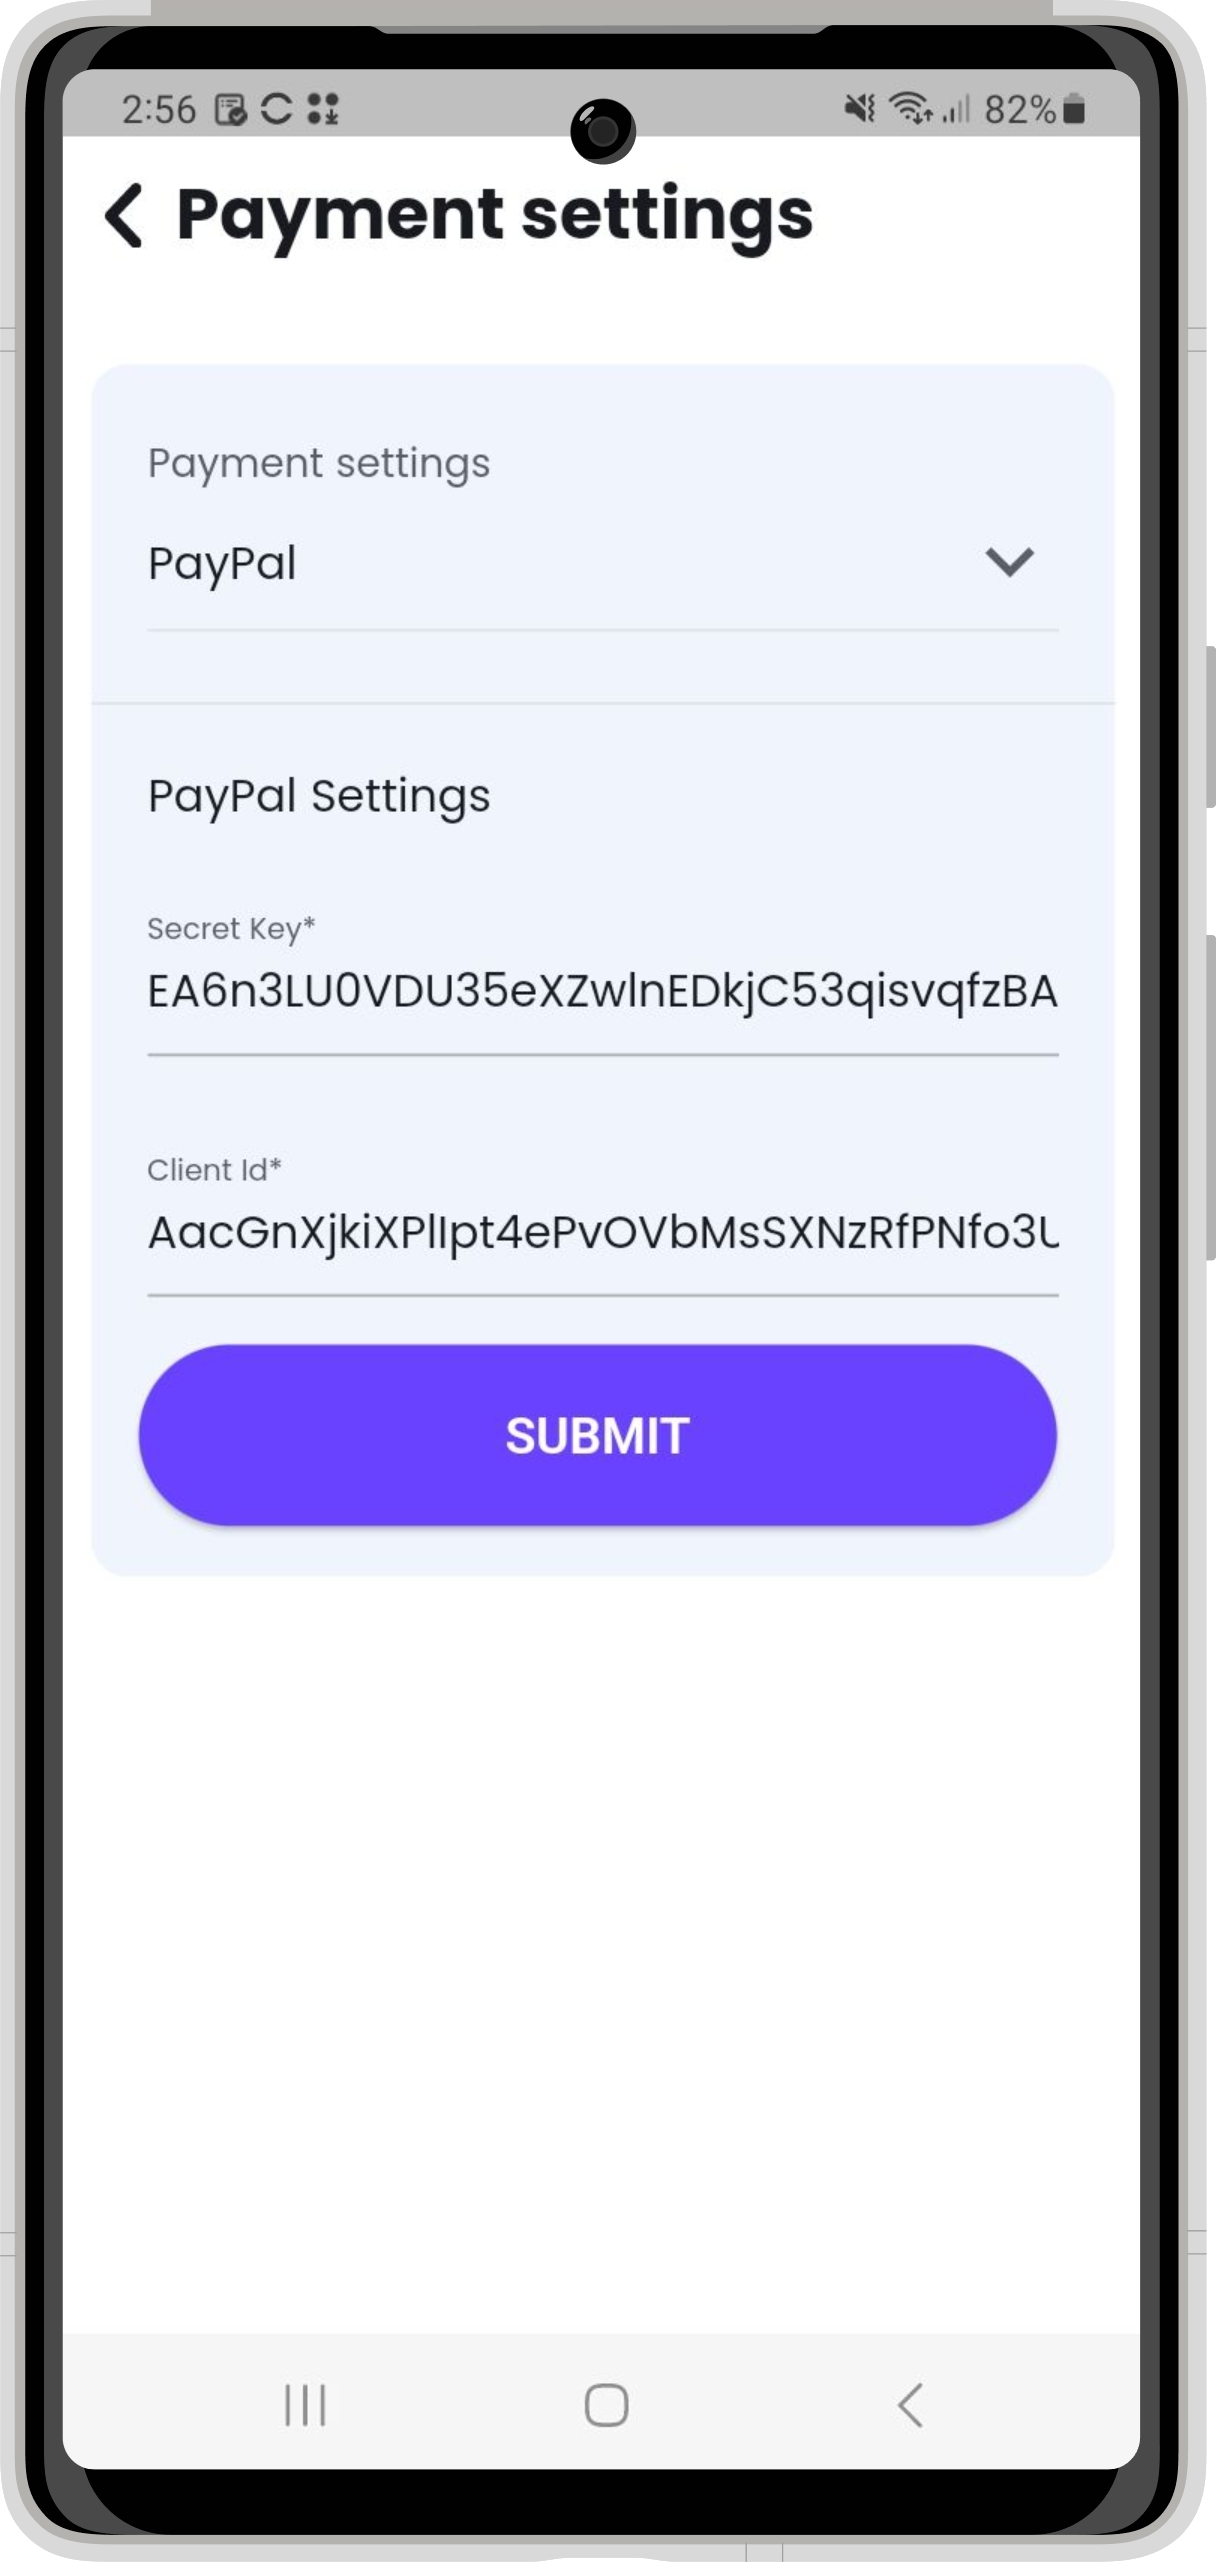
1) Click on top-right side "Live".
2) Follow the instructions on the screen to provide your personal details, such as your name, address, phone number, and date of birth. Make sure to enter accurate information.
3) Review the terms and conditions: Read PayPal's terms and conditions and user agreement thoroughly. If you agree with the terms, check the box to indicate your acceptance.
4) Verify your email address: After completing the registration form, PayPal will send a confirmation email to the address you provided during the sign-up process. Open your email inbox, locate the email from PayPal, and click on the verification link within the email to confirm your email address.
5) Link your bank account or card: To activate your live PayPal account, you need to link it to a bank account or a credit/debit card. On the PayPal website, navigate to the "Wallet" or "Settings" section and choose the option to link a bank account or card.
6) Enter your financial information: Provide the required details of your bank account or card, such as the account number, routing number (for bank accounts), or the card number, expiration date, and CVV (for cards). PayPal will use this information for verification purposes.
7) Confirm your linked bank account or card: PayPal will initiate a verification process to ensure that the bank account or card you linked is valid. They may make small deposits to your bank account or charge a small amount to your card. Check your bank statement or card statement to find these transactions.
8) Verify your bank account or card: Once you see the deposits or charges in your bank statement or card statement, log in to your PayPal account and navigate to the "Wallet" or "Settings" section. Locate the option to confirm your bank account or card and enter the exact amounts charged or deposited by PayPal.
9) Provide additional verification (if requested): Depending on your country and specific circumstances, PayPal may require additional verification. This may include uploading documents such as a copy of your identification card, proof of address, or proof of business registration. If prompted, follow the instructions provided by PayPal to complete the verification process.
10) Review and adjust your account settings: Once your account is fully activated, take some time to review and adjust your account settings according to your preferences. You can manage privacy settings, notification preferences, security options, and more.
11) Start using your PayPal account: Congratulations! Your live PayPal account is now active and ready to use. You can start sending and receiving money, making online purchases, or receiving payments for your business.
13) In App Purchase
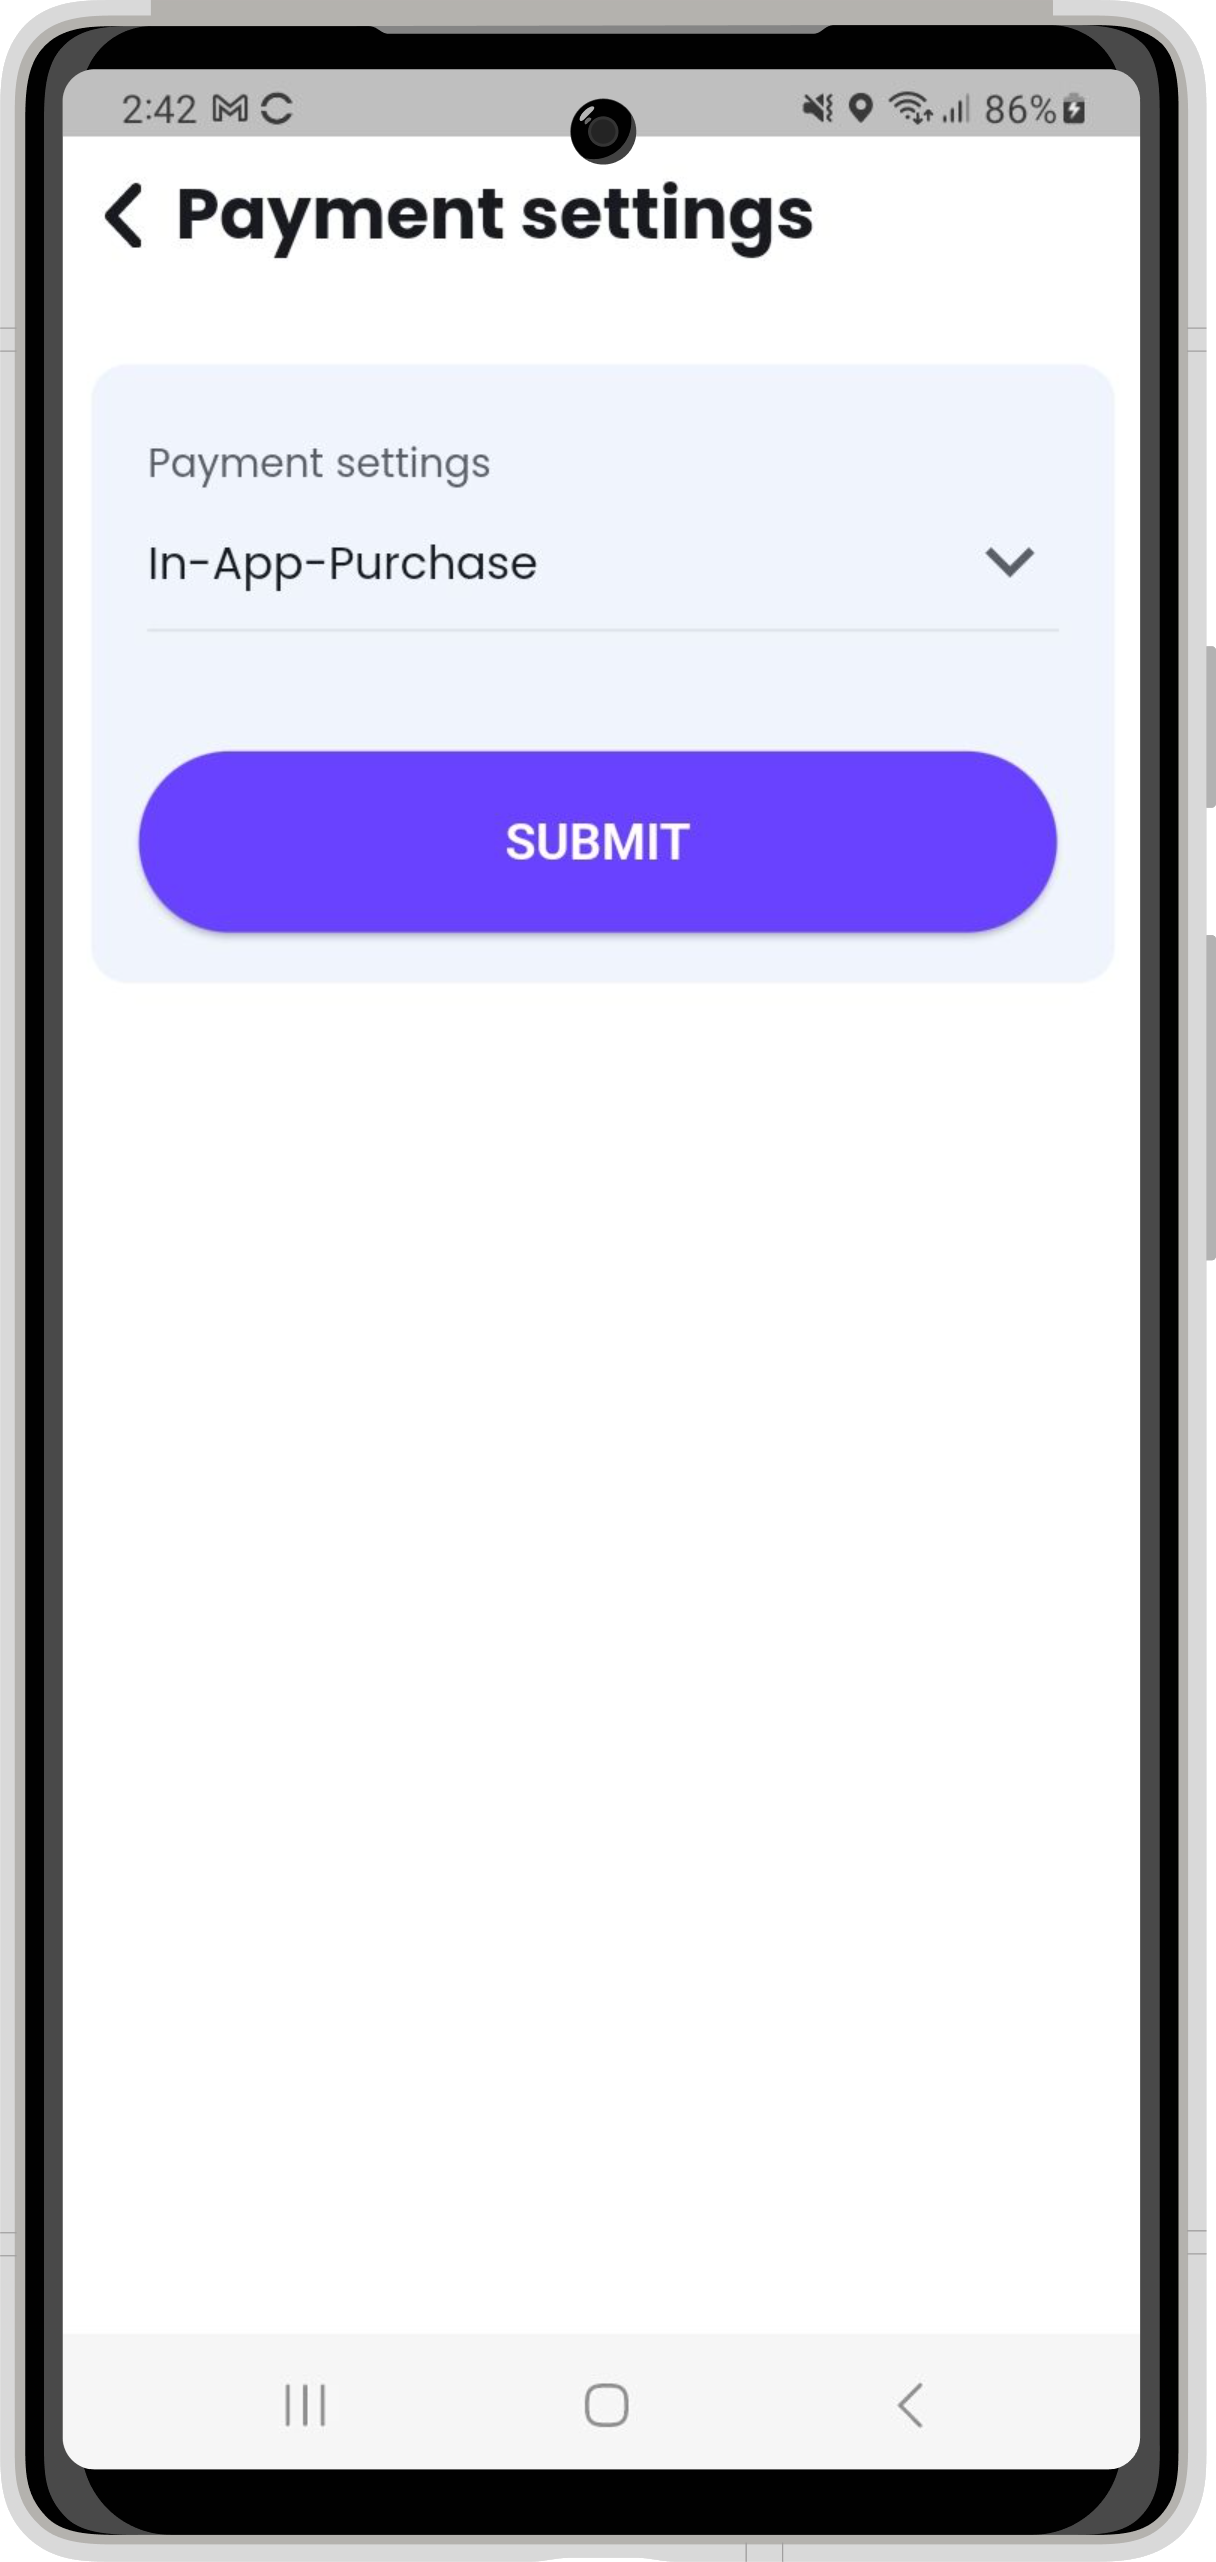
1) If you don't have one already, sign up for a Google Play Developer account. You will need to pay a one-time registration fee. 2) Link your Google Play Developer account to a Google Wallet Merchant account. This is where you'll receive payments from users. Provide your banking and tax information. 3) Ensure your app is ready to support in-app purchases. 4) In the Google Play Developer Console, navigate to your app's page, go to "Monetize" > "In-app products," and click the "Create" button to add new in-app products. You can create either managed products (consumable or non-consumable) or subscriptions.For each product, provide details like the product ID, pricing, and localized descriptions. 5) For each in-app product, configure its details, including pricing, availability, and any promotional information. You can also create different price points for different regions. 6) Before releasing your app, it's crucial to test your in-app purchases. Use test accounts provided by Google Play to simulate purchases without actual charges. Ensure that your app handles purchases and consumption correctly. 7). Once you've thoroughly tested your in-app purchases and your app is ready for release, submit it to the Google Play Store. Ensure that your app's store listing provides clear and accurate information about in-app purchases. 8) After your app is live, promote your in-app purchases within your app and on the app's store listing to encourage users to make purchases. 9) Continuously monitor the performance of your in-app purchases, including conversion rates, revenue, and user feedback. Use this data to make improvements and optimize your in-app purchase strategy.
14) FAQ
1) How to Edit Email or Password for Admin ?
Ans. if you don't know how Edit Email or Password please follow this steps.(click here)
2) How to add trainer ?
Ans. if you don't know how to add trainer please follow this steps.(click here)
3) How to add trainer packages?
Ans. if you don't know how to add trainer pakages please follow this steps.(click here)
4) How to assign trainer packages?
Ans. if you don't know how to assign trainer packages please follow this steps.(click here)
5) How to add member ?
Ans. if you don't know how to add Member please follow this steps.(click here)
6) How to add membership ?
Ans. if you don't know how to add membership please follow this steps.(click here)
7) How to assign membership ?
Ans. if you don't know how to assign membership please follow this steps.(click here)
8) How to add workout ?
Ans. if you don't know how to add workout please follow this steps.(click here)
9) How to add workout category ?
Ans. if you don't know how to add workout category please follow this steps.(click here)
10) How to add exercise ?
Ans. if you don't know how to add exercise please follow this steps.(click here)
11) How to add class schedule ?
Ans. if you don't know how to add class schedule follow this steps.(click here)
12) How to add measurement ?
Ans. if you don't know how to add measurement please follow this steps.(click here)
13) How to start workout ?
Ans. if you don't know how to start workout please follow this steps.(click here)
14) How to join class ?
Ans. if you don't know how to join class please follow this steps.(click here)
15) How to add Nutrition plan ?
Ans. if you don't know how to add nutrition plan please follow this steps.(click here)
16) How to View Nutrition plan ?
Ans. if you don't know how to add nutrition plan please follow this steps.(click here)